11
ENGLISH
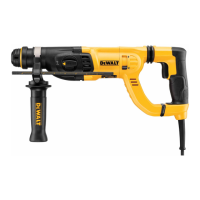
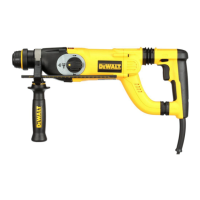
Rotary Drilling (fig. 1)
1. Hold down the mode selector button (e) then
set the mode selector switch (d) to the “rotary
drilling” position.
2. Depending on your tool, follow either of the
following instructions:
– D25032, D25033, D25133, D25263: Fit the
chuck adapter/chuck assembly.
– D25134, D25144: Replace the SDS Plus tool
holder with the keyless chuck.
3. Proceed as described for hammerdrilling.
WARNING: Never use standard chucks
in the hammerdrilling mode.
Screwdriving (fig. 1)
1. Hold down the mode selector button (e) then
set the mode selector switch (d) to the rotary
drilling position.
2. Select the direction of rotation.
3. Depending on your tool, follow either of the
following instructions:
– D25032, D25033, D25133, D25263: Insert
the special SDS Plus screwdriving adaptor for
use with hexagonal screwdriver bits.
– D25134, D25144: Replace the SDS Plus tool
holder with the keyless chuck
4. Insert the appropriate screwdriver bit. When
driving slotted head screws always use bits with
a finder sleeve.
5. Gently press the variable speed switch (a) to
prevent damage to the screw head. In reverse
(LH) rotation the tool speed is automatically
reduced for easy screw removal.
6. When the screw is flush with the workpiece,
release the variable speed switch to prevent
the screw head from penetrating into the
workpiece.
Chipping and Chiselling (fig. 1)
D25033, D25133, D25134, D25144, D25263
1. Hold down the mode selector button (e)
then set the mode selector switch (d) to the
“hammering only” position.
2. Insert the appropriate chisel and rotate it by
hand to lock it into position.
3. Adjust the side handle (h) as required.
4. Switch on the tool and start working.
5. Always switch off the tool when work is finished
and before unplugging.
Switching On and Off (fig. 1)
1. To run the tool, press the variable speed switch
(a). The pressure exerted on the variable speed
switch determines the tool speed.
2. For continuous operation, press and hold down
the variable speed switch.
3. To stop the tool, release the switch.
Hammerdrilling (fig. 1)
DRILLING WITH A SOLID BIT
1. Hold down the mode selector button (e)
then set the mode selector switch (d) to the
hammerdrilling position.
2. Insert the appropriate drill bit.
NOTE: For best results use high quality carbide-
tipped bits.
3. Adjust the side handle (h) as required.
4. If necessary, set the drilling depth.
5. Mark the spot where the hole is to be drilled.
6. Place the drill bit on the spot and switch on the
tool.
7. Always switch off the tool when work is finished
and before unplugging.
DRILLING WITH A CORE BIT
1. Hold down the mode selector button (e)
then set the mode selector switch (d) to the
hammerdrilling position.
2. Adjust the side handle (h) as required.
3. Insert the appropriate core bit.
4. Assemble the centerdrill into the core bit.
5. Place the centerdrill on the spot and press the
on/off switch (a). Drill until the core penetrates
into the concrete approx. 1 cm.
6. Stop drilling and remove the centerdrill. Place
the core bit back into the hole and continue
drilling.
7. When drilling through a structure thicker than
the depth of the core bit, break away the round
cylinder of concrete or core inside the bit at
regular intervals. To avoid unwanted breaking
away of concrete around the hole, first drill a
hole the diameter of the center drill completely
through the structure. Then drill the cored hole
halfway from each side.
8. Always switch off the tool when work is finished
and before unplugging.