English
10
ADVERTENCIA
AVERTISSEMENT
LIRE ET COMPRENDRE LES ÉTIQUETTES DE L’OUTIL AINSI
QUE LE GUIDE D’UTILISATION. LE NON-RESPECT DES
AVERTISSEMENTS PRÉSENTE DES RISQUES DE DÉCÈS OU DE BLESSURES GRAVES. LES
PERSONNES QUI UTILISENT L’OUTIL ET LES PERSONNES QUI SE TROUVENT DANS LA ZONE
DE TRAVAIL DOIVENT PORTER DES LUNETTES DE SÉCURITÉ À ÉCRANS LATÉRAUX CONFORMES
À LA NORME ANSI Z87.1. ÉLOIGNER LES DOIGTS DE LA DÉTENTE LORSQU’ON N’ENFONCE
PAS D’ATTACHES AFIN D’ÉVITER LE FONCTIONNEMENT ACCIDENTEL DE L’OUTIL. LE CHOIX
DE LA MÉTHODE D’AGRAFAGE EST IMPORTANT. VÉRIFIER LES OPTIONS DE DÉTENTE DANS
LE GUIDE D’UTILISATION.
NE NEUTRALISEZ JAMAIS LOCK-OFF. UTILISER LE DISPOSITIF DE
VERROUILLAGE EN MODE HORS TENSION LORSQUE L’OUTIL NE SERT PAS. S’ASSURER QUE
LA DÉTENTE ET LE DÉCLENCHEUR FONCTIONNENT CONVENABLEMENT AVANT D’UTILISER
L’OUTIL. NE JAMAIS POINTER L’OUTIL VERS SOI OU VERS D’AUTRES PERSONNES DANS LA
ZONE DE TRAVAIL. ENLEVEZ LA BATTERIE QUAND : VÉRIFICATION DE L'OPÉRATION
APPROPRIÉE DU VOYAGE ET LE DÉCLENCHEMENT DE CONTACT, LES BOURRAGES DÉGAGEANTS,
OU ENTRETIEN. EMPLOYEZ SEULEMENT AVEC LES BATTERIES ET LE CHARGEUR DE D
E
WALT.
POR FAVOR LEA DETENIDAMENTE Y COMPRENDA EL MANUAL
DE INSTRUCCIONES Y LAS ETIQUETAS. EL NO OBEDECER LAS
ADVERTENCIAS SEÑALADAS PODRÍA RESULTAR EN SERIAS LESIONES PERSONALES U
OCASIONAR LA MUERTE. TODO OPERARIO Y DEMÁS PERSONAS EN EL ÁREA DE TRABAJO
DEBERÁ LLEVAR ANTEOJOS DE PROTECCIÓN ANSI Z87.1 CON GUARDAS LATERALES.
MANTENGA LOS DEDOS ALEJADOS DEL GATILLO CUANDO NO ESTÉ CLAVANDO A FIN DE NO
ACCIONAR LA HERRAMIENTA INADVERTIDAMENTE. EL MÉTODO DE DISPARO ES IMPORTANTE.
CONSULTE LAS OPCIONES QUE OFRECE EL MANUAL. NUNCA DESHABILITE EL SEGURO.
UTILICE EL SEGURO CUANDO LA HERRAMIENTA NO SE ENCUENTRE EN FUNCIONAMIENTO.
ASEGÚRESE QUE EL GATILLO Y EL DISPARADOR POR CONTACTO FUNCIONEN DEBIDAMENTE
ANTES DE ACCIONAR LA HERRAMIENTA. JAMÁS ORIENTE LA HERRAMIENTA HACIA SI
MISMO NI HACIA LAS DEMÁS PERSONAS EN LA ZONA DE TRABAJO. RETIRE LA BATERÍA
DE LA HERRAMIENTA CUANDO: PRESTE CUALQUIER TIPO DE MANTENIMIENTO, CUANDO
DESTRABE LOS SUJETADORES O CUANDO VERIFIQUE EL FUNCIONAMIENTO APROPIADO DEL
DISPARADOR POR CONTACTO O DEL GATILLO. LA HERRAMIENTA SE DEBERÁ UTILIZAR
SOLAMENTE CON LAS BATERÍAS Y CON LOS CARGADORES D
E
WALT.
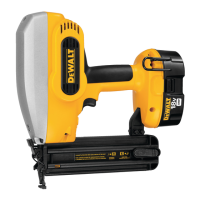
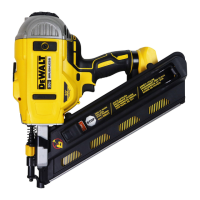
FIG. 24