ENGLISH
11
Your tool is equipped with a brake. The chuck will
stop
as soon as the trigger switch is fully released.
NOTE:
Continuous use in variable speed range is
not
recommended. It may damage the switch and
should
be avoided.
Forward/Reverse Control Button
(fig. 1)
A forward/reverse control button (b) determines the
di
rection of the tool and also serves as a lock-off
button
.
To select forward rotation, release the trigger
switch
and depress the forward/reverse control
button
on the right side of the tool.
To select reverse, depress the forward/reverse
cont
rol button on the left side of the tool.
The
center position of the control button locks the
tool in the OFF position. When changing the position
of the control button, be sure the trigger is released.
NOTE:The
first time the tool is run after changing
the
direction of rotation, you may hear a click on
start
up. This is normal and does not indicate a
problem.
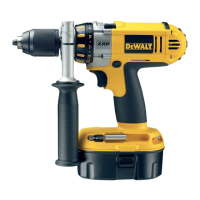
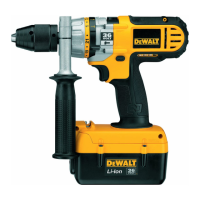
Mode Control Collar
Your drill is equipped with a separate mode
control collar (fig. 1, c) to switch between drilling,
screwdriving and hammerdrilling mode.
SCREWDRIVING
(FIG. 4)
1. Select the desired speed/torque range using the
th
ree-speed gear shifter (e) on the top of tool
to
match the speed and torque to the planned
application. To set the torque level to the proper
setting on the clutch collar, initially set the clutch
collar at a lower setting to ensure the fastener to
be
set to your specification.
NOTE: Use the lowest torque setting required
to
seat the fastener at the desired depth. The
lower
the number, the lower the torque output.
2. Rotate the mode control collar (c) so the screw
symbol
is aligned with the arrow.
3. Set the torque adjustment collar (d) to the
app
ropriate number setting for the torque
desi
red.
NOTE: The torque adjustment collar may
be
set on any number and change between
screwdriving and drilling modes using the mode
cont
rol collar.
DRILLING
(FIG. 5)
CAUTION: When the mode collar is in
the
drill/hammerdrill mode, the drill will
not
clutch out regardless of the position
of
the torque adjustment collar (d).
Rotate the mode control collar (c) so the drill
symbol
is aligned with the arrow.
NOTE
: The torque adjustment collar (d) may be set
on
any number.
HAMMERDRILLING (FIG. 6)
Rotate the mode control collar (c) so the hammer
symbol is aligned with the arrow.
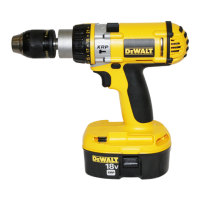
Torque Adjustment Collar (fig. 4)
Your tool has an adjustable torque screwdriver
mechanism
for driving and removing a wide array
of
fastener shapes and sizes and a hammer
mechanism
for drilling into masonry. Circling the
to
rque adjustment collar (d) are numbers. These
numbers
are used to set the clutch to deliver a
to
rque range. The higher the number on the collar,
the
higher the torque and the larger the fastener
which
can be driven. To select any of the numbers,
rotate until the desired number aligns with the arrow.
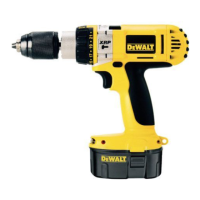
Three-Speed Gearing (fig. 4)
The three-speed feature of your tool allows you to
shift
gears for greater versatility. To select speed 1
(highest
torque setting), turn the tool off and permit
it
to stop. Slide the gear shifter (e) all the way to the
left.
Speed 2 (middle torque and speed setting) is in
the
middle position. Speed 3 (highest speed setting)
is
to the right.
NOTE:
Do not change gears when the tool is
running.
Always allow the drill to come to a complete
stop
before changing gears. If you have trouble
changing
gears, make sure that the gear shifter is
engaged
in one of the three speed settings.
Self-Tightening Chuck Operation
(fig. 7–9)
WARNING: Do not attempt to tighten
drill
bits (or any other accessory) by
gripping
the front part of the chuck
and
turning the tool on. Damage to the
chuck
and personal injury may result.
Always
lock off trigger switch when
changing
accessories.
WARNING: Always ensure the bit
is secure before starting the tool. A
loose bit may eject from tool causing
possible personal injury.
TO
INSERT A DRILL BIT OR OTHER ACCESSORY
1. Lock the trigger in the OFF position.