PILES ET CHARGEURS
Le bloc-piles n’est pas entièrement chargé lorsqu’il sort de la boîte. Avant d'utiliser le bloc-piles et le chargeur, lisez
attentivement les instructions de sécurité suivantes, puis suivez les procédures de chargement énoncées. Lorsque vous
commandez des blocs-piles de remplacement, assurez-vous d’inclure le numéro du catalogue et la tension.
Repairs
The charger and battery pack are notserviceable. There are no serviceable parts inside the charger or battery pack.
WARNING: To assure product SAFETY and RELIABILITY, repairs, maintenance and adjustment (including brush inspection and
replacement, when applicable) should be performed by a
factory service center or a
authorized service center.
Always use identical replacementparts.
LIRE TOUTES LES CONSIGNES
Consignes importantes de sécurité lesblocs-piles
AVERTISSEMENT : lisez toutes les consignes de sécurité, les instructions et les symboles d’avertissements du
bloc-piles, du chargeur et du produit. Tout manquement aux avertissements et instructions pose des risques de
décharges électriques, d’incendie et/ou de blessures graves.
• Ne pas recharger ou utiliser un bloc-piles en milieu déflagrant, en présence, par exemple, de poussières, gaz ou
liquides inflammables. Le fait d’insérer ou retirer un bloc-piles de son chargeur pourrait causer l’inflammation de poussières ou
d’émanations.
• Lorsque non utilisé, garder le bloc-piles éloigné de petits objets métalliques comme des trombones attache-feuilles,
des pièces de monnaie, des clés, des clous et vis ou autres pièces qui pourraient court-circuiter les bornes. Un court-
circuit pourrait causer des brûlures ou unincendie.
• NE JAMAIS forcer l’insertion d’un bloc-piles dans un chargeur. NE modifier un bloc-piles d’AUCUNE façon pour le faire
rentrer dans un chargeur incompatible, car il pourrait se briser et causer des dommages corporels graves. Consulter le
tableau en dernière page de ce manuel pour connaître les compatibilités entre chargeurs et blocs-piles.
• Recharger les blocs-piles exclusivement dans des chargeurs
.
• NE PAS éclabousser le bloc-piles ou l’immerger dans l’eau ou dans tout autreliquide.
• Ne pas entreposer ou utiliser l’appareil et le bloc-piles en présence de températures ambiantes pouvant excéder 40°C
(104°F) (comme dans des hangars ou des bâtiments métalliques l’été). Pour préserver leur durée de vie, entreposer les
blocs-piles dans un endroit frais etsec.
REMARQUE: ne pas mettre un bloc-piles dans un outil dont la gâchette est verrouillée en position de marche. Ne
jamais bloquer l’interrupteur en position deMARCHE.
• Ne pas exposer le bloc-piles ou l’outil/l’appareil au feu ou à une température excessive. L’exposition au feu ou à une
température au-dessus de 130° C (265° F) pourrait entraîner uneexplosion.
• Ne pas incinérer le bloc-piles même s’il est sévèrement endommagé ou complètement usagé, car il pourrait exploser
et causer un incendie. Pendant l’incinération des blocs-piles au lithium-ion, des vapeurs et matières toxiques sontdégagées.
• En cas de contact du liquide de la pile avec la peau, rincer immédiatement au savon doux et à l’eau. En cas de contact
oculaire, rincer l’œil ouvert à l’eau claire une quinzaine de minutes ou jusqu’à ce que l’irritation cesse. Si des soins médicaux
s’avéraient nécessaires, noter que l’électrolyte de la pile est composé d’un mélange de carbonates organiques liquides et de sels
delithium.
• Le contenu des cellules d’une pile ouverte peut causer une irritation respiratoire. En cas d’inhalation, exposer l’individu à
l’air libre. Si les symptômes persistent, consulter unmédecin.
AVERTISSEMENT : risques de brûlure. Le liquide de la pile peut s’enflammer s’il est exposé à des étincelles ou à uneflamme.
AVERTISSEMENT : risques d’incendie. Ne jamais tenter d’ouvrir le bloc-piles pour quelque raison que ce soit. Si le boîtier du
bloc-piles est fissuré ou endommagé, ne pas l’insérer dans un chargeur. Ne pas écraser, laisser tomber, ou endommager les
blocs-piles. Ne pas utiliser un bloc-piles ou un chargeur qui a reçu un choc violent, ou si l’appareil est tombé, a été écrasé ou
endommagé de quelque façon que ce soit (p. ex. percé par un clou, frappé d’un coup de marteau, piétiné). Les blocs-piles
endommagés doivent être renvoyés à un centre de réparation pour y êtrerecyclés.
Three Year Limited Warranty
will repair or replace, without charge, any defects due to faulty materials or workmanship for three years from the date
of purchase (two years for batteries). This warranty does not cover part failure due to normal wear or tool abuse. For further
detail of warranty coverage and warranty repair information, visit www.dewalt.com or call 1-800-4-
(1-800-433-9258).
This warranty does not apply to accessories or damage caused where repairs have been made or attempted by others. THIS
LIMITED WARRANTY IS GIVEN IN LIEU OF ALL OTHERS, INCLUDING THE IMPLIED WARRANTY OF MERCHANTABILITY AND FITNESS
FOR A PARTICULAR PURPOSE, AND EXCLUDES ALL INCIDENTAL OR CONSEQUENTIAL DAMAGES. Some states do not allow
limitations on how long an implied warranty lasts or the exclusion or limitation of incidental or consequential damages, so
these limitations may not apply to you. This warranty gives you specific legal rights and you may have other rights which vary in
certain states orprovinces.
In addition to the warranty
tools are covered byour:
1 YEAR FREE SERVICE
will maintain the tool and replace worn parts caused by normal use, for free, any time during the first year
afterpurchase.
2 YEARS FREE SERVICE ON D
WALT BATTERYPACKS
DC9071, DC9091, DC9096, DC9182, DC9280, DC9360, DCB120, DCB122, DCB124, DCB127, DCB201, DCB203BT, DCB207,DCB361
3 YEARS FREE SERVICE ON D
WALT BATTERYPACKS
DCB200, DCB203, DCB204, DCB204BT, DCB205, DCB205BT, DCB206, DCB208, DCB230, DCB240, DCB606, DCB609, DCB612
NOTE: Battery warranty voided if the battery pack is tampered with in any way.
is not responsible for any injury caused
by tampering and may prosecute warranty fraud to the fullest extent permitted bylaw.
90 DAY MONEY BACK GUARANTEE
If you are not completely satisfied with the performance of your
Power Tool or Nailer for any reason, you can return it
within 90 days from the date of purchase with a receipt for a full refund – no questionsasked.
LATIN AMERICA: This warranty does not apply to products sold in Latin America. For products sold in Latin America, see country
specific warranty information contained in the packaging, call the local company or see website for warrantyinformation.
FREE WARNING LABEL REPLACEMENT: If your warning labels become illegible or are missing, call 1-800-4-
(1-800-
433-9258) for a freereplacement.
Register Online
Thank you for your purchase. Register your product nowfor:
• WARRANTY SERVICE: Registering your product will help you obtain more efficient warranty service in case there is a
problem with yourproduct.
• CONFIRMATION OF OWNERSHIP: In case of an insurance loss, such as fire, flood or theft, your registration of ownership
will serve as your proof ofpurchase.
• FOR YOUR SAFETY: Registering your product will allow us to contact you in the unlikely event a safety notification is
required under the Federal Consumer SafetyAct.
• Register online at www.dewalt.com
AVERTISSEMENT : lire tous les avertissements de sécurité et toutes les directives. Le non-respect des avertissements et
des directives pourrait se solder par un choc électrique, un incendie et/ou une blessuregrave.
AVERTISSEMENT : afin de réduire le risque de blessures, lire le mode d’emploi del’outil.
Pour toute question ou remarque au sujet de cet outil ou de tout autre outil
composez le
numéro sans frais : (1-800-433-9258).
Définitions: symboles et termes d'alarmessécurité
Ces guides d'utilisation utilisent les symboles et termes d'alarmes sécurité suivants pour vous prévenir de situations dangereuses
et de risques de dommages corporels ou matériels.
DANGER : indique une situation dangereuse imminente qui, si elle n’est pas évitée, entraînera la mort ou des
blessuresgraves.
AVERTISSEMENT : indique une situation potentiellement dangereuse qui, si elle n’est pas évitée, pourrait entraîner la mort
ou des blessuresgraves.
ATTENTION : indique une situation potentiellement dangereuse qui, si elle n’est pas évitée, pourrait entraîner des blessures
légères oumodérées.
(Si utilisé sans aucun terme) Indique un message propre à la sécurité.
AVIS : indique une pratique ne posant aucun risque de dommages corporels mais qui par contre, si rien n’est fait pour
l’éviter, pourrait poser des risques de dommages matériels.
MAINTENANCE
WARNING: To reduce the risk of serious personal injury, turn unit off and remove the battery pack before making
any adjustments or removing/installing attachments or accessories. An accidental start-up can causeinjury.
• Do not place any object on top of the charger or place the charger on a soft surface that might block the ventilation
slots and result in excessive internal heat. Place the charger in a position away from any heat source. The charger is ventilated
through slots in the top and the bottom of thehousing.
• Do not operate the charger with a damaged cord orplug–have them replaced immediately.
• Do not operate the charger if it has received a sharp blow, been dropped or otherwise damaged in any way. Take it to
an authorized servicecenter.
• Do not disassemble the charger; take it to an authorized service center when service or repair is required. Incorrect
reassembly may result in a risk of electric shock, electrocution orfire.
• Disconnect the charger from the outlet before attempting any cleaning. This will reduce the risk of electric shock.
Removing the battery pack will not reduce thisrisk.
• NEVER attempt to connect 2 chargerstogether.
• The charger is designed to operate on standard 120V household electrical power. Do not attempt to use it on any
other voltage. This does not apply to the vehicularcharger.
WARNING: Shock hazard. Do not allow any liquid to get inside the charger. Electric shock mayresult.
WARNING: Burn hazard. Do not submerge the battery pack in any liquid or allow any liquid to enter the battery pack. Never
attempt to open the battery pack for any reason. If the plastic housing of the battery pack breaks or cracks, return to a service
center for recycling.
CAUTION: Burn hazard. To reduce the risk of injury, charge only
rechargeable battery packs. Other types of batteries
may overheat and burst resulting in personal injury and propertydamage.
CAUTION: Under certain conditions, with the charger plugged into the power supply, the charger can be shorted by foreign
material. Foreign materials of a conductive nature, such as, but not limited to, grinding dust, metal chips, steel wool, aluminum
foil or any buildup of metallic particles should be kept away from the charger cavities. Always unplug the charger from the
power supply when there is no battery pack in the cavity. Unplug the charger before attempting toclean.
SAVE THESE INSTRUCTIONS
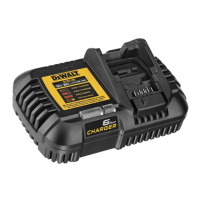
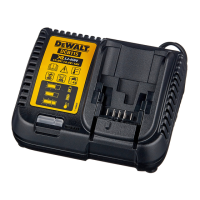
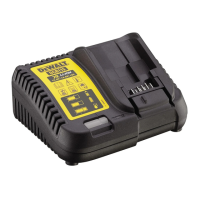
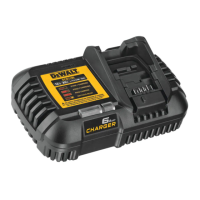
CHARGING A BATTERY
NOTE: To ensure maximum performance and life of lithium-ion battery packs, charge the battery pack fully before firstuse.
1. Plug the charger into an appropriate outlet before inserting batterypack.
2. Connect the charger and battery pack, making sure the battery is fully seated. The (charging) light will blink continuously
indicating that the charging process hasstarted.
3. The Stage 1 Charging blink indicator represents the charge process that charges the majority of the battery's capacity.
Stage2 Charging blink indicator represents the remainder, or top off charge process, for the battery to reach fullcapacity.
4. The completion of charge will be indicated by the light remaining ON continuously. The battery pack is fully charged and
may be removed and used at this time or left in the charger.
NOTE: To remove the battery pack, some chargers require the battery pack release button to bepressed.
Indicators
Stage 1 Charging
Stage 2 Charging
Fully Charged
Hot/Cold Pack Delay*
* DCB107, DCB112, DCB113, DCB115, DCB118, DCB132, DCB1106, DCB1112: The red light will continue to blink, but a
yellow indicator light will be illuminated during this operation. Once the battery pack has reached an appropriate temperature,
the yellow light will turn off and the charger will resume the charging procedure.
A charger will not charge a faulty battery pack. The charger refusing to light could indicate a problem with the charger or a faulty
battery pack.
NOTE: If the charger refuses to light, take the charger and battery pack to be tested at an authorized servicecenter.
Leaving the Battery Pack In the Charger
The charger and battery pack can be left connected with the charge indicator showing pack charged.
Hot/Cold Pack Delay
When the charger detects a battery pack that is too hot or too cold, it automatically starts a Hot/Cold Pack Delay, suspending
charging until the battery pack has reached an appropriate temperature. The charger then automatically switches to the pack
charging mode. This feature ensures maximum battery packlife.
A cold battery pack may charge at a slower rate than a warm batterypack.
The DCB118 and DCB1112 chargers are equipped with an internal fan designed to cool the battery pack. The fan will turn on
automatically when the battery pack needs to be cooled.
Never operate the charger if the fan does not operate properly or if ventilation slots are blocked. Do not permit foreign objects to
enter the interior of the charger.
Electronic Protection System
Li-Ion tools are designed with an Electronic Protection System that will protect the battery pack against overloading, overheating
or deep discharge.
The tool will automatically turn off if the Electronic Protection System engages. If this occurs, place the lithium-ion battery pack
on the charger until it is fully charged.
Important Charging Notes
1. Longest life and best performance can be obtained if the battery pack is charged when the air temperature is between 65°F
– 75°F (18° C– 24°C). DO NOT charge when the battery pack is below +40°F (+4.5°C), or above +104°F (+40°C). This is
important and will prevent serious damage to the batterypack.
2. The charger and battery pack may become warm to the touch while charging. This is a normal condition, and does not
indicate a problem. To facilitate the cooling of the battery pack after use, avoid placing the charger or battery pack in a warm
environment such as in a metal shed or an uninsulatedtrailer.
3. If the battery pack does not charge properly:
a. Check operation of receptacle by plugging in a lamp or other appliance;
b. Check to see if receptacle is connected to a light switch which turns power off when you turn out
the lights;
c. Move the charger and battery pack to a location where the surrounding air temperature is approximately 65°F – 75°F
(18°C – 24°C);
d. If charging problems persist, take the tool, battery pack and charger to your local servicecenter.
4. The battery pack should be recharged when it fails to produce sufficient power on jobs which were easily done previously.
DO NOT CONTINUE to use under these conditions. Follow the charging procedure. You may also charge a partially used pack
whenever you desire with no adverse effect on the batterypack.
5. Foreign materials of a conductive nature such as, but not limited to, grinding dust, metal chips, steel wool, aluminum foil,
or any buildup of metallic particles should be kept away from charger cavities. Always unplug the charger from the power
supply when there is no battery pack in the cavity. Unplug the charger before attempting toclean.
6. Do not freeze or immerse the charger in water or any otherliquid.
Charger Cleaning Instructions
WARNING: Shock hazard. Disconnect the charger from the AC outlet before cleaning. Dirt and grease may be removed from
the exterior of the charger using a cloth or soft non-metallic brush. Do not use water or any cleaningsolutions.
Wall Mounting
DCB107, DCB112, DCB113, DCB115, DCB118, DCB132, DCB1106, DCB1112
These chargers are designed to be wall mountable or to sit upright on a table or work surface. If wall mounting, locate the
charger within reach of an electrical outlet, and away from a corner or other obstructions which may impede air flow. Use
the back of the charger as a template for the location of the mounting screws on the wall. Mount the charger securely using
drywall screws (purchased separately) at least 1” (25.4 mm) long, with a screw head diameter of 0.28–0.35” (7–9mm), screwed
into wood to an optimal depth leaving approximately 7/32” (5.5 mm) of the screw exposed. Align the slots on the back of the
charger with the exposed screws and fully engage them in theslots.
FRANÇAIS
 Loading...