Do you have a question about the DeWalt DCD796 and is the answer not in the manual?
Defines the 'DANGER' signal word for imminent hazardous situations.
Defines the 'WARNING' signal word for potential hazardous situations.
Defines the 'CAUTION' signal word for minor hazardous situations.
Guidelines for maintaining a safe and clear work environment.
Precautions for safe use of electrical components and connections.
Measures for operator safety and well-being during use.
Instructions for operating and maintaining the power tool properly.
Guidelines for safely using and maintaining battery packs.
Information on when and how to get the power tool serviced.
Step-by-step guide on how to charge the battery pack.
Explanation of the charge status indicators on the charger.
Describes the charger's behavior with temperature-affected batteries.
Specifies the use of only Li-Ion battery packs.
Key safety precautions specifically for Lithium-Ion battery packs.
Details the voltage and compatible battery pack models.
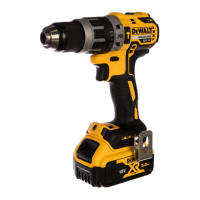
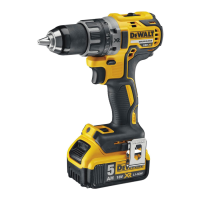
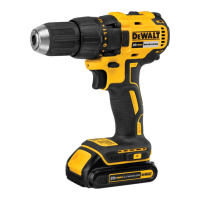
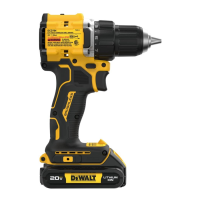
Identifies and describes the various parts of the power tool.
Instructions for installing and removing the battery pack from the tool.
General guidance on operating the tool safely and effectively.
Illustrates the correct way to hold the tool for safe operation.
Information regarding the tool's lubrication requirements.
Instructions for cleaning the power tool and its components.
Specific steps for safely cleaning the battery charger.
Guidance on using recommended accessories with the tool.
Information on proper disposal and environmental responsibility.
Recommendations for the care and disposal of rechargeable battery packs.
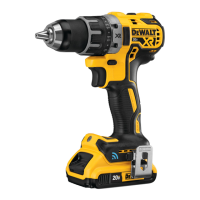
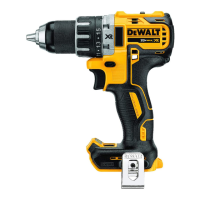
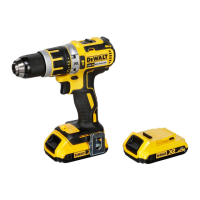
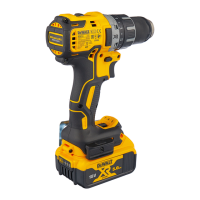
The DEWALT DCD791 Drill/Driver and DCD796 Drill/Driver/Hammerdrill are brushless cordless compact 13 mm (1/2") power tools designed for professional drilling, percussion drilling, and screwdriving applications. These tools are not intended for use in wet conditions or in the presence of flammable liquids or gases.
The tools feature a variable speed trigger switch (A) for precise control. Squeezing the trigger turns the tool on, and releasing it turns the tool off. The tool is equipped with a brake that stops the chuck when the trigger is fully released. Continuous use in variable speed range is not recommended as it may damage the switch.
A forward/reverse control button (B) determines the direction of rotation and also serves as a lock-off button. To select forward rotation, release the trigger switch and press the forward/reverse control button on the right side of the tool. For reverse rotation, press the button on the left side. The center position of the control button locks the tool in the off position. Always ensure the trigger is released when changing the control button's position. A clicking sound may be heard on start-up after changing the direction of rotation, which is normal.
The torque adjustment collar (C) allows for setting the clutch to deliver a specific torque range, useful for driving and removing fasteners. The higher the number on the collar, the higher the torque. This collar is engaged only in screwdriving mode.
The dual range gearing feature, controlled by the gear shifter (D), provides versatility. Speed 1 (high torque setting) is selected by sliding the gear shifter forward (towards the chuck). Speed 2 (low torque setting) is selected by sliding the gear shifter back (away from the chuck). Always allow the drill to come to a complete stop before changing gears to avoid damage.
The LED worklight (E) and its switch (L) are located on the foot of the tool. The worklight activates when the trigger switch is depressed. Low (M), medium (N), and spotlight (O) modes can be changed by moving the switch. In low and medium settings, the beam automatically turns off 20 seconds after the trigger switch is released. The spotlight mode (O) runs for 20 minutes after the trigger switch is released, flashing twice and dimming two minutes before shutting off. Lightly tapping the trigger switch can prevent the spotlight from shutting off. When using the worklight in medium or spotlight mode, avoid staring at the light or placing the drill in a position that causes others to stare into the light, as this could cause serious eye injury.
The tool operates on an 18-volt Li-Ion battery pack. Some DEWALT battery packs include a fuel gauge (P) with three green LED lights indicating the remaining charge level. Pressing and holding the fuel gauge button illuminates the LEDs. If the charge level is below the usable limit, the fuel gauge will not illuminate, and the battery will need recharging. The fuel gauge is an indication of charge level and is subject to variation based on product components, temperature, and end-user application.
For drill operation, turn the collar to the drill symbol and select the desired speed/torque range using the gear shifter. For wood, use twist bits, spade bits, power auger bits, or hole saws. For metal, use high-speed steel twist drill bits or hole saws, applying a cutting lubricant (except for cast iron and brass, which should be drilled dry). Always apply pressure in a straight line with the bit, ensuring it bites without stalling the motor or deflecting. Hold the tool firmly with both hands to control twisting action. If the drill stalls due to overload, immediately release the trigger, remove the bit, and determine the cause. Do not repeatedly click the trigger to restart a stalled drill, as this can damage the tool. To minimize stalling, reduce pressure and ease the bit through the end of the hole. Keep the motor running when pulling the bit out to prevent jamming. For variable speed drills, use a slow speed to start the hole and accelerate as it deepens.
For hammerdrill operation (DCD796 only), turn the collar to the hammerdrill symbol and select the high speed (2) setting by sliding the gear shifter back. Use carbide-tipped or masonry bits only. Apply just enough force to keep the hammer from bouncing excessively, avoiding too much force which can lead to slower drilling speeds and overheating. Drill straight, keeping the bit at a right angle to the work. Avoid side pressure on the bit to prevent clogging of the flutes. For deep holes, if the hammer speed drops, pull the bit partially out of the hole while the tool is running to clear debris. A smooth, even flow of dust indicates proper drilling rate.
For screwdriver operation, turn the torque adjustment collar to the desired position and select the appropriate speed/torque range. Use the lowest torque setting required to seat the fastener at the desired depth. Insert the fastener accessory into the chuck. Practice on scrap material to determine the proper clutch collar position, starting with lower torque settings and advancing as needed to avoid damage to the workpiece or fastener.
The keyless single sleeve chuck (F) allows for one-handed operation. To insert an accessory, turn the tool off and disconnect from the power source. Grasp the black sleeve of the chuck with one hand and secure the tool with the other. Rotate the sleeve counterclockwise to open it. Insert the accessory about 19 mm (3/4") into the chuck and tighten securely by rotating the chuck sleeve clockwise with one hand while holding the tool. The tool's automatic spindle lock mechanism facilitates one-handed operation. Ensure the chuck is tightened for maximum tightness.
The belt hook (G) and bit clip (I) can be attached to either side of the tool using the provided screw (H) to accommodate left- or right-handed users. If not desired, they can be removed. Always ensure the screw holding the belt hook is secure. Do not suspend the tool overhead or suspend objects from the belt hook; only hang the tool's belt hook from a work belt.
Your DEWALT power tool is designed for long-term operation with minimal maintenance. Proper tool care and regular cleaning are essential for continuous satisfactory operation.
To clean the tool, blow dirt and dust out of the main housing with dry air, wearing approved eye protection and a dust mask. Never use solvents or harsh chemicals on the non-metallic parts, as they can weaken the materials. Use a cloth dampened with water and mild soap. Never allow liquid inside the tool or immerse any part of it.
For charger cleaning, disconnect the charger from the AC outlet. Dirt and grease can be removed from the exterior with a cloth or soft non-metallic brush. Do not use water or cleaning solutions.
The battery pack and charger are not serviceable. If the charger indicates a problem, take both the charger and battery pack to an authorized service center.
When the charger detects a battery that is too hot or too cold, it automatically initiates a Hot/Cold Pack Delay, suspending charging until the battery reaches an appropriate temperature. This feature ensures maximum battery life. A cold battery pack will charge at about half the rate of a warm battery pack throughout the charging cycle.
To ensure maximum performance and life of lithium-ion batteries, charge the battery pack fully before first use. Store battery packs in a cool, dry place away from direct sunlight and excessive heat or cold for optimum performance and life. For long storage, a fully charged battery pack in a cool, dry place out of the charger is recommended. Do not store battery packs completely depleted of charge.
Lithium-ion cells are recyclable. At the end of its technical life, run the battery pack down completely, then remove it from the tool and take it to your dealer or a local recycling station for proper recycling or disposal.
Always turn the tool off and disconnect the battery pack before making any adjustments, changing accessories, or removing/installing attachments to prevent accidental start-up and injury. Use only DEWALT battery packs and chargers.
| Torque settings | 15 |
|---|---|
| Sound power level | 100 dB |
| Chuck capacity (min) | 1.5 mm |
| Sound pressure level | 89 dB |
| Idle speed (1st gear) | 550 RPM |
| Idle speed (2nd gear) | 2000 RPM |
| Impact rate (low speed) | 9350 bpm |
| Sound level uncertainty | 3 dB |
| Impact rate (high speed) | 34000 bpm |
| Drilling diameter in wood (max) | 40 mm |
| Vibration level (metal drilling) | 2.5 m/s² |
| Maximum torque (hard applications) | 70 N⋅m |
| Maximum torque (soft applications) | 27 N⋅m |
| Drilling diameter in concrete (max) | 13 mm |
| Vibration level (concrete drilling) | 11.5 m/s² |
| Product color | Black, Yellow |
| Uncertainty K | 1.5 m/s² |
| Drilling | Yes |
| Chuck type | Keyless |
| Product design | Pistol grip drill |
| Number of batteries included | 2 pc(s) |
| Battery type | XR Li-Ion |
| Power source | Battery |
| Battery voltage | 18 V |
| Battery capacity | 2 Ah |
| Depth | 190 mm |
|---|---|
| Width | 67 mm |
| Height | 203 mm |
| Weight | 1600 g |