10
FIG. E
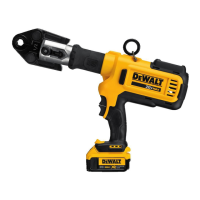
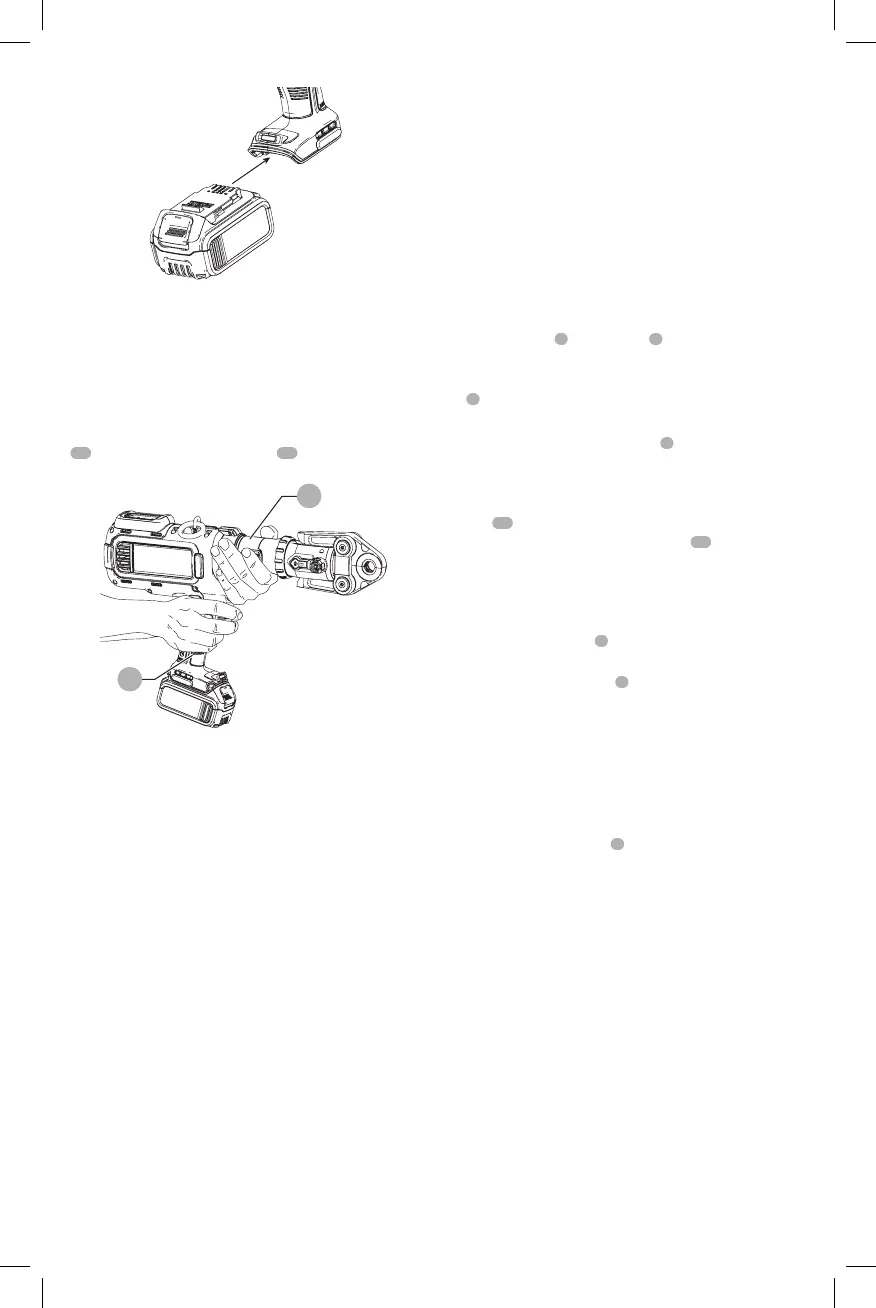
Proper Hand Position (Fig. F)
WARNING: To reduce the risk of serious personal injury,
ALWAYS use proper hand position as shown.
WARNING: To reduce the risk of serious personal injury,
ALWAYS hold securely in anticipation of a sudden
reaction.
Proper hand position requires one hand on the main handle
15
and one hand on the tool neck
16
, of the press tool.
FIG. F
15
16
Preparing the Connection
WARNING: Always follow the specific
manufacturer's installation instructions for press
tool attachments being used. It is the installer's
responsibility to ensure the compatibility of the pipe
and fittings used for the connection. Contact the
manufacturer for specific information on their fittings
system. Failure to follow all instructions and warnings
may result in property damage and/or serious
personalinjury.
• Make sure to clear the work area of loose debris and any
other items that could hinder the pressing operation.
• Always ensure the work area is set up properly and that
the tool's connection is prepared according to the fitting
manufacturer’s instructions.
• Follow the fitting manufacturer’s instructions to make
sure the tubing is inserted properly into the fitting.
Pressing (Fig. A, C)
WARNING: To reduce the risk of serious personal
injury, inspect the jaw assembly for cleanliness,
cracks or other damage before beginning a press.
Using a dirty or damaged jaw assembly could result
in improper press connections that could lead to
extensive property damage. Return damaged jaw
assembly to a
service facility.
WARNING: To reduce the risk of serious personal
injury, prior to use, inspect workpieces for cracks,
defects or wear. Defective workpieces may shatter.
WARNING: Before turning on the press tool, be
sure hands are clear of the jaws.
Before beginning a press, check the fuel gauge to determine
whether the battery charge is sufficient to complete the
pressing operation.
NOTE: The tool will turn off automatically after 2 minutes
of no use.
1. Press jaw arms
2
to open jaws
1
and place around
thefitting.
2. Turn the tool ON by holding the power ON/OFF button
8
until all 3 LEDs illuminate green.
3. Hold tool securely.
4. Press and hold the trigger switch
5
(bottom trigger)
until the cycle is complete, indicated by the ram
automatically returning to its original position.
5. When the press cycle is complete, the Cycle Complete
LED
18
will flash green for 5 seconds. If the press cycle
is incomplete, the cycle complete LED
18
will flash red
for 5 seconds. No action is possible until the user presses
the ON/OFF button.
6. If the battery dies or tool malfunctions during the press
connection, the rollers can retract by pressing the
reverse trigger switch
6
. This will retract the ram and
allow the jaws to be opened.
7. Press the ON/OFF button
8
to turn the tool OFF, then
press the jaw arms to open the jaw set.
NOTE: If the tool does not complete the press properly, read
the Troubleshooting Guide or LED Indications sections or
take the tool to a
factory service center.
NOTE: When pressing overhead, always confirm workpiece
and tool are secure before pressing.
NOTICE: In the event of an incomplete press, press the
reverse trigger switch
6
to open the press jaws and
remove the material.
Inspecting the Pressed Connection
1. Clear the pressed fitting of any control rings or control
labels. These are used by fitting manufacturers to
indicate an unpressed fitting.
2. Check for excessive misalignment, tubing not fully
inserted into the fitting, and incorrect jaw or attachment
alignment. Make sure no other issues are present on the
pressed connection per the manufacturer’s instructions.
If any issues are present, remove the fitting and replace
with a new one.
3. Test the fitting according to manufacturer’s instructions
or local codes.
MAINTENANCE
WARNING: To reduce the risk of serious personal
injury, turn unit off and remove the battery pack
before making any adjustments or removing/
 Loading...