31
ENGLISH
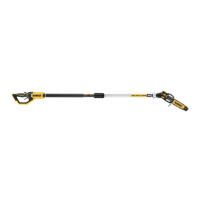
Pruning Instructions (Fig.A, F)
DANGER: Keep hands and other body parts away from
the blade. Contact with the blade will result in serious
personalinjury.
WARNING: To guard against injury, observe the
following:
• Read instruction manual before using. Save
instructionmanual.
• Check the shrub for foreign objects such as wires or
fences before eachuse.
• Keep hand on firmly on tool and other hand far away
from cutting action. Don'toverreach.
• Do not use under wetconditions.
CAUTION: Do not use blade to cut branches greater than
25mm. Use the pruner only for cutting normal shrubbery
around houses andbuildings.
Working Position (Fig.F)
Maintain proper footing and balance and do not overreach.
Wear safety goggles, non-skid footwear and gloves when
pruning. Hold the tool firmly. Always hold the pruner, as shown
LED Worklight (Fig.A)
CAUTION: Do not stare into worklight. Serious eye
injury couldresult.
The LED worklight
5
is activated when the trigger switch
1
is depressed, and will automatically turn off 20seconds after
the trigger switch is released. If the trigger switch remains
depressed, the worklight will remainon.
NOTE: The worklight is for lighting the immediate work surface
and is not intended to be used as aflashlight.
Switching On (Fig.A, D, F)
DANGER: Keep hands and other body parts: away from
the blade. Contact with the blade will result in serious
personalinjury laceration and amputationhazard.
WARNING: Never attempt to lock a switch in the
ONposition.
1. Keeping your hands and other body parts away from the
blade, push the lock-off button
2
down and squeeze the
lock-off switch
3
then squeeze the trigger switch
1
.
2. The cutting blade
6
will make a cut cycle. Once this cycle is
complete you must release the trigger switch
1
.
3. To make repeated cuts, squeeze the trigger switch
1
again
while continuing to hold down lock off switch
3
.
4. To turn the tool off, release the trigger switch
1
and the
lock-off switch
3
.
NOTE: In order to keep the unit powered on, you must
continue to squeeze the lock-off switch
3
. If held too long
the tool will time out and will need to release switches and
startagain.
NOTE: If the lock-off button
2
or lock-off switch
3
are
unintentionally depressed without squeezing the trigger
switch
1
, the tool will poweroff.
Proper Hand Position (Fig.D, E)
WARNING: To reduce the risk of serious personal injury,
ALWAYS use proper hand position asshown.
WARNING: To reduce the risk of serious personal
injury, ALWAYS hold securely in anticipation of a
suddenreaction.
Proper hand position requires one hand on the main handle
4
.
Keep other hand far from the cuttingaction.
OPERATION
Instructions for Use
WARNING: Always observe the safety instructions and
applicableregulations.
WARNING: To reduce the risk of serious personal
injury, turn tool off and disconnect battery pack
before making any adjustments or removing/
installing attachments or accessories. An accidental
start-up can causeinjury.
Inserting and Removing the Battery Pack
from the Tool (Fig.B)
NOTE: Make sure your battery pack
8
is fullycharged.
To Install the Battery Pack into the Tool Handle
1. Align the battery pack with the rails inside the tool’s
handle(Fig. B).
2. Slide it into the handle until the battery pack is firmly seated
in the tool and ensure that you hear the lock snap intoplace.
To Remove the Battery Pack from the Tool
1. Press the battery release button
9
and firmly pull the
battery pack out of the toolhandle.
2. Insert battery pack into the charger as described in the
charger section of thismanual.
Fuel Gauge Battery Packs (Fig.B)
Some DeWALT battery packs include a fuel gauge which
consists of three green LED lights that indicate the level of
charge remaining in the batterypack.
To actuate the fuel gauge, press and hold the fuel gauge
button
18
. A combination of the three green LED lights will
illuminate designating the level of charge left. When the level
of charge in the battery is below the usable limit, the fuel gauge
will not illuminate and the battery will need to berecharged.
NOTE: The fuel gauge is only an indication of the charge left on
the battery pack. It does not indicate tool functionality and is
subject to variation based on product components, temperature
and end-userapplication.
ASSEMBLY AND ADJUSTMENTS
WARNING: To reduce the risk of serious personal
injury, turn tool off and disconnect battery pack
before making any adjustments or removing/
installing attachments or accessories. An accidental
start-up can causeinjury.
WARNING: Use only DeWALT battery packs andchargers.