7
ENGLISH
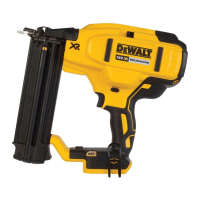
Nail Length Setting (Fig. G)
This nailer is equipped with a nail length selection switch
15
Fig. G
15
located on thefoot.
• For shorter nails, select speed 1 by setting the switch to the
left mostposition.
• For longer nails and more rigorous applications, select speed
2 by setting the switch to the right mostposition.
In the event that nails are not driving to depth in speed
setting 1, you may have to switch to speed setting 2 for
additional drivingpower.
NOTICE: Firing nails under 2" (50.8 mm) in length using
Speed Setting 2 will cause excessive wear to your tool and
may result inearly failures and or damage.
Speed Setting Benefit Typical Nail Length
2 Power to drive longer nails 2- 1/2” (63.5mm)
1 Increased tool durability, Increased battery life, Increased
speed of firing
1 -1/2” (38.1mm)
Actuating/Firing the Tool (Fig. A, H, I)
WARNING: Metal connector nails are not designed to penetrate metal. When installing
metal connectors, ALWAYS place the exposed point of the metal connector tip
13
into the
metal connector’s pre-formed hole, and orient so the nail is perpendicular to the hole before
attempting to drive a fastener. Refer to FigureH.
Fig. H
WARNING: Fasteners must be driven straight into the material. Do not tilt nailer while
driving fasteners. Fasteners not driven straight can deflect, causing injury. Refer to Fig.I.
Fig. I
The tool can be fired/actuated by pulling the trigger
1
in one of two modes: sequential mode or
RapidCycle™ mode. Refer to Selecting the Mode for detailed instructions for firing in eachmode.
Selecting the Mode (Fig. A)
WARNING: Always wear proper eye [ANSI Z87.1 (CAN/CSA Z94.3)] and ANSI S12.6 (S3.19)
hearing protection when operatingtool.
To select standard sequential mode, slide the mode selector switch
9
to display the single
arrow
icon.
To select rapid sequential operating mode (RapidCycle™), slide the mode selector switch
9
to
display the double arrow icon.
NOTE: Battery life in RapidCycle™ mode will be shorter than in standard sequential mode.
Leaving the tool in standard sequential will give maximum batterylife.
Sequential Mode
The sequential mode is used for intermittent nailing. It offers the maximum battery life for
drivingnails.
1. Using the mode selector switch
9
, select the sequentialmode.
2. Release the trigger safety lock-off
2
.
3. Push the contact trip
6
against the worksurface.
4. Pull the trigger switch
1
to actuate thetool.
5. Release the trigger and raise the nailer from the worksurface.
6. Repeat steps 3–5 to actuate the nextnail.
RapidCycle™ Mode
In RapidCycle™ mode, the motor rotation speed is automatically restored after driving a nail to
allow fast consecutive nailing. While offering the ability to drive more nails in less time, this mode
more quickly depletes the batterycharge.
1. Using the mode selector switch
9
to select the RapidCycle™mode.
2. Release the trigger safety lock-off
2
.
3. Push the contact trip
6
against the worksurface.
4. Pull the trigger switch
1
to actuate thetool.
5. Release the trigger and raise the nailer from the work surface. NOTE: The tool motor returns
to full speed automatically without the contact tip
6
beingdepressed.
6. Repeat steps 3–5 to actuate the nextnail.
Adjusting Depth (Fig. J)
The depth that the nail is driven can be adjusted using the depth adjustment wheel
3
on the
nose of thetool.
WARNING: To reduce risk of serious injury from accidental actuation when
attempting to adjust depth, ALWAYS:
• Remove batterypack.
• Engage trigger lock-off.
• Always point the nose of the nailer away fromyou.
• Avoid contact with trigger duringadjustments.
1. To drive the nail shallower, rotate the
Fig. J
3
depth adjustment wheel
3
to the left,
toward the shallow nailicon.
2. To drive a nail deeper, rotate the depth
adjustment wheel
3
to the right, toward
the deeper nail icon .
LED Indicator (Fig. A)
There is an low battery and jam/stall indicator
light
4
located on the back of the tool just below the backcap.
LOW BATTERY
Replace battery with a
chargedpack.
HOT PACK
Let the battery cool or replace it
with a coolpack.
JAM/STALL CONDITION
Rotate the stall release lever
torelease.
Refer to StallRelease.
+
HOT TOOL
Let the tool cool down before
continuinguse.
+/or
or any othercombination.
ERROR
Reset tool by removing and
reinserting battery pack or cycling
trigger lock off. If error code persist,
take tool to an authorized
 Loading...