9
ENGLISH
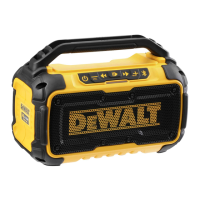
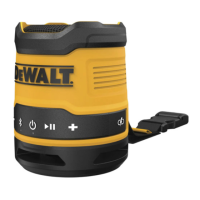
Pairing Speaker with a Bluetooth® AudioDevice
(Fig.A)
1. Place the speaker and the Bluetooth® audio device within
1m of eachother.
2. Turn on the speaker by pressing the power button
1
.
3. Be sure the Bluetooth® audio device has Bluetooth® turned
on. (Please consult your device's instruction manual for
specific pairing instructions.)
4. Press the Bluetooth® button
6
on the speaker. This will
cause the Bluetooth® status indicator
4
to blink slowly.
During this time, the speaker is trying to find a previously
paired device. If found, the Bluetooth® status indicator will
stay lit without anyblinking.
5. If another device is to be paired, the Bluetooth® status
indicator will blink rapidly. While the speaker is displaying
the fast blink, it is in pairingmode with a newdevice.
6. Confirm pairing on your device.
NOTE: If pairing is not confirmed within 5minutes, the
status indicator will stop flashing and will return to a half
second interval blinkpattern.
7. Once pairing is successful, the Bluetooth® status indicator
will turn solid. The speaker will now play audio from
yourdevice.
Bluetooth® Status Indicator
Blink Patterns Status/Mode
Steady blinking (half
second interval)
Speaker is unpaired or in
connectingmode.
Rapid Blinking Speaker is in pairing mode and
discoverable by yourdevice.
Solid light Speaker is connected with adevice.
No light Speaker has timed out and/or isoff.
Connecting a Previously Paired Bluetooth® AudioDevice
If a Bluetooth® device has been previously paired to the speaker,
it should automatically reconnect when the speaker is powered
on. After 4seconds, the speaker will go into connecting mode.
This is indicated by the Bluetooth® status indicator
4
blinking
steadily. Once the previously paired Bluetooth® device is
recognized and connected, the Bluetooth® status indicator will
stop blinking and turn solid. If connection does not occur and
you are unable to stream audio, please follow the instructions
for Pairing Speaker with a Bluetooth® AudioDevice.
NOTE: The Bluetooth® audio device must have Bluetooth®
turned on to automaticallypair.
Timeout Functionality (Fig.A)
To conserve battery life, the speaker is designed to power off
automatically after a half hour of inactivity. This inactivity could
be due to the device being unpaired for a half hour or in the
case of the Bluetooth® connection being broken for the same
period of time. If the speaker powers off due to inactivity of
any kind, refer to Connecting a Previously Paired Bluetooth®
AudioDevice.
NOTE: Optimum Bluetooth® streaming range is roughly
9m (line of sight) to the speaker, but distances up to 30m
Button Functions (Fig.A)
Power Button
Press the power button
1
to turn the speaker either on oroff.
Play/Pause Button
Press the play/pause button
5
to begin playing a selection
from the audio device. Press the play/pause button again to
pauseplay.
Volume Adjustment Buttons
The volume buttons
2
can be used to increase or decrease
volume on thespeaker.
Track Change Buttons
The right and left track change buttons
3
can be used to skip or
go to previous tracks on the audiodevice.
NOTE: The track change buttons will function only when paired
via Bluetooth®.
Playing Audio
Audio can be played through the speaker via a wireless
Bluetooth® connection to a compatible Bluetooth® audiodevice.
OPERATION
Instructions for Use
WARNING: Always observe the safety instructions and
applicableregulations.
WARNING: To reduce the risk of serious personal
injury, turn tool off and disconnect battery pack
before making any adjustments or removing/
installing attachments or accessories. An accidental
start‑up can causeinjury.
2. Slide it in until the battery pack is firmly seated and ensure
that you hear the lock snap intoplace. Be sure that it does
notdisengage.
To Remove the Battery Pack from theSpeaker
1. Press the battery release button
12
and firmly pull the
battery pack out of the batteryport.
2. Insert battery pack into the charger as described in the
charger section of thismanual.
Fuel Gauge Battery Packs (Fig.B)
Some DeWALT battery packs include a fuel gauge which
consists of three green LED lights that indicate the level of
charge remaining in the batterypack.
To actuate the fuel gauge, press and hold the fuel gauge button.
A combination of the three green LED lights will illuminate
designating the level of charge left. When the level of charge
in the battery is below the usable limit, the fuel gauge will not
illuminate and the battery will need to berecharged.
NOTE: The fuel gauge is only an indication of the charge left on
the battery pack. It does not indicate tool functionality and is
subject to variation based on product components, temperature
and end-userapplication.