13
ENGLISH
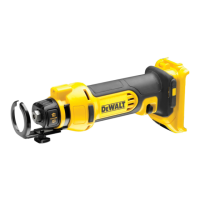
Lanyard Connection (Fig. A)
Optional Accessory
Safety Warnings Specific for Use At Height
WARNING:
• If the tool is dropped for any reason, the lanyard
attachment point and battery strap components
must be inspected and properly serviced prior to
re‑use. The lanyard attachment point is designed
to stretch to absorb the shock of a drop. Any
permanent stretch to the device exposing the
red marked internal coils indicates it has been
compromised and must be serviced prior toreuse.
• Remove any wrenches/chuck keys and store them
separately when using atheight.
• Do not use hang hook as lanyard
attachmentpoint.
Accessories
WARNING: Since accessories, other than those
offered by DeWALT, have not been tested with this
product, use of such accessories with this tool could be
hazardous. To reduce the risk of injury, only DeWALT
recommended accessories should be used with
thisproduct.
Recommended accessories for use with your tool are
available at extra cost from your local dealer or authorized
service center. If you need assistance in locating any
accessory, please contact DeWALT call 1‑800‑4‑DeWALT
(1-800-433-9258) or visit our website: www.dewalt.com.
Cleaning
WARNING: Blow dirt and dust out of all air vents with
clean, dry air at least once a week. To minimize the risk
of eye injury, always wear ANSI Z87.1 approved eye
protection when performing thisprocedure.
WARNING: Never use solvents or other harsh
chemicals for cleaning the non‑metallic parts of the
tool. These chemicals may weaken the plastic materials
used in these parts. Use a cloth dampened only with
water and mild soap. Never let any liquid get inside the
tool; never immerse any part of the tool into aliquid.
MAINTENANCE
WARNING: To reduce the risk of serious personal
injury, turn unit off and remove the battery pack
before making any adjustments or removing/
installing attachments or accessories. An
accidental start‑up can causeinjury.
Your DeWALT power tool has been designed to operate
over a long period of time with a minimum of maintenance.
Continuous satisfactory operation depends upon proper tool
care and regularcleaning.
Transportation and Storage
During transportation and storage lock the trigger switch
with the lock‑offbutton.
Remove the battery pack during the toolstorage.
Tool Connect™ Chip (Fig.K)
WARNING: To reduce the risk of serious personal
injury, turn unit off and remove the battery pack
before making any adjustments or removing/
installing attachments or accessories. An
accidental start‑up can causeinjury.
Your tool is Tool Connect™ Chip ready and has a location for
installation of a Tool Connect™ Chip.
Tool Connect™ Chip is an optional application for your
smart device (such as a smart phone or tablet) that connects
the device to utilize the mobile application for inventory
management functions.
Refer to Tool Connect™ Chip Instruction Sheet for
moreinformation.
Installing the Tool Connect™ Chip
1. Remove the retaining screws
25
that hold the Tool
Connect™ Chip protective cover
26
into thetool.
2. Remove the protective cover and insert the Tool
Connect™ Chip into the empty pocket
27
.
3. Ensure that the Tool Connect™ Chip is flush with the
housing. Secure it with the retaining screws and tighten
thescrews.
4. Refer to Tool Connect™ Chip Instruction Sheet for
furtherinstructions.
WARNING: Wheels used for cutting may break or kick
back if they bend or twist while the tool is being used to
do cut‑offwork.
WARNING: Do not bang or bump a cut‑off wheel
when starting or during acut.
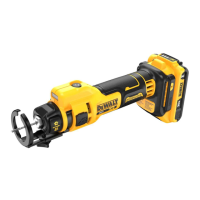
1. Grasp main handle
3
firmly.
2. Line up wheel with material to be cut. Be sure nothing is
near or in line with thewheel.
3. Depress and hold trigger switch
4
then slowly feed
wheel into work with firm pressure. Do not force the tool.
For maximum efficiency and wheel life, keep the wheel
speedhigh.
4. To stop tool, release trigger switch
4
.
If Using the Dust Shroud for Dust Collecting
(Fig.J)
1. Remove batterypack.
2. Adjust the depth of cut when using the dustshroud.
3. Insert the batterypack.
4. While cutting, keep the shoe flat against the workpiece
and maintain a firm grip, don’t force the cut off tool
through the workpiece. Forcing a cut off tool can
causekickback.
NOTE: If making a partial cut, restarting a cut, or
correcting cut direction. Allow the wheels to come to
a complete stop. To resume cutting, center the wheel
in the kerf (cutting slot)
29
, back and saw away from
cutting edge, pull the trigger and re‑enter the cutslowly.
5. To stop tool, release triggerswitch.