21
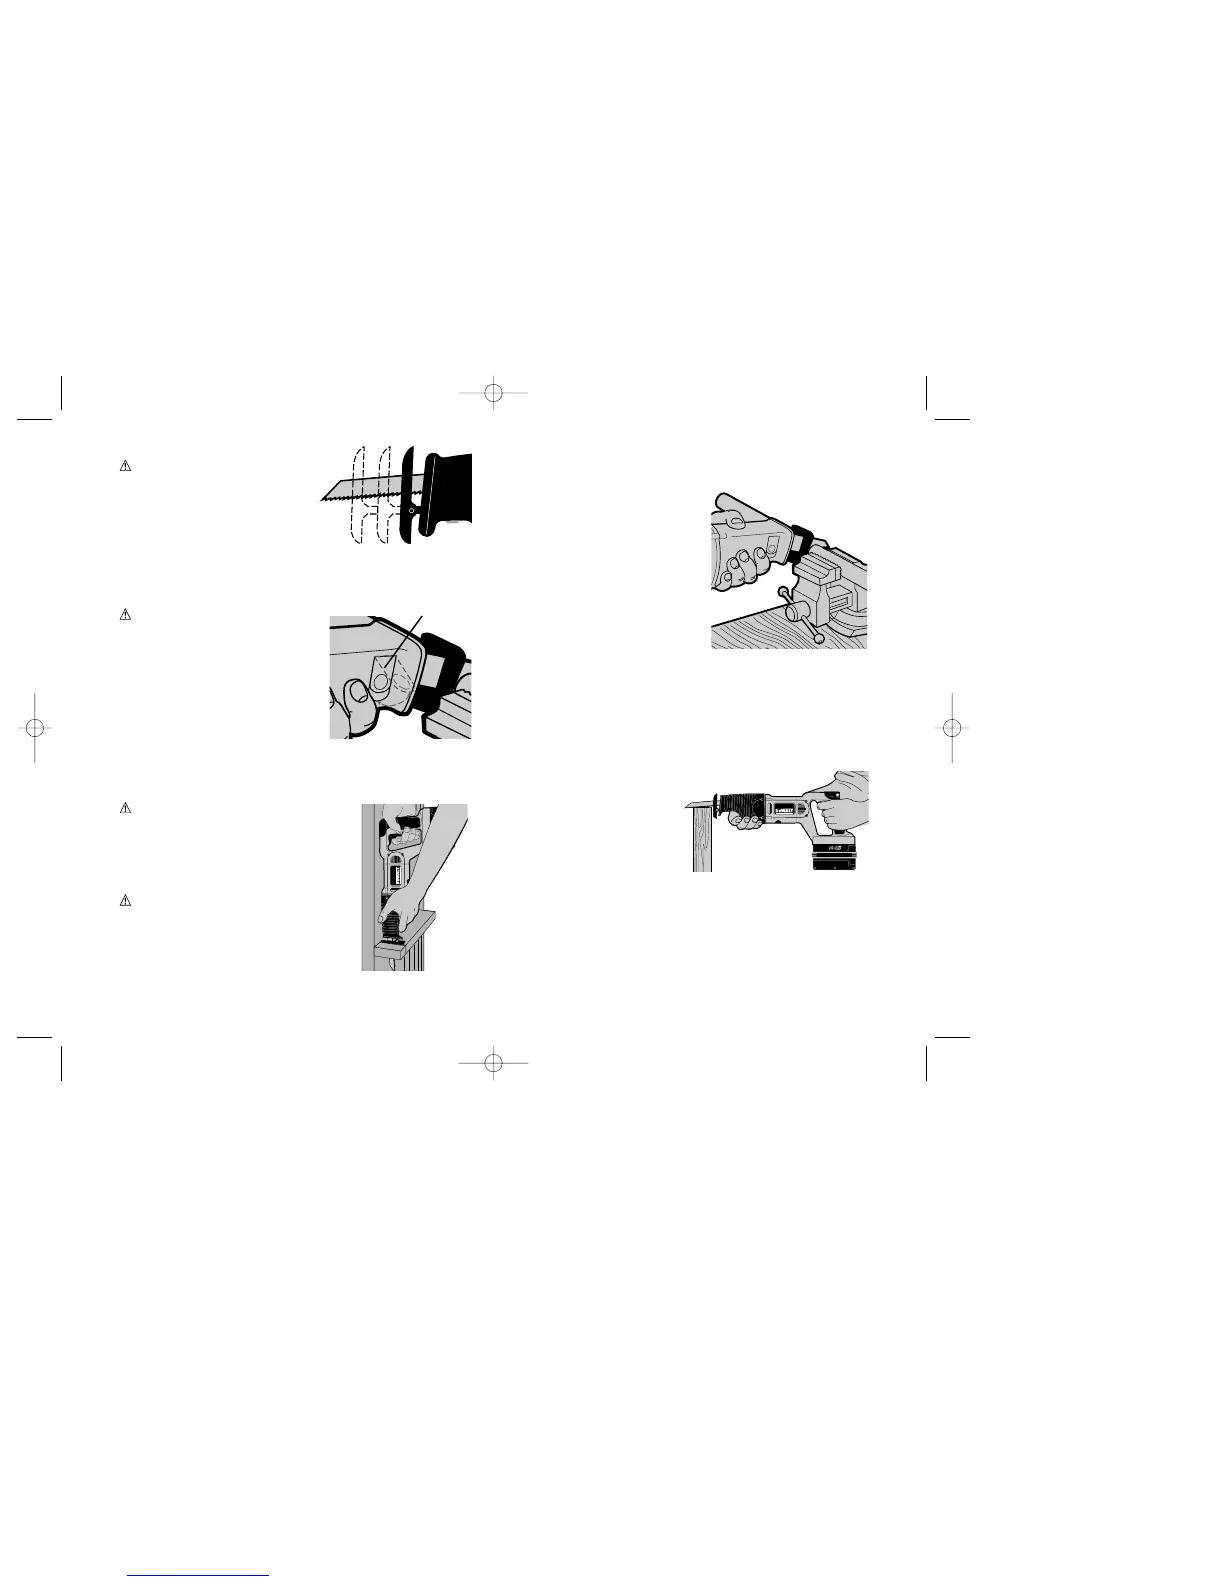
Adjustable Shoe Fig. F1(C), F5
Caution: Lock the Trigger
Switch and remove battery.
The shoe will adjust to limit the depth of
cut. Hold the saw with the underside
facing up. Push the button on the hand
grip and slide the shoe out to one of the
three settings and release the button.
This adjustment also allows you to use different areas of the blade –
extending blade life.
Blade Clamp Release Lever Fig. F1(D), F6(A)
Caution: Lock Trigger Switch
and Remove Battery.
To install the blade into saw:
1. Open blade clamp release lever up.
2. Insert blade shank from the front.
3. Close blade clamp release lever
down.
To remove blade from saw:
1. Open up blade clamp release lever.
2. Remove blade.
OPERATION
Caution: Always wear protection while
operating this or any other power tool.
Flush-To Cutting Fig. F7
The compact design of the motor housing and
spindle housing permits extremely close cutting to
floors, corners and other difficult areas.
Caution: When sawing into walls, floors or
wherever “live” electrical wires may be
encountered, DO NOT TOUCH ANY FRONT
METAL PARTS OF THE TOOL! Hold the tool
only by the plastic or rubber handle and housing
to prevent electrical shock if you saw into a “live”
wire.
Metal Cutting Fig. F8
This unit has different metal cutting
capabilities depending upon the type of
blade used and the metal to be cut. Use a
finer blade for ferrous metals and a course
blade for non-ferrous materials. In thin
gauge sheet metals it is best to clamp wood
to both sides of sheet. This will ensure a
clean cut without excess vibration or
tearing of metal. Always remember not to
force cutting blades as this reduces blade
life and causes costly blade breakage. To
prolong blade life, use other areas of the
blade by adjusting the shoe position. (See
Adjustable Shoe).
Note: It is generally recommended that when cutting metals you should spread a
thin film of oil or other coolant along the line ahead of the saw cut for easier
operation and longer blade life.
Wood Cutting Fig. F9
Before cutting any type of wood, be sure it is firmly anchored or clamped to prevent
slipping. Place blade lightly against
work to be cut, switch on saw motor
and allow it to obtain maximum speed
before applying pressure. Always hold
saw firmly against the material being
cut. This will prevent the saw from
jumping or vibrating and minimise blade
breakage.
Pocket Cutting (Wood Only)
Fig. F10
The initial step in pocket cutting is to
measure the surface to be cut and mark clearly with a pencil, chalk or scriber. Insert
pocket cutting blade in blade clamp and tighten blade clamp securely. Next, tip the
saw backward until the back edge of the shoe is resting on the work surface. Now
switch motor on, always permitting blade to attain maximum speed. Grip the handle
steadily and begin a slow, deliberate upward swing with the handle of the saw.
Blade will begin to feed into material. Always be sure blade is completely through
F5
F6
F7
F8
A
Button
F9