english
50
• Calibrationchecksandothermaintenance
repairs can be performed by DeWALT service
centers.
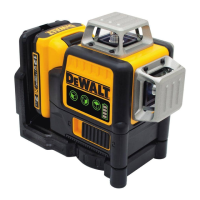
• Whenthelaserisnotinuse,storeitinthekit
box provided.
• Donotstoreyourlaserinthekitboxifthelaser
is wet. Dry exterior parts with a soft, dry cloth
and allow the laser to air dry.
• Donotstoreyourlaserattemperaturesbelow
-18˚C (0˚F) or above 41˚C (105˚F).
• Thechargerisnotserviceable.Thereareno
serviceable parts inside the charger.
Field Calibration Check (fig. 10-12)
WARNING: Alwayshavethelaserhead
calibratedbyaqualifiedrepairagent.
Field calibration checks should be done frequently.
NOTE: As part of the DeWALT guarantee,
the owner is entitled to one FREE calibration
service within the first year. Simply complete
the enclosed voucher and return along with the
laser and proof of purchase to an authorized
DeWALT agent. A certificate will be awarded at
no additional charge.
Field calibration checks do not calibrate the laser.
These checks indicate whether or not the laser is
providing a correct level and plumb line and do not
correct errors in the leveling or plumbing capability
of the laser.
These checks cannot take the place of professional
calibration performed by a D
eWALT service center.
LEVEL CALIBRATION CHECK (X-AXIS)
1. Set up a tripod between two walls that are at
least 15 m (50 feet) apart. The exact location of
the tripod is not critical.
2. Mount the laser unit on the tripod so that the
X-axis points directly toward one of the walls.
3. Turn the laser unit on and allow it to self-level.
4. Mark and measure points A and B on the walls
as shown in Figure 10.
5. Turn the entire laser unit 180º so the X-axis
points directly toward the opposite wall.
6. Allow the laser unit to self-level, and mark and
measure points AA and BB on the walls as
shown in Figure 11.
7. Calculate the total error using the equation:
Total Error = (AA – A) – (BB– B)
8. Compare total error to the allowable limits
shown in the following table.
Distance between walls Allowable Error
L = 15 m (50 ft.) 3 mm (0.125")
L = 25 m (80 ft.) 5 mm (0.2")
L = 50 m (160 ft.) 10 mm (0.4")
LEVEL CALIBRATION CHECK (Y-AXIS)
Repeat the procedure above, but with the laser unit
positioned so the Y-axis is pointed directly toward
the walls.
PLUMB ERROR CHECK (FIG. 12)
1. Using a standard plumb bob as a reference,
mark the top and bottom of a wall (Be sure to
mark the wall and not the floor and ceiling.)
2. Position the rotary laser securely on the floor
approximately 1 m (3') from the wall.
3. Turn the laser on, and point the dot at the
mark on the bottom of the wall. Then, using the
up/down arrows on the remote control, rotate
the dot upwards. If the center of the dot scans
over the mark on the top of the wall, the laser is
properly calibrated.
NOTE: This check should be done with a wall no
shorter than the tallest wall for which this laser will
be used.
Cleaning
WARNING:
• Unplugthechargerbeforecleaning.
Dirt and grease may be removed
from the exterior of the charger using
a cloth or soft non-metallic brush.
Donotusewateroranycleaning
solutions.
• Removethebatterypackbefore
cleaning your laser unit.
• Neverusesolventsorotherharsh
chemicals for cleaning the non-
metallic parts of the laser. Use a cloth
dampenedonlywithwaterandmild
soap.
• Neverletanyliquidgetinsidethe
unit;neverimmerseanypartofthe
unitintoaliquid.
• Neverusecompressedairtoclean
the laser.
 Loading...