Do you have a question about the DeWalt DW331 and is the answer not in the manual?
Read all safety warnings and instructions to reduce the risk of injury, electric shock, fire and/or serious injury.
Describes the level of severity for signal words like DANGER, WARNING, CAUTION, and NOTICE to indicate potential hazards.
Ensures users stay alert, use common sense, wear PPE, and prevent unintentional starting to avoid personal injury.
Guidelines for using and maintaining power tools correctly, including not forcing the tool and keeping it clean.
Recommends servicing by qualified personnel using identical parts to maintain tool safety.
Provides specific safety advice for jigsaws, such as handling insulated gripping surfaces and blade stopping.
Identifies unavoidable risks such as hearing impairment, injury from flying particles, burns, and injury from prolonged use.
Explains pictograms found on the tool, such as reading the manual, wearing ear protection, and eye protection.
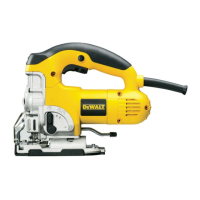
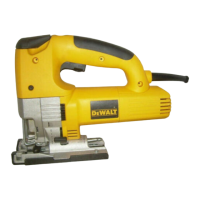
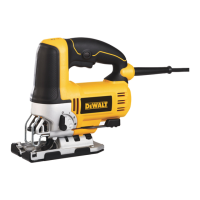
Details the various components included in the jigsaw package, such as blades, inserts, and accessories.
Specifies that the jigsaw is designed for professional cutting of various materials and warns against wet conditions.
Emphasizes checking that the power supply matches the tool's voltage rating for safe operation.
Describes the tool-free system for quick and easy changing of saw blades by operating the blade latch.
Lists different types of saw blades and their applications for various cutting tasks and materials.
Explains how to adjust the shoe to cut bevel angles up to 45 degrees using the scale and lever.
Details how to select the pendulum stroke setting for optimal cutting on different materials using a selector.
Explains how to adjust the sawdust blower lever to direct air to the blade for a clear view of the cutting line.
Describes how to attach the anti-scratch shoe cover to reduce damage on sensitive workpiece surfaces.
Details how to insert and remove the anti-splinter shoe insert into the shoe or shoe cover to reduce workpiece splintering.
Explains how to connect the dust extraction shroud and adapter to a system for removing dust from the workpiece.
Offers essential guidelines for safe operation, including securing workpieces and using sharp blades.
Instructs users to hold the jigsaw with one hand on the front handle and the other on the main handle for secure operation.
Details the procedure for turning the jigsaw on, operating it continuously with the lock-on button, and switching it off.
Explains how to adjust the sawing speed by varying pressure on the switch or using the control dial based on material type.
Provides guidance on drawing a cutting line, switching on the tool, following the line, and using a parallel fence for straight cuts.
Describes how to drill a pilot hole to start a cut and follow the line for precise woodworking.
Explains how to use a conventional blade for initial cuts and a flush cutting blade for finishing near edges.
Details the process for sawing metal, including mounting the appropriate blade and using a cooling lubricant.
Outlines the need for proper tool care and regular cleaning for continuous satisfactory operation.
Recommends applying a drop of oil to the guide roller at regular intervals to prevent jamming.
Advises blowing out dust with dry air, wearing PPE, and using mild soap and water for cleaning, avoiding harsh chemicals and liquids.
Recommends using only DEWALT recommended accessories to reduce the risk of injury, listing available parallel guides and trammel bars.
Encourages separate collection of used products for recycling to prevent environmental pollution and reduce demand for raw materials.
| Input power | 701 W |
|---|---|
| Output power | 445 W |
| Power source | AC |
| Stroke height | 26 mm |
| No-load stroke rate | 3100 spm |
| Cutting depth in wood | 135 mm |
| Cutting depth in aluminum | 12 mm |
| Cutting depth in non-alloyed steel | 30 mm |