10
English
• Presstheguard(8)downandturnitinthe
direction of the arrow (fig. B2).
• Securelytightenthescrews(10).
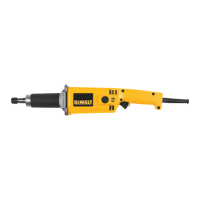
DW840 - REMOVING
• Toremovetheguard,proceedinreverseorder.
Mounting and Removing a Grinding
Wheel (fig. D, E)
• Placethetoolonatable,guardup.
• Fitthebackingflange(11)correctlyontothe
spindle (12).
• Placethegrindingwheelonthebackingflange.
• Screwthethreadedflange(14)ontothe
spindle (12).
• Pressthespindlelock(5)androtatethe
grinding wheel until it locks in position.
• Tightenthethreadedflangeusingthetwo-pin
spanner (13) supplied.
• Releasethespindlelock.
• Toremovethegrindingwheel,loosenthe
threaded flange using the two-pin spanner
(while the spindle lock is engaged).
Fitting and Removing a
Backing Pad/Sanding Sheet
(fig. D, E)
• Place the tool on a table, guard up.
• Remove the backing flange (11).
• Place the rubber backing pad correctly onto the
spindle (12).
• Place the sanding sheet on the rubber backing
pad.
• Screw the threaded clamp nut (14) onto the
spindle. The ring on the threaded clamp nut
(14) must face towards the rubber backing pad.
• Press the spindle lock button (5) and rotate the
spindle (12) until it locks in position.
• Tighten the threaded clamp nut (14) with the
two-pin spanner.
• Release the spindle lock
• To remove the rubber backing pad, loosen
the threaded clamp nut (14) wih the two-pin
spanner.
Prior to Operation
• Installtheappropriateguardanddiskorwheel.
Do not use excessively worn disks or wheels.
• Donotuseadamagedaccessory.Beforeeach
use inspect the accessory such as abrasive
wheels for chips and cracks, backing pad for
Using an Extension Cable
If an extension cable is required, use an approved
3–core extension cable suitable for the power input
of this tool (see Technical Data).The minimum
conductor size is 1.5 mm
2
; the maximum length
is 30 m.
When using a cable reel, always unwind the cable
completely.
ASSEMBLY AND ADJUSTMENT
WARNING: To reduce the risk
of serious personal injury, turn
tool off and disconnect tool from
power source before making any
adjustments or removing/installing
attachments or accessories.Before
reconnecting the tool, depress and
release the trigger switch to ensure that
the tool is off. An accidental start-up can
cause injury.
Attaching the Side Handle (fig. F)
WARNING: Beforeusingthetool,check
that the handle is tightened securely.
WARNING: The side handle should
always be used to maintain control of the
tool at all times.
Screw the side handle (3) tightly into one of the
holes (15) on either side of the gear case.
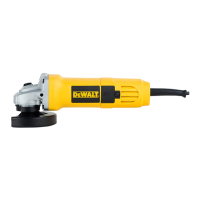
Mounting and Removing the Guard
WARNING: Guards must be used with
this grinder.
DW830 - MOUNTING (FIG. B1 & C)
• Placetheanglegrinderonatable,spindleup.
• Alignthelug(6)withtheslot(7)inthebracket.
• Presstheguard(8)downandturnitinthe
direction of the arrow (fig. B1).
WARNING: The guard locking pin (9)
prevents the guard from coming loose.
DW830 - REMOVING (FIG. B1 & C)
• Placetheanglegrinderonatable,spindleup.
• Rotatetheguard(8)inthedirectionofthearrow
(fig. C).
• Useascrewdrivertopressthelockingpin(9)in
the slot.
• Releasetheguard.
DW840 - MOUNTING (FIG. B2 & C)
• Placetheanglegrinderonatable,spindleup.
• Alignthelugs(6)withtheslots(7).