ENGLISH
4
Mounting the DWE7490, DWE7491
and DWE7499
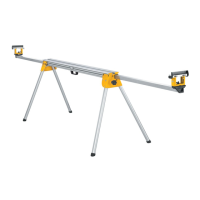
1. Place the saw, table side down, on a stable, non-
marringsurface.
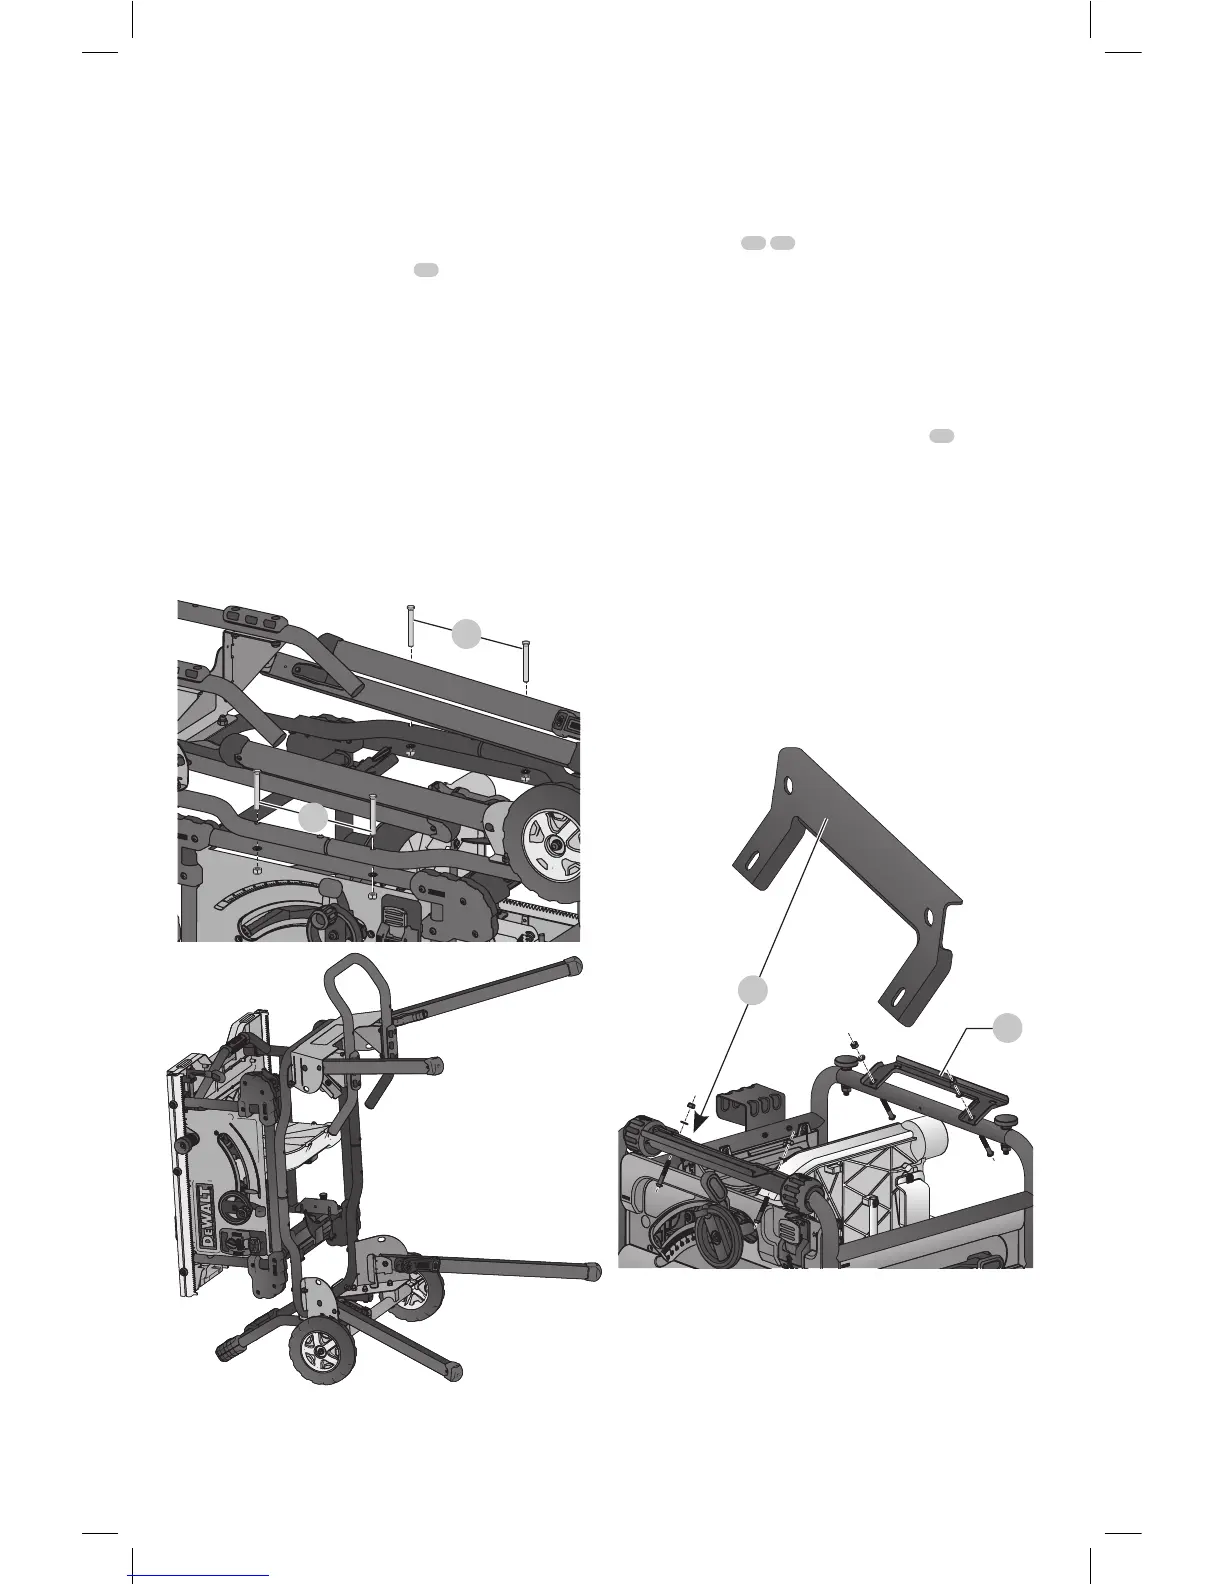
2. Place the stand on top of saw as shown in FigureF.
Align the stand holes with the saw frame holes.
3. Feed the M8x75 pan head bolt
16
through a M8 flat
washer, then through the stand frame and then through
the saw frame. Secure with an M8 lock nut from top and
tighten in each of the four holelocations.
4. Lift assembly by stand handle onto kickstand.
NOTE: The stand should be oriented on the saw such that
the D
E
WALT label on the stand and on the saw are on the
same side.
WARNING: To reduce the risk of personal injury, be
sure the table saw is fully anchored on the stand.
WARNING: To reduce the risk of personal injury, do
not hang objects from the handle. The stand may tip
when downward force is applied.
Fig. F
16
16
Mounting the DW745, DWE7480
DCS7485
1. Place the saw, table side down, on a stable, non-
marringsurface.
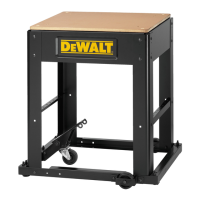
2. Attach the adaptor brackets (not included with
DWE7491RS)
17
18
in FigureG to the saw using the
M6x40 pan head bolts, M6 washers, and M6 lock nuts as
shown in FigureG. Do not tighten fully.
NOTE: Attach the front adapter bracket to the front side
of the saw/stand (the side with the D
E
WALT label) and
the rear bracket to the opposite side.
3. Place the stand on top of the saw as shown. Align the
stand holes with the holes in the adapters.
4. Feed each of the M8X45 pan head bolts
19
through an
M8 flat washer, then through the stand, then through
the adapter plate. Secure with M8 lock nuts.
5. Tighten all fasteners securely.
6. Lift assembly by stand handle onto kickstand.
WARNING: When the adapter brackets
are mounted to the power tool, operate it
exclusively on the saw stand. Without the saw
stand, the adapter brackets mounted with the power
tool, does not stand securely and can tip over.
WARNING: Without the saw stand, the power tool
with adapter brackets does not stand securely and
can tip over.
Fig. G
18
17