7
ENGLISH
11
and four nuts
13
as shown in Fig. F. Torque the
hardware to 15in/lbs.
2. Install the grommets
9
in the grommet holes
21
as
shown each side of the wall cabinet
5
as shown in Fig. G.
3. Attach
upper shelf
8
to wall cabinet
5
with four 8-32
x 3/8 screws
12
as shown in Fig. H. Hand tighten the
screws and ensure the shelf is secured in place.
4. Slide the
lower power tool holster
8
under the wall
cabinet
5
engaging the lances
22
into the lance slots
23
in the wall cabinet
5
.
NOTE: Ensure that all six lances
22
are completely
seated in the lance slots
23
.
5. Secure the lower power tool holster
7
to the
toolcabinet
5
using four 1/4-20 x .0750 socket head
screw
11
and four nuts
13
as shown in Fig. I. Torque
the hardware to15 in/lbs.
6. Secure the metal rail mounting bracket
15
to the
assembled wall cabinet
5
using four 1/4-20 x .0750
socket head screw
11
and four nuts
13
as shown in
Fig. J. Torque the hardware to 15 in/lbs.
7. After assembly is complete place top mat
16
in the
upper shelf
8
.
8. Remove the paper backing from the two spacer
blocks
17
. Install the two spacer blocks
17
with the
sticky side to the back of thecabinet
5
.
NOTE: Spacer blocks
17
should be located on the lower
corners of the cabinet, approximately 1" (25mm) from
theedges.
9. Mount the cabinet assembly
24
to a DeWALT metal
rail so the metal rail mounting bracket
15
engages as
shown inFig. K.
NOTE: The cabinet assembly
24
can not be placed
over end caps on the DeWALT metal rail. The cabinet
assembly
24
must be hung left or right of the end caps.
Wall Mounting (Fig. F, G, L)
1. Assemble the cabinet shelf
6
to the power tool wall
cabinet
5
using four 1/4-20 x .0750 socket head screw
11
and four nuts
13
as shown in Fig. F. Torque the
hardware to 15in/lbs.
2. Install the grommets
9
in the grommet holes
21
as
shown each side of the wall cabinet
5
as shown in Fig. G.
3. Locate and mark wall studs
19
if installing over drywall.
4. Drill two 1/8" pilot holes.
NOTE: Use outside screw holes
25
for mounting to
studs 24" (609 mm) on center. Use inside screw holes
26
for mounting to studs 16" (406 mm) on center tas shown
in Fig. L.
5. Position the DWST82824 power tool wall cabinet
5
onto
the wall and straighten it using a level.
6. Place a washer
14
on each #14x 3” screw
10
and insert
the screws through the screw holes
25
or
26
as shown
in Fig. L.
7. Drive the #14x 3” screws
11
through the screw holes
25
or
26
and into the wall studs
19
until snug.
8. After assembly is complete place top mat
16
in the
upper shelf
8
.
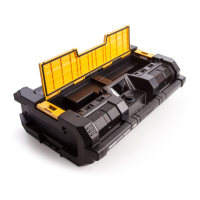
DWST82824 Assembly and Installation
(Fig.F—L)
Required Tools and Hardware
You will need to gather a few common tools and hardware.
Always consult your local building code for proper hardware.
DeWALT METAL RAIL MOUNTING INSTALLATION
• Safety glasses
• Gloves
• Screwdriver
• 3/8" (10mm) wrench
• 7/16" (11mm) wrench
• 5/32" (4mm) hex wrench
• 8-32 X 3/8 screws
• 1/4-20 x .0750 Socket head screw
11
• Nuts
13
• Spacer block
17
OPTIONAL WALL MOUNTING INSTALLATION
• Safety glasses
• Gloves
• 3/8" (10mm) wrench
• #14x 3” screw
10
• Washer
14
‑ Use the included #14x 3” screws
10
for mounting to
woodstuds.
CAUTION: Always use the correct screws for the
surface that DeWALT power tool wall cabinet will be
anchored in. Using the wrong screw will reduce the
holding force required for proper installation possibly
resulting in personal injury or property damage.
Decide how you would like to install your DWST82824 power
tool wall cabinet
5
before you begin.
1. DWST82824 power tool wall cabinet
5
can be installed
on a wood framed wall. It may also be installed over
drywall and metal studs.
WARNING: Before attempting to attach DeWALT
power tool wall cabinet to metal studs and drywall
consult your local authority having jurisdiction
“AHJ” for proper fastening requirements.
Improper installation can cause personal injury and or
propertydamage.
DeWALT Metal Rail Mounting (Fig. F—K)
1. Assemble the cabinet shelf
6
to the power tool wall
cabinet
5
using four 1/4-20 x .0750 socket head screw
NOTE: Ensure that all six lances
3
are completely seated
in the lance slots
4
.
2. With the required tools and hardware close at hand,
position DWST82822 power tool holster
1
on the wall
and straighten using a level.
3. Place screws in the screw holes
20
. Ensure the
distance between each mounting point is not less
than 16" (406 mm). Always follow the masonry screw
manuafacturer instructions when installing.
 Loading...