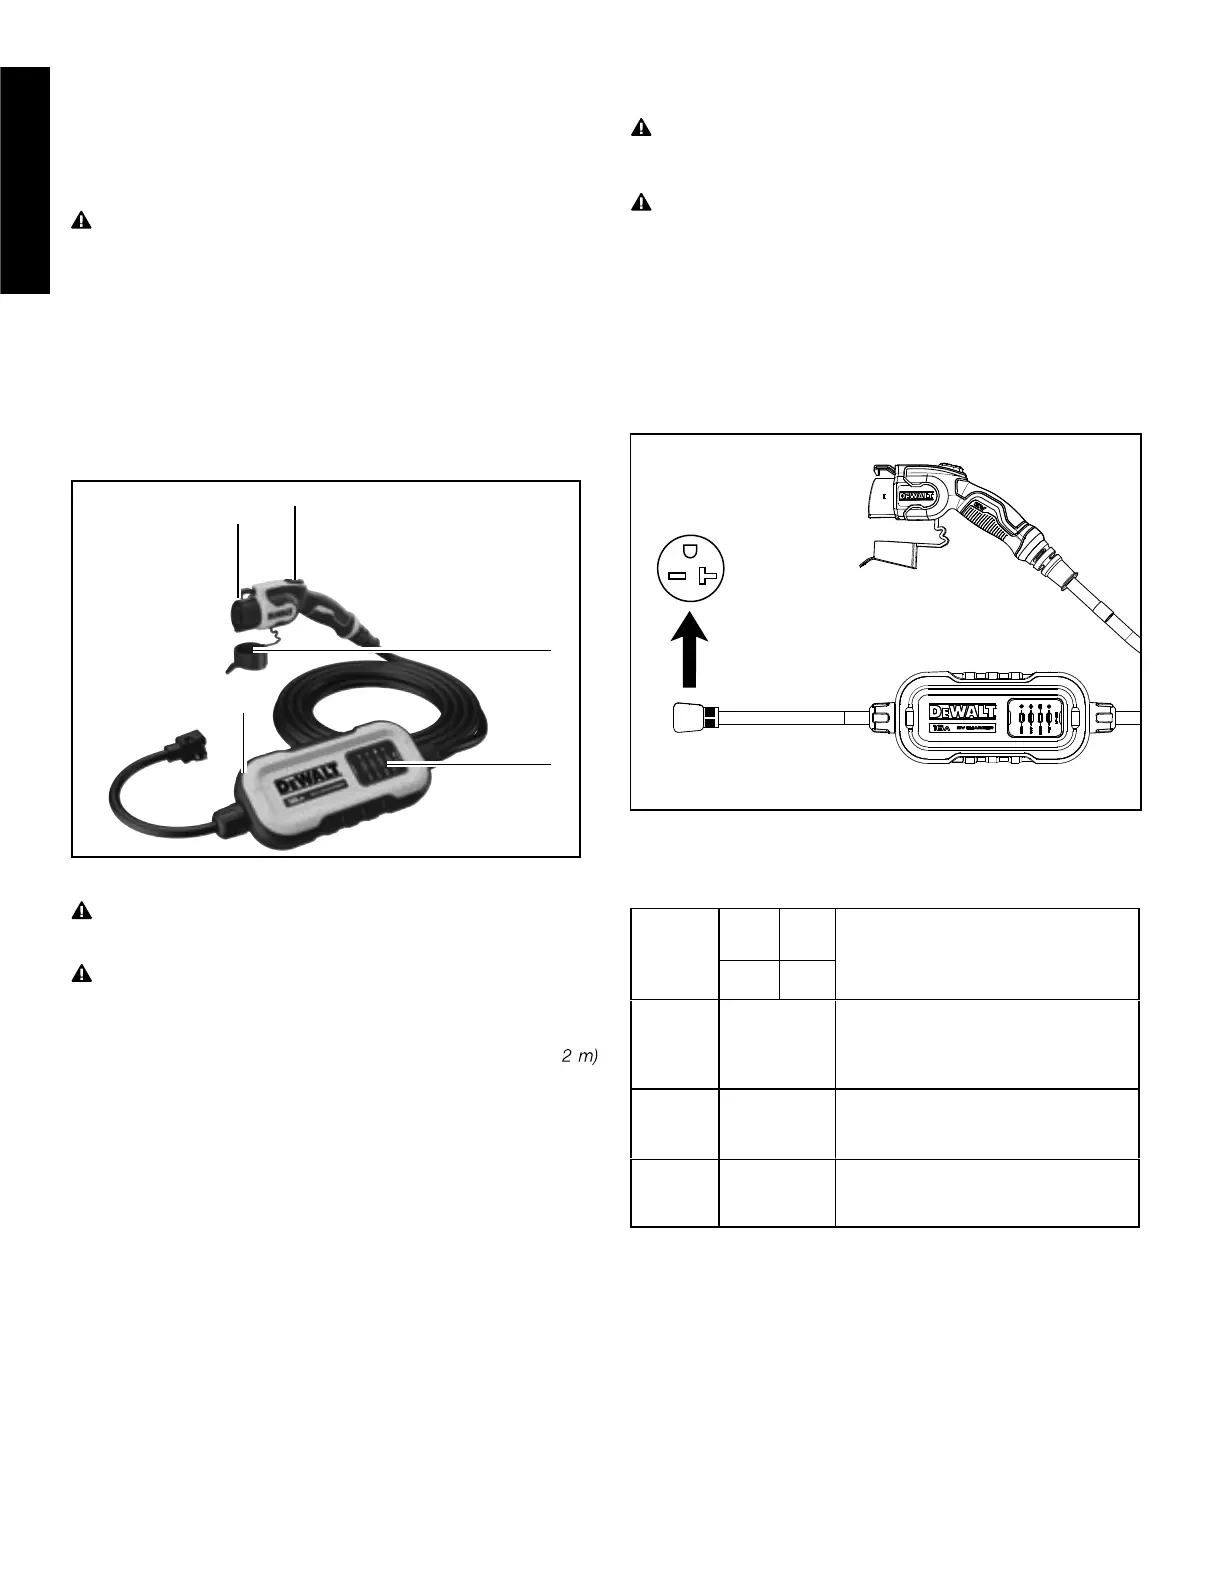
Main Unit Components
A. Main Unit
B. LED Indicator
C. Charging Handle
D. Release Lever
E. Protective Cover
A
B
C
D
E
Plug-in Installation
CAUTION: Ensure that the proper dedicated outlet
Alternatively, a licensed electrician may install a NEMA 6-20 outlet.
CAUTION:
(500-660 mm) from the ground adjacent to the stud where the
The NEMA 6-20 outlet should be located 20-26 in
product is to be mounted.
1. Connect the power plug to the NEMA 6-20 outlet.
2. Lights up after power on (AC input voltage within the range of
120V-240). Green indicator - 12A. Blue indicator - 16A.
3. Ensure that the charging handle is fully inserted into your vehicle's
charging port so it clicks rmly into place. The charging process starts.
4. When your vehicle is fully charged, you can verify the charging
status by checking your vehicle’s dashboard.
NEMA 6-20 is available for use with this product.
Operating Instructions
LED Indicator
Blue
Green
Green
Red and Blue
12A
Green 16A
POWER
Lights up after power on (AC input
voltage within the range of 120V-240),
Blue indicator - 12A
Green indicator - 16A
The indicator lights up when charging
handle inserted into the vehicle's
charging port and lights off when the
charging handle is removed.
The indicator will lights up when have
fault. Please see below table of Error
Codes.
The indicator lights up when charging
process starts and lights off when the
charging is complete.
READY
CHARGE
FAULT
4
English
SAVE THESE
INSTRUCTIONS
Before First Use
DANGER: Risk of suffocation! Keep any packaging materials
away from children and pets - these materials are a potential
source of danger, e.g. suffocation.
• Remove all packaging materials
• Remove and review all components before use.
• Check the product for transport damages.
Installation Instructions
CAUTION: Protect the product from harsh weather conditions
such as rain, snow and extreme temperatures. Consider installing the
product under a carport or in a garage.
CAUTION: Install the product in a safe location away from
flammable materials and out of reach of children and pets.
NOTICE: It is recommended to install the product at a sufficient
height from grade such that the height of the storage means for the
coupling device is located between 24" (600 mm) and 48" (1.
from grade.
• Install the product within convenient proximity to where there is
an existing NEMA 6-20 outlet. Additionally, ensure that the cord
or wiring leading into the product has some slack.
• For optimal charging efficiency, place the product as close as
possible to the electrical panel to avoid lengthy cable runs.
• Install the product to an easily accessible location for the driver
to plug in and out the vehicle. Make sure the installation location
allows enough slack for the charging cable to reach the vehicle's
charging port.
• The wall used for installation must have the capacity to support
the weight of the product and its accessories and must remain
level once the installation is completed.
• Avoid installing the product in areas with excessive vibration or
elevated temperatures.
 Loading...