15
ENGLISH
d. Cutting off long narrow strips can cause kickback.The cut
off strip can sag or twist closing the kerf and pinching
theblade.
e. Snagging the lower guard on a surface below the
material being cut momentarily reduces operator
control.The saw can lift partially out of the cut increasing
the chance of bladetwist.
2. IMPROPER DEPTH OF CUT SETTING ON SAW
To make the most efficient cut, the blade should protrude
only far enough to expose a tooth as shown in FigureH.This
allows the shoe to support the blade and minimises
twisting and pinching in the material.See the section titled
DepthAdjustment.
3. BLADE TWISTINGMISALIGNMENT IN CUT
a. Pushing harder to cut can cause the blade totwist.
b. Trying to turn the saw in the cut(trying to get back on
the marked line) can cause bladetwist.
c. Overreaching or operating the saw with poor body
control(out of balance), can result in twisting theblade.
d. Changing hand grip or body position while cutting can
result in bladetwist.
e. Backing up the saw to clear blade can lead totwist.
4. USE OF DULL OR DIRTY BLADES
Dull blades cause increased loading of the saw.To
compensate, an operator will usually push harder which
further loads the unit and promotes twisting of the blade
in the kerf.Worn blades may also have insufficient body
clearance which increases the chance of binding and
increasedloading.
5. RESTARTING A CUT WITH THE BLADE TEETH JAMMED
AGAINST THE MATERIAL
The saw should be brought up to full operating speed
before starting a cut or restarting a cut after the unit has
been stopped with the blade in the kerf.Failure to do so can
cause stalling andkickback.
Any other conditions which could result in pinching,
binding, twisting, or misalignment of the blade could cause
kickback.Refer to the sections Further Safety Instructions for
All Saws and Blades for procedures and techniques that will
minimise the occurrence ofkickback.
Depth Adjustment(Fig.H)
WARNING: To reduce the risk of serious personal
injury, turn tool off and disconnect battery pack
before making any adjustments or removing/
installing attachments or accessories.An accidental
start-up can causeinjury.
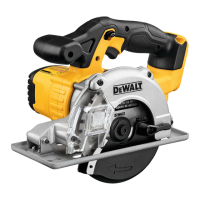
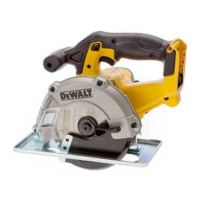
The metal-cutting saw is equipped with a pivoting shoe that
allows the operator to set the depth of cut.For the most efficient
cutting action, set the depth adjustment so that one tooth of
the blade projects below the material to be cut.This distance
is from the tip of the tooth to the bottom of the gullet in front
of the tooth.This keeps blade friction at a minimum, removes
metal chips from the cut, results in cooler, faster sawing and
reduces the chance ofkickback.
To Set the Depth of Cut
1. Lay the piece of material you plan to cut along the blade
asshown.
2. Note how much tooth projects beyond thematerial.
3. Loosen the depth adjustment lever
3
and move the shoe to
change the depth ofcut.
4. Retighten the depth adjustment leversecurely.
Workpiece Support(Fig.I)
Cutting Sheets of Metal
Figure I shows the correct and incorrect way to support a large
sheet.To avoid kickback, support material near the cut.Do not
support it away from the cut.If material is supported away from
the cut, it will bind the blade and cause kickback.When cutting
thin strips, keep the blade at least 13 mm from the edge of the
material.Thin strips may bind, causing kickback and increasing
the risk of personalinjury.
Cutting Rectangular Metal Stock
Clamp the material you plan to cut to a workbench or other
work surface as shownabove.
Cutting(Fig.J,K)
1. Hold the saw securely using both hands.FigureJ shows
appropriate hand position.Keep your body to one side of
the line along which you are cutting.This will protect you
from injury related tokickback.
2. When cutting ends off of rectangular metal stock, place the
widest part of the shoe on the part of the material that is
clamped to the workbench or other support, not on the part
of the material that will fall when the cut ismade.
3. Depress the trigger switch and allow the saw to reach
full speed before the blade contacts the material to be
cut(Fig.K).
4. Push the saw forward at a speed that allows the blade to cut
withoutlaboring.
5. As you finish a cut, release the trigger and allow the blade to
stop before lifting the saw from the work.As you lift the saw,
the guard will automatically close under theblade.
Correcting a Cut
Should your cut begin to leave the cutting line, don’t try to
force it back on.Forcing a correction can stall the saw and
cause kickback.Instead, release the switch and allow the blade
to come to a complete stop.Then, back the saw out of the
cut.Restart the saw and re-enter the cut, following the desired
cuttingline.
CAUTION: Do not cut through bolts with the metal-
cutting saw.Damage to the saw or personal injury
couldresult.
Maximizing Blade Life
To extend blade life, follow these practices:
• Do not force the blade through the metal.The saw must cut
at its own pace and at a constantrate.
 Loading...

