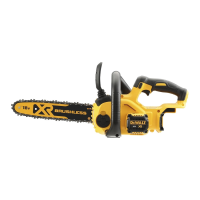
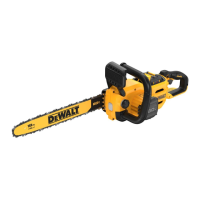
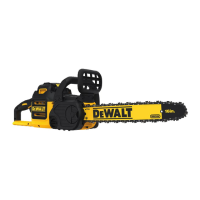
The DEWALT DCM575 is a 54V chainsaw designed for professional cutting applications, specifically ideal for pruning and cutting logs up to 35 cm in diameter. It is a cordless power tool, operating on a 54-volt Li-Ion battery pack.
Technical Specifications:
- Voltage: 54 VDC (for both UK & Ireland)
- Battery Type: Li-Ion
- Bar Length: 40 cm
- Maximum Chain Speed (no-load): 15 m/s
- Maximum Cutting Length: 40 cm
- Oil Capacity: 115 ml
- Weight (without battery pack): 4.4 kg
- Noise Values (according to EN60745-2-13:2009+A1:2010):
- LPA (emission sound pressure level): 80.5 dB(A)
- LWA (sound power level): 100.5 dB(A)
- K (uncertainty for the given sound level): 3 dB(A)
- Vibration Values (according to EN60745-2-13:2009+A1:2010):
- Vibration emission value ah: 3.5 m/s²
- Uncertainty K: 1.5 m/s²
Usage Features:
Battery and Charger:
The DCM575 operates with DEWALT 54-volt Li-Ion battery packs such as DCB546 and DCB547. These battery packs are not fully charged out of the carton and should be fully charged before first use to ensure maximum performance and life. The charger is designed for indoor use and charges batteries between 4 °C and 40 °C. It features a Hot/Cold Pack Delay which suspends charging until the battery reaches an appropriate temperature. Some battery packs include a fuel gauge with three green LED lights indicating the remaining charge level.
Assembly and Adjustments:
The chainsaw requires assembly of the saw chain and guide bar.
- Installing Guide Bar and Saw Chain: The saw chain and guide bar are packed separately. The process involves placing the saw on a flat surface, removing the sprocket cover by rotating the bar adjust locking knob counterclockwise, wrapping the saw chain around the guide bar (ensuring teeth face the correct direction), placing the chain around the sprocket, and aligning the guide bar with the chain tensioning pin and bolt. The sprocket cover is then replaced, and the bar adjust locking knob is rotated clockwise until it clicks, then loosened one full turn to allow for tensioning. The chain tensioning knob is rotated clockwise to increase tension until the chain is snug around the guide bar. Finally, the bar adjust locking knob is securely tightened until three audible clicks are heard.
- Adjusting Chain Tension: Proper chain tension is crucial for safe and efficient operation. The tension is correct when the chain snaps back after being pulled 3 mm away from the guide bar with light force, and there is no "sag" between the guide bar and the chain on the underside. To adjust, the locking tab is flipped up, the bar adjust locking knob is rotated counterclockwise one full turn, and the chain tensioning knob is rotated clockwise until correct tension is achieved. Over-tensioning should be avoided as it leads to excessive wear.
- Replacing Saw Chain: To replace a worn saw chain, the battery is removed, the bar adjust locking knob is rotated counterclockwise to release chain tension, and the sprocket cover is removed. The old chain is lifted out, and a new chain is placed in the guide bar slot, ensuring the saw teeth face the correct direction. The installation steps for the guide bar and saw chain are then followed.
Operation:
- Starting the Chainsaw: To turn the unit on, ensure the chain brake is disengaged (pulled towards the front handle into the "set" position). Push down on the lock-off lever (2) and squeeze the variable speed trigger switch (1). The farther the trigger is depressed, the faster the chain will operate. Releasing the trigger turns the unit off. If too much force is applied during a cut, the saw may turn off; to restart, release the lock-off lever and trigger switch, then restart with less force.
- Chain Brake: The chainsaw is equipped with a motor chain braking system that stops the chain quickly in case of kickback. To engage the brake, push the chain brake/front hand guard (3) forward until it clicks. To disengage, pull the chain brake/front hand guard towards the front handle (13) into the "set" position. The chain brake should be tested before every use by gripping the tool, turning it on, and rotating the left hand forward to push the front hand guard. The chain should stop immediately.
- Auto Oiling System: The chainsaw has an auto oiling system to keep the saw chain and guide bar lubricated. The oil level indicator (10) shows the oil level. If the level is less than a quarter full, the reservoir should be refilled with high-quality bar and chain oil. A non-detergent SAE30 motor oil can be used as a temporary substitute. Vegetable-based oil is recommended for pruning trees. Waste oil or very thick oil should not be used. To refill, flip down the locking lever, unscrew the oil cap (16) a quarter turn, fill the reservoir to the top of the oil level indicator, then refit and tighten the oil cap.
- Proper Hand Position: Always hold the chainsaw with both hands: the left hand on the front handle (13) and the right hand on the rear handle (12). A firm grip with thumbs and fingers encircling the handles is essential to resist kickback forces. Never use a cross-handed grip or allow any part of the body to be in line with the guide bar.
- Cutting Techniques:
- Felling (cutting down a tree): This should only be performed by trained personnel. A retreat path must be planned and cleared. Before cutting, assess the tree's natural lean, branch location, and wind direction. Make a notching undercut (1/3 of the tree's diameter, perpendicular to the fall direction) and a felling back cut (at least 51 mm higher than the notching cut, parallel to it) to create a hinge. Stop cutting if the tree may not fall in the desired direction and use wedges.
- Limbing (removing branches): Leave larger lower limbs to support the log. Remove small limbs in one cut. Cut branches under tension from the bottom towards the top to avoid binding.
- Bucking (cross-cutting felled trees/logs): Always start a cut with the chain running at full speed. Place the bottom spike (22) behind the initial cut area, turn the saw on, and rotate the chain and bar down into the tree using the spike as a hinge. For logs supported along their entire length, make a cut from the top (overbuck), avoiding contact with the earth. For logs supported at one end, cut 1/3 of the diameter from the underside (underbuck) first, then make the finishing cut by overbucking to meet the first cut. When on a slope, stand on the uphill side of the log. Reduce cutting pressure near the end of the cut and ensure the chain does not contact the ground.
Maintenance Features:
- Cleaning: Use only mild soap and a damp cloth to clean the tool. Solvents or harsh chemicals should not be used on plastic parts. Dirt and dust should be blown out of the main housing and air vents with dry air.
- Chain and Bar Maintenance: After every few hours of use, remove the sprocket cover, guide bar, and chain, and clean them thoroughly with a soft bristle brush. Ensure the oiling hole on the bar is clear of debris. When replacing dull chains, it's good practice to flip the chain bar from bottom to top.
- Saw Chain Sharpening: To maintain optimal performance, keep the chain teeth sharp. Use a 4.5 mm file and a file holder or filing guide to ensure correct sharpening angles. Place the file holder flat on the top plate and depth gauge of the cutter. Maintain a 30° filing angle line on the file guide, parallel with the chain (file at 60° from the side). Sharpen cutters on one side first, from inside to outside, then turn the saw around and repeat for the other side. Use a flat file to file the tops of the rakers so they are about 0.635 mm below the tips of the cutters. Keep all cutter lengths equal. If damage is present on the chrome surface, file back until it's removed.
- Service: Repairs, maintenance, and adjustments should be performed by a DEWALT authorized service center using identical replacement parts. The charger and battery pack are not serviceable.
Safety Features:
The chainsaw includes several safety features to reduce kickback hazards:
- Reduced-Kickback Guide Bar: Designed with a small radius tip to reduce the kickback danger zone.
- Low-Kickback Chain: Designed with a contoured depth gauge and guard link to deflect kickback force.
However, users should not rely solely on these devices and must follow all safety precautions, instructions, and maintenance in the manual.
Residual Risks:
Despite safety regulations and devices, certain residual risks remain, including:
- Impairment of hearing.
- Risk of personal injury due to flying particles.
- Risk of burns due to accessories becoming hot during operation.
- Risk of personal injury due to prolonged use.
Environmental Protection:
Products and batteries marked with the "separate collection" symbol must not be disposed of with normal household waste. They contain materials that can be recovered or recycled. Li-Ion cells are recyclable and should be taken to a dealer or local recycling station at the end of their technical life.