EasyManua.ls Logo

DHP Upholstered Bed 4175049 User Manual

DHP Upholstered Bed 4175049
24 pages
To Next Page IconTo Next Page
Page #1 background imageLoading...
Page #1 background image
DO NOT RETURN TO THE STORE !
Visit www.dhpfurniture.com/eng/support-home
or call Toll-Free 1-800-267-1739
4175049
B34417504900 - 10125-M
Date of Purchase
Upholstered Bed
K.T. - 2018/1/11
If parts are missing or damaged, we will gladly ship your
replacement parts free of charge.
Lot Number
Thank you for purchasing from DHP!
THIS INSTRUCTION BOOKLET CONTAINS IMPORTANT SAFETY
INFORMATION. PLEASE READ AND KEEP FOR FUTURE REFERENCE.
1
© 2014 Dorel Home Products All Rights Reserved
King
Black Faux Leather
Weight Limit: 500 Lb / 227 Kg
TM
Question and Answer IconNeed help?

Do you have a question about the DHP Upholstered Bed 4175049 and is the answer not in the manual?

DHP Upholstered Bed 4175049 Specifications

General IconGeneral
SizeFull
ColorGray
StyleModern
Box Spring RequiredNo
Product TypeBed
Upholstery MaterialFabric

Summary

Warranty Information

Pre-Assembly Guidance

Assembly Preparation and Cautions

Guidance on assembly space, tools, people, and safety cautions.

Product Registration and Engagement

Registration Benefits and Process

Details benefits of registering your product and the steps to complete it.

Follow DHP on Social Media

Links to DHP's social media for product updates, trends, and promotions.

Parts Identification

Component List and Packaging

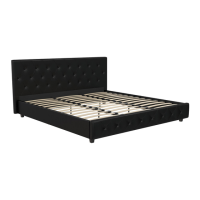
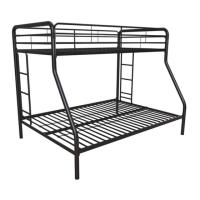
Lists all parts, packaging details, and identification for assembly.

Hardware Pack

Hardware Identification and Usage

Details screws, bolts, and other hardware used in the assembly process.

Step-by-Step Assembly

Step 1: Attach E to C

Connect part E to part C using hardware 3. Repeat for other E/C parts.

Step 2: Attach T and S to C

Connect parts T and S to part C using hardware 1. Repeat for other T/S/C parts.

Step 3: Secure Headboard and Footboard

Screw hardware 2 into A and hardware 1 into B, leaving half exposed.

Step 4: Connect Side Panels to Frame

Hang two C parts onto A and B. Do not fully tighten bolts until Step 9.

Step 5: Attach Corner Brackets to Legs

Attach part N to part Z using hardware 4. Repeat for all legs.

Step 6: Secure Legs to Bed Frame

Attach four N parts to A, B, and C using hardware 1.

Step 7: Attach Support Legs to Rails

Attach two L parts to F using hardware 1. Repeat for remaining L x 2 and F.

Step 8: Attach Center Rails to Frame

Attach two F parts to A and B using hardware 1.

Step 9: Connect Cross Rails to Frame

Attach K to E and F using hardware 1. Tighten all bolts.

Step 10: Install Slat Caps

Insert P1 into X, then press X into E. Repeat for all slat rows.

Step 11: Install Wooden Slats

Insert Y onto P1 ends, then attach Y x 2 to F x 2. Repeat for all slat rows.

Helpful Hints and Safety Warnings

Usage and Safety Precautions

Provides essential safety advice, including age limits, prohibited activities, and mattress size.
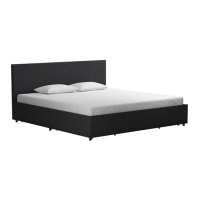
Related product manuals