EasyManua.ls Logo

Diamond Audio Technology D7056 User Manual

Default Icon
10 pages
To Next Page IconTo Next Page
Page #1 background imageLoading...
Page #1 background image
10
LOWPASS ON/OFF
Pushing this button “IN” engages the Lowpass filter. Pushing this button
“OUT” will bypass the filter.
LOWPASS FREQUENCY
Turning this control sets the Lowpass crossover point from 50Hz (fully
counterclockwise) to 5kHz (fully clockwise).
HIGHPASS FREQUENCY
Turning this control sets the Highpass crossover point from 50Hz (fully
counterclockwise) to 5kHz (fully clockwise).
HIGHPASS ON/OFF
Pushing this button “IN” engages the Highpass filter. Pushing this button
“OUT” will bypass the filter.
Note: By engaging both Highpass and Lowpass filters and setting the desired
crossover points, a Bandpass filter can be created:
D7 CROSSOVER FREQUENCIES
Diamond Audio D7 Professional Reference Series Amplifiers feature fully
variable crossovers. The frequency control knobs (located in the tray on the
top of the amplifier) are labeled 50Hz when the knob is rotated fully counter-
clockwise (left) and 5kHz when rotated fully clockwise (right).
To make basic setting of the crossover frequencies a little easier, we’ve
come up with the following rotational diagram:
HIGHPASS/LOWPASS
FREQUENCY
11
Notice that the outer most circle of numbers (1:00, 2:00, etc.) represent
numbers as they appear on the face of a clock. The number underneath each
“hour” designation on the simulated clock face is the approximate crossover
frequency at that position.
BRIDGING
All pairs of Diamond Audio D7 amplifier channels are capable of being
bridged to a 4 Ohm mono output. Creation of the mono channel is accomp-
lished by using the left channel positive (+) output connection of the amplifier
for the speaker positive and the right channel negative (-) output connection
of the amplifier for the speaker negative.
Example: Two 8 ohm Woofers Wired In Parallel = 4 ohm Bridged Impedance.
Note: It is important that a 4 Ohm minimum total speaker impedance load is
observed! If an impedance load of less than 4 Ohms is used, you will
eventually damage your amplifier and void your warranty.
RCA INPUTS AND OUTPUTS
The D7056 Professional Reference Amplifier features 3 pairs of stereo input
RCA jacks. Each pair of amplifier channels can be driven separately or they
can be combined in a number of different ways. This amplifier IS NOT
equipped with an AUXILIARY Crossover.
Question and Answer IconNeed help?

Do you have a question about the Diamond Audio Technology D7056 and is the answer not in the manual?

Diamond Audio Technology D7056 Specifications

Technical Specifications IconTechnical Specifications
frequency response3 – 50, 000 Hz
signal-to-noise ratio102dB
THD0.02%
channel separation80dB
input sensitivity0.5 to 12VRMS
input impedance>40kOhms
power supply operating range10 to 16VDC
Dimensions IconDimensions
length22 3/4"
width10 5/8"
height3"

Summary

Crossover Controls

Lowpass Filter On/Off

Button to engage or bypass the lowpass filter.

Lowpass Frequency Adjustment

Control to set the lowpass crossover point from 50Hz to 5kHz.

Highpass Filter On/Off

Button to engage or bypass the highpass filter.

Highpass Frequency Adjustment

Control to set the highpass crossover point from 50Hz to 5kHz.

Crossover Frequency Diagram

Rotational diagram for basic setting of crossover frequencies.

Bandpass Filter Creation

Note on creating a bandpass filter by engaging both highpass and lowpass filters.

Bridging Configuration

Bridging Capability

Explanation of bridging amplifier channels for 4 Ohm mono output.

Bridging Example

Example of wiring two 8 ohm woofers for 4 ohm bridged impedance.

Impedance Warning

Warning about minimum 4 Ohm load to avoid amplifier damage and voiding warranty.

RCA Inputs and Outputs Overview

RCA Input Jacks

Description of RCA input jacks for connecting audio signals.

Input Signal Routing and Gain Settings

CH 1/2 Input and -12dB Button

Connecting signals and adjusting sensitivity for channels 1/2.

CH 3/4 Input and -12dB Button

Connecting signals and adjusting sensitivity for channels 3/4.

CH 5/6 Input and -12dB Button

Connecting signals and adjusting sensitivity for channels 5/6.

Input Select Functions

Using select buttons to route signals to different channels.

Gain Adjustment Procedure

Step-by-step guide to setting amplifier input gain levels.

Speaker Wiring

Speaker Wire Gauge

Recommendation for speaker wire gauge and connection procedure.

Banana Jack Installation

Instructions for installing banana jacks into the speaker block.

Thermal Management System

Cooling System Overview

Explanation of the amplifier's temperature-controlled cooling fans.

Airflow Requirements

Importance of adequate breathing room for peak efficiency.

Crossover Functionality

Crossover Filter Type

Details on third-order 18dB/octave Butterworth filters.

Crossover Control Options

Variable controls for Highpass, Lowpass, Bandpass, or All-pass.

Independent Crossovers

Separate crossover for output RCA jacks for other amplifiers.

Amplifier Protection

Temperature Monitoring Circuit

Circuit that reduces voltage at 185F to prevent shutdown.

Troubleshooting and Support

Referral to troubleshooting section or technical department for issues.

Power and Ground Cable Gauge

Power Cable Gauge Chart

Chart for selecting appropriate power cable gauge based on current and length.

Multiple Amplifier Calculation

Method to calculate total current draw for multiple amplifiers.

Turn-On Connection

Remote Turn-On Wire

Connecting the remote turn-on wire from the source unit.

System Power Draw Calculation

Amperage Draw Formula

Formula to determine total system amperage draw based on RMS power.

Example Calculation

Example calculation for a 6-channel amplifier's current draw.

Troubleshooting Common Issues

No Amplifier Output

Steps to diagnose and resolve an amplifier with no output.

Sound in One Channel Only

Troubleshooting steps for a single channel with no sound.

Squealing Amplifier Channels

Diagnosing and resolving squealing sounds from amplifier channels.

Volume Softening Issue

Addressing amplifier volume softening due to thermal protection.

Amplifier Mounting

Mounting Location Considerations

Guidelines for mounting amplifiers, avoiding enclosures without ventilation.

Adjustable Mounting Flanges

Instructions for moving and tightening mounting flanges.

Power and Ground Connections

Power Connection (+12V)

Procedure for connecting the main power cable to the amplifier.

Ground Connection

Steps for establishing a proper ground connection for the amplifier.

System Diagrams

System Diagram 1: Triamp System

Wiring diagram for a basic 2-channel three-way triamp system.

Installation Tools and Procedures

Tools Needed

List of tools required for amplifier installation.

Professional Installation Advice

Recommendation to use a factory authorized installation technician.

Safety Precaution: Battery Cable

Warning to remove the negative battery cable before installation.

System Diagrams

System Diagram 2: Biamp Subwoofer System

Wiring diagram for a biamp system with dual-bridged subwoofers.

Continuous RMS Output Power

D7056 Output Ratings

Specifications for continuous RMS output power at different impedances.

Crossover Specifications

Crossover Quantity and Type

Details on crossover quantity, type, slope, and alignment.

Fuse Recommendations

External Fusing Requirement

Recommendation for external fusing to protect the vehicle.

Fuse Rating Calculation

How to calculate main fuse rating for single or multiple amplifiers.

System Diagrams

System Diagram 3: Four Channel System

Wiring diagram for a four-channel system with a bridged subwoofer.

System Diagrams

System Diagram 4: Four Channel Active

Wiring diagram for a four-channel fully active system with subwoofers.

Technical Features

Symmetrical Topology

Description of the amplifier's symmetrical topology and power supply.

Isolated Input Section

Explanation of the isolated input section and instrumentation amplifier.

Input Signal Capability

Up to 12VRMS input signal voltage capability with -12dB attenuator.

Crossover Topology

Details on third-order 18dB/octave Butterworth crossover topology.

Gain Output Stage

Wide bandwidth/low distortion symmetrical gain output stage.

Circuit Board and Heatsink

Features 3 oz. gold plated copper circuit board and proprietary heatsink.

Cooling System

High efficiency forced-air cooling system.

Power Distribution

Solid copper high-current power distribution busbars.

Convenience and Appearance Features

Variable Electronic Crossovers

Three fully variable and independent electronic crossovers.

Assignable Crossover Inputs

Ability to assign crossover inputs.

Power/Ground Connector Blocks

24-Karat gold plated brass circuit board mounted 4 gauge blocks.

Speaker Connector Blocks

24-Karat gold plated brass circuit board mounted 10 gauge blocks.

Circuit Board Viewing Panel

Tinted plexiglas circuit board viewing panel.

End Panels

Solid billet CNC machined end panels with adjustable mounting flanges.

Specifications

Frequency Response

Frequency response range of the amplifier.

Signal-to-Noise Ratio

Signal-to-noise ratio of the amplifier.

THD

Total Harmonic Distortion (THD) rating.

Channel Separation

Channel separation rating.

Input Sensitivity

Input sensitivity range of the amplifier.

Input Impedance

Input impedance of the amplifier.

Power Supply Operating Range

Operating voltage range for the power supply.

D7056 Dimensions

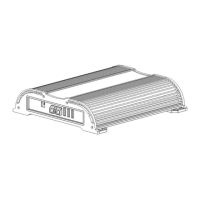
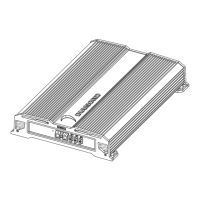
Physical dimensions of the D7056 amplifier model.

Related product manuals