EasyManua.ls Logo

Dickson TH8 Series User Manual

Dickson TH8 Series
7 pages
To Next Page IconTo Next Page
Page #1 background imageLoading...
Page #1 background image
Default Recorder Settings
This manual applies to: TH8P0, TH8P2, TH8P3 and TH8P5
7 day chart rotation
32°F - 120°F (TH8P0, TH8P2)
-20°F - 120°F (TH8P3, TH8P5)
Quick Start
1. Remove the protective pen caps.
2. Check to make sure the Replaceable Sensor is connected firmly to the recorder. If using model TH8P3/5 make sure the
extension cord is connected firmly to the recorder and that the Replaceable Sensor is plugged in firmly to the extension
cable.
3. Insert batteries and plug in AC adapter (See Button Operations below).
TH8P0: four (4) AA batteries required;
TH8P2/3/5: four (4) AA batteries backup power only (See Power section for backup life). Unit will power on.
4. The instrument will move pens to the appropriate readings.
5. The blue pen has a longer pen arm and records humidity or dew point (depending on your dip switch selection. The red
pen has a shorter arm and records temperature. The pens are offset to allow the red pen to glide under the blue pen.
The blue pen indicates the correct time and the red pen precedes it by 3/16 of an inch.
6. Install the chart that matches the Dip Switch settings (See Dip Switch Setup below).
7. Press the PEN HOME key to move the pens to the outside of the chart. The pen is automatically raised off the chart.
8. Remove the old chart, place the new chart on the Chart Hub being certain that the edge of the chart slides under the
Chart Guide Clips located at the outside of the chart.
9. Set the appropriate time. There are two ways to adjust the chart and set the appropriate time:
Phone: 1-800-757-3747 or 1-630-543-3747 | Fax: 1-630-543-0498 | Email: support@dicksondata.com | Website:DicksonDate.com
TH8
8” (203mm) Temperature & Humidity Chart
Recorder
Question and Answer IconNeed help?

Do you have a question about the Dickson TH8 Series and is the answer not in the manual?

Dickson TH8 Series Specifications

General IconGeneral
BrandDickson
ModelTH8 Series
CategoryMeasuring Instruments
LanguageEnglish

Summary

Default Recorder Settings

Quick Start Guide

Initial Setup Steps

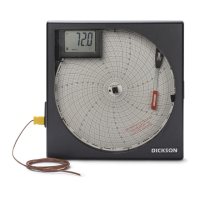
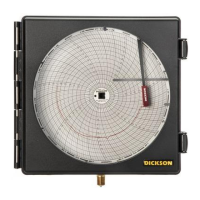
Steps for initial setup including pen cap removal, sensor connection, power, and pen positioning.

Chart Installation and Time Setting

Instructions for installing a new chart and setting the correct time using manual or automatic methods.

Understanding Recorder Features

Display Symbols Explained

Key symbols and indicators used on the recorder display for channel, readings, and alarms.

Basic Operations

Instructions for turning the unit on/off and positioning the pens using the Pen Home function.

Alarm Configuration

Setting Alarm Parameters

Procedure to enable/disable alarms and set minimum/maximum values for each pen.

Alarm Relays Functionality

Details on how SPST relay contacts function for alarm conditions and limitations.

Dip Switch Setup and Configuration

Configuring Dip Switches

Guide to setting dip switches on the back of the unit for specific applications and chart matching.

Switch Settings for Recording Time

Details on dip switch configurations for 24 hr, 7 day, and 31 day recording time options.

Temperature and Dew Point Ranges

Dip switch settings for various temperature ranges and selecting RH or Dew Point for the blue pen.

Power and Battery Backup

Powering the Recorder

Information on AC power operation with optional AA battery backup and estimated backup life.

LED Indicator Status

Explanation of LED indicators for AC power, battery status, and low battery conditions.

Troubleshooting Common Issues

Chart Not Running or Slow

Diagnosing issues with chart timekeeping, restricted movement, or incorrect chart installation.

Display and Chart Mismatches

Troubleshooting differences between display readings and chart recordings, including dip switch settings.

Power and Response Problems

Resolving issues with battery backup, unit response, and power-up failures.

Replaceable Sensor and Calibration

Replaceable Sensor Information

Details on the R200/R250 sensor, compatibility, and recommendations for replacement.

User Calibration Procedure

Step-by-step guide for adjusting pen calibration using an external standard.

Related product manuals