Do you have a question about the DIGI-STAR EZ 3200 and is the answer not in the manual?
Lists key features and capabilities of the scale models.
Details temperature range, power requirements, and power consumption.
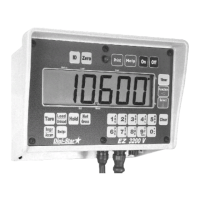
Describes physical dimensions, weight, display type, and enclosure rating.
Instructions for physically attaching the indicator using a bracket and screws.
Guidance on connecting the power cable to a vehicle battery or regulated supply.
How to connect a remote 12 Vdc alarm to the indicator's orange wire.
Instructions for connecting a momentary switch or relay to the blue wire for remote control.
Details on connecting strain gauge load cells using the J902 connector and color coding.
Recommends grounding rods for additional protection against lightning.
Information on how to request the technical manual for the EZ3200.
Step-by-step guide to initiate and navigate the indicator's self-test procedure.
Illustrates how to calculate a Calibration Multiplier to match scales.
Placeholder for original scale setup and calibration numbers.
A template for recording scale readings to calculate the calibration multiplier.
Discusses using different load cells and contacting a service center for new numbers.
Detailed instructions on how to modify the indicator's SETUP and CAL numbers.
Procedure to exit setup mode and return to normal weighing operations.
Steps to power on the indicator and enter the GROSS weighing mode.
Procedure for powering down the scale indicator.
How to set a zero point for the empty trailer, bin, or platform.
Explains how to access additional information using the Help key.
How to ensure the scale is in Gross Mode, showing weight change since last zero.
Steps to switch to Net Mode, which displays weight change after a Tare.
How to freeze the displayed weight to prevent changes from zero shift.
Procedure to deactivate Hold Mode and re-activate scale adjustments.
How to cancel Hold Mode without adjusting the Zero/Balance.
Guide to setting a target weight and understanding different display modes.
Methods to clear an active preset alarm and reset for a new preset.
Using the Remote Enter Preset Feature to clear the alarm.
How to preload a known container weight for net weighing.
Steps to access and navigate Menu 4 for setup options like PRETAR.
Steps to access and navigate Menu 2 for setup options like TAREAP.
Explains the pre-alarm feature as an early warning for presets.
Instructions for setting the pre-alarm method and value in Menu 4.
Procedures for starting the mix timer using two different methods.
How to stop and reset the mix timer alarms.
How to restart the mix timer with previously entered time.
Steps to begin counting rotations using two methods.
How to reset the rotation counter and its alarms.
How to restart the rotation counter with a previously set count.
Overview of three methods for programming feeding recipes.
Details on programming recipes based on individual animal feed amounts.
How to program recipes using percentages of the total load or per animal.
Instructions for programming recipes based on specific weight amounts per load.
Step-by-step guide to creating a new recipe on the indicator.
How to select or change the recipe programming method in Menu 4.
Instructions for modifying existing recipes using two different methods.
Procedures for deleting specific recipes or all recipes from the indicator.
How to print the details of one specific recipe from memory.
Steps to print all recipes currently stored in the indicator's memory.
Explains automatic progression through recipe ingredients based on criteria.
How to set the tolerance window for auto-advance in Menu 4.
Explains the delay time feature for auto-advancing ingredients.
Instructions for setting the delay time in Menu 4, including a MANUAL option.
Guide on how to load ingredients for a batch using programmed recipes, with two methods.
How to manually step through recipe ingredients, especially when Delay Time is manual.
Steps to view programmed recipes and their ingredient amounts.
How to check the total loaded/unloaded amounts for each ingredient.
Procedure to print the accumulated amount for a single ingredient.
Steps to print the accumulated amounts for all ingredients in recipes.
How to print the list of all ingredient names and their current accumulation status.
Guide to changing ingredient names in the indicator's memory.
Steps to clear the accumulated amount for a specific ingredient.
Procedure to clear all accumulated ingredient amounts.
Overview of remote display, radio control, and printing capabilities.
Mentions clock option and introduces the ID number feature.
Procedures for entering, saving, and viewing the identification number.
Explains how to assign and use functions with the Function and Select keys.
Covers adding, recalling, printing, and clearing weight memory entries.
Steps to perform and print weigh averaging operations.
Explains the Black Out feature for retaining preset data during power outages.
Describes the pulsed output feature indicating decreasing weight.
Example of programming recipes based on individual animal feed amounts.
Example of programming recipes using percentages of total load.
Example of programming recipes based on specific weight amounts per load.
| Brand | DIGI-STAR |
|---|---|
| Model | EZ 3200 |
| Category | Touch Panel |
| Language | English |