TN 559 – Cleaning and replacing faders - All consoles Page 2
Quantum 2 / Quantum 3 / SD12
This section is for the cleaning and replacement of faders in Quantum 2, Quantum 3, and SD12 consoles
only. If it feels like the faders are sticking, then either replacement or thorough cleaning is required.
Part Numbers – see Appendix 1 – Fader Table for full details
• Input fader: 681-00200 Input fader with plug – SD12, Q2, Q3 (and Q3 master section)
• Master fader: 681-00199 Master fader with plug – SD12, Q2
Replacing Faders
1. Power down the console, switch off the PSU’s
and connect your antistatic strap to an
appropriate earthing point.
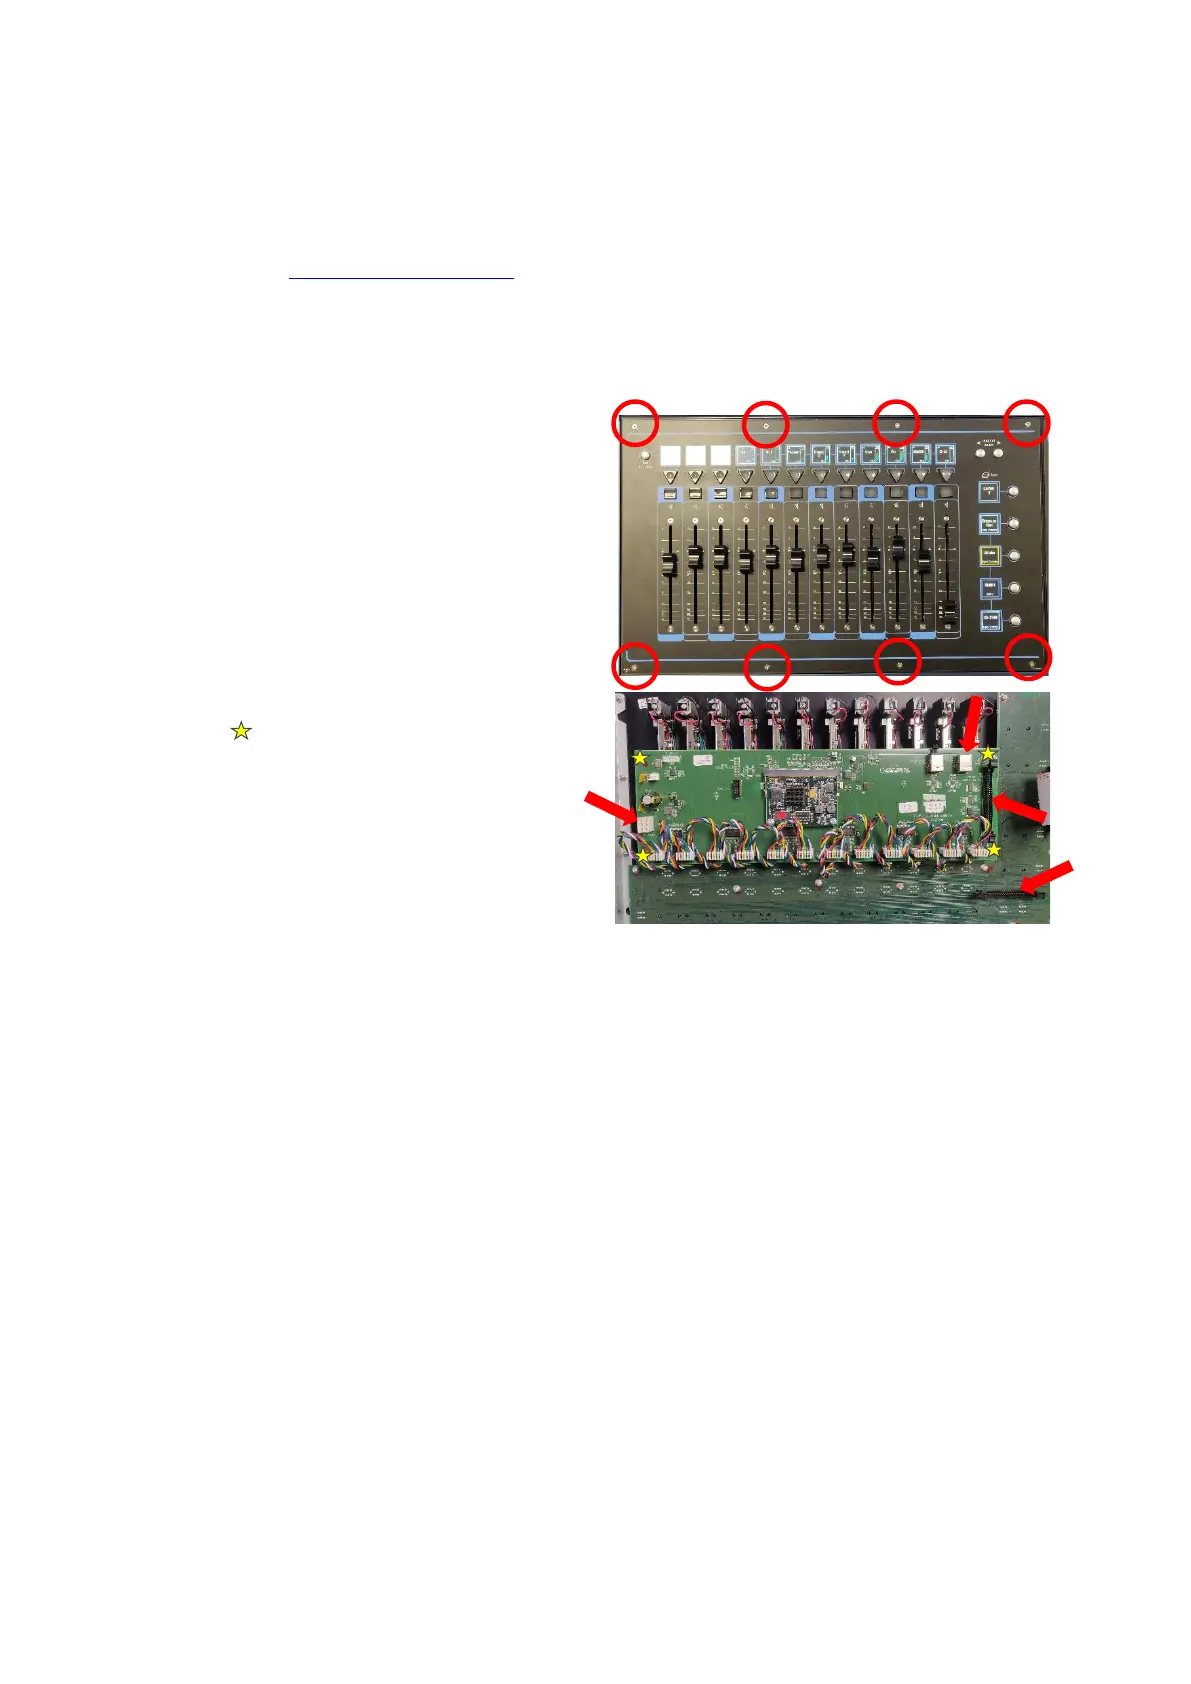
2. Unscrew the fader panel (Q3 panel shown
opposite) with the 2mm Hex driver
3. Carefully tilt the panel and disconnect the
cables to the PCB’s (indicated below with
arrows), and the fader connectors.
4. Carefully unscrew the fader driver PCB
retaining screws (indicated above as yellow
stars ), store the fader driver card
somewhere safe.
5. Flip the panel back over and remove the
fader knobs and store them somewhere
safe.
6. Use a Hex driver to remove the screws at the
top and bottom of the first fader, store them
somewhere safe.
7. Carefully remove the fader and place to one side.
8. Repeat the fader removal (steps 6 and 7) and place them to one side keeping the sequence of
faders, do not mix them up – label them if necessary.
9. Using the vacuum cleaner and the paintbrush, gently clean the panel, PCBs, and the area inside of
the console.
10. Install the new faders, screw down the fader driver PCB, plug the faders into the PCB, and carefully
re-plug the connectors to the PCB’s. Place the fader panel back into the console, switch the console
on and test the functionality of the faders and buttons – the panel can now be screwed back into
place.
Cleaning Faders - Follow steps 1 – 9 above
11. Use the compressed air to dislodge any dust and dirt from the inside of the fader assembly, then use
the vacuum cleaner to remove the dust and dirt. Repeat as necessary.
12. Lay the fader on paper towels, place the thin nozzle of the cleaner-lubricant spray along the fader
slot and with the fader at one end spray for no more than 1 second.
13. Move the fader up and down approximately 20 times and use the paper towel to wipe up any excess
or dirty liquid.
14. Repeat steps 11 - 13 for the remaining faders.
15. Re-install the faders, screw down the fader driver PCB, plug the faders into the PCB, and carefully re-
plug the connectors to the PCB’s. Place the fader panel back into the console, switch the console on
and test the functionality of the faders and buttons – the panel can now be screwed back into place.
 Loading...