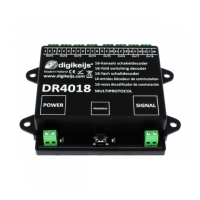
DR4018 DIGISWITCH (v1.34)
www.digikeijs.com Pagina / page / Seite / page 12
Quick start
Follow these steps to start using your decoder as an 8-channel switching decoder straight away.
Give the module an address
The DR4018 module rst needs an address to be able to communicate with your control unit.
The module comes as standard with address “1” and set up as a switching decoder using DCC format.
Step 1 : Connect both the POWER + SIGNAL to the rails or tracks output on your control unit.
Step 2 : Set your control unit to the starng address you want to give the module.
Step 3 : Press the program buon on the module unl the red LED remains on.
Step 4 : Now switch your control unit to the selected address.
Step 5 : If the module is connected correctly, the LED will go o when you select the address.
Step 6 : The rst output (OUT1) has now received the selected address. All subsequent OUT outputs are
given an address 1 number higher.
Example: The module is programmed to address 56. OUT1 is given the address 56, OUT2 gets
address 57, OUT3 number 58 etc.
Because the decoder is mulprotocol and supports DCC and Marklin Motorola, selecng a switching address
should also select the protocol. When the decoder receives a switching command as per the steps above, the de-
coder idenes which protocol was used and stores this in its memory.
IMPORTANT!
In DCC mode you can select any starng address and the module will automacally give the subsequent outputs
an address that is one higher.
The Motorola protocol works with groups of 8 numbers. This means you cannot chose a starng address from
within a block. For example: address 1 through 8, 9 through 16, 17 through 24 etc.
Reset the module to factory sengs using POM programming
Use this method to reset the module to factory sengs using POM programming.
Step 1 : Connect the signal input on the decoder to the rails output on your control unit.
Step 2 : Ensure the module is receiving power via the module’s power input.
(You can also connect the power and signal inputs to each other)
Step 3 : Set your control unit to POM programming mode.
(You can nd more informaon about the POM mode in your control unit’s manual)
Step 5 : Choose local address 9999 on your control unit.
Step 6 : Press the buon on the module unl the LED goes on.
Step 7 : Then program decimal value 8 in CV8.
Step 8 : Press the buon on the module unl the LED goes out.
Step 9 : It is important when carrying out a RESET that the module is now disconnected from the power.
Disconnect both the power and the signal inputs and wait for 3 to 5 seconds.
Step 10: The decoder can now be reconnected to the power and will have returned to the factory sengs.
BE CAREFUL! The decoder now has address 1 again.
 Loading...