DVM-250/DVM-250Plus Installation Guide 860-00129-00 Rev C
Copyright © 2010-2015 Digital Ally, Inc. i
Table of Contents
SECTION - 1: BEFORE YOU BEGIN .............................................................................................. 1-1
TOOLS NEEDED .................................................................................................................................... 1-1
CAUTIONS AND NOTES ........................................................................................................................ 1-1
SECTION - 2: PARTS, CABLES AND ACCESSORIES.................................................................. 2-2
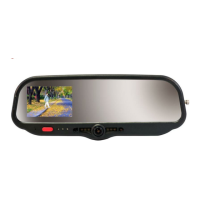
DVM-250 ............................................................................................................................................ 2-2
Parts and Accessories List ............................................................................................................. 2-2
Optional Accessories ..................................................................................................................... 2-4
DVM-250 Basic Wiring Diagram ................................................................................................. 2-5
DVM-250Plus Basic Wiring Diagram .......................................................................................... 2-6
SECTION - 3: INSTALLATION INSTRUCTIONS ......................................................................... 3-1
STEP 1: FACTORY MIRROR REMOVAL .................................................................................................. 3-1
Screw Mount Rearview Mirror Removal...................................................................................... 3-1
Wedge (Screwless) Mount Rearview Mirror Removal ................................................................. 3-1
Cam Lock Rearview Mirror Removal .......................................................................................... 3-1
STEP 2: DVM INSTALLATION ............................................................................................................... 3-2
STEP 3: INTERFACE BOX INSTALLATION .............................................................................................. 3-4
Interface Box ................................................................................................................................. 3-4
Mount the IF Box .......................................................................................................................... 3-4
DVM to Interface Box Cable Installation ..................................................................................... 3-4
Interface Box Power Cable Installation ........................................................................................ 3-5
STEP 4: INTERFACE BOX EXTERNAL TRIGGER WIRING ....................................................................... 3-5
Determine the Device Trigger(s) Signal Level ............................................................................. 3-5
Trigger Wiring Installation ............................................................................................................ 3-6
RJ45 to Terminal Connector Adapter (optional) ........................................................................... 3-7
Siren Adapter Interface ................................................................................................................. 3-7
STEP 5: WIRELESS MICROPHONE INSTALLATION (OPTIONAL) FOR USE WITH 001-00042-32 ONLY ... 3-8
STEP 6: BACKUP CAMERA INSTALLATION (DVM-250PLUS ONLY) ..................................................... 3-9
Route the Camera Cable ............................................................................................................... 3-9
Mount the Backup Camera ........................................................................................................... 3-9
Connect the Backup Camera ....................................................................................................... 3-10
SECTION - 4: TESTING THE INSTALLATION .......................................................................... 4-11
INITIAL POWER UP ............................................................................................................................. 4-11
RECORD AN EVENT ............................................................................................................................ 4-11
VIEWING THE BACKUP CAMERA (DVM-250PLUS ONLY) ................................................................. 4-11
SENSOR/OUTPUT ALARM TESTING .................................................................................................... 4-11
SECTION - 5: SUPPORT .................................................................................................................. 5-11
How to Reset the DVM-250 System .......................................................................................... 5-11
Basic Troubleshooting ................................................................................................................ 5-12
SECTION - 6: CONTACT INFORMATION .................................................................................. 6-13
SECTION - 7: INTERFACE BOX SENSOR WORKSHEET ....................................................... 7-14
 Loading...