Setting the Mic input level.
• Turn Bypass off (the Bypass LED should be off).
• Set the Mic level by singing or talking into the microphone at your
loudest performance volume while adjusting the Mic In knob. The
Mic Clip LED should be green, just tickling the orange. If the LED is
red, you have too much input. If the Mic level is still too hot press the
pad switch to the +4 dBu setting.
Note: Because the Talker defaults to the NuVo pre-set on power up,
you will not hear anything until you talk or sing and play at the same
time. Also, keep in mind that the volume of your singing voice controls
the volume of the Talker effect.
Setting the Instrument level.
• Bypass should still be off.
• Watch the Instrument Clip LED while you play. Adjust the
Instrument In knob until the Clip LED is green, just tickling the
orange. If the LED is red, you have too much input.
Note: Once again, if you are in the NuVo preset then you’ll hear out-
put only when you talk and play at the same time.
Setting the levels between the Effect and the Bypassed sound.
• Sing or talk into the Mic while playing your instrument, to hear the
Talker "effect".
• Switch in and out of Bypass and adjust the Effect Out knob until you
find the right balance between your instrument and the Talker. If the
effect sound is louder than your instrument sound in Bypass, turn
down the Effect Out knob until it is the same (or maybe a little louder
for soloing purposes).
Note: It is best not to adjust your instrument's output level while doing
this - use the Effect Out Knob for more or less volume.
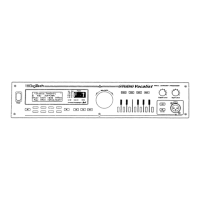
Setting the balance between the Amp output and the PA output
When you have set up both an amplifier and a mixer as outputs, and
you have chosen “Both” with the Effect Routing Switch, you may
want to use the PA Level knob on the back panel to balance the rela-
tive volume of the effect signal going to the PA output with the
bypassed mic volume. It can also be used to balance the level of the
PA output compared to the Amp output.
Note: This control has no effect on the Bypassed signal
Note: The PA output when using the Talker effect is an amplified sig-
nal, and is capable of much higher levels than the bypassed mic sig-
nal. You may want to trim the effect level back with the PA Level knob
to match your mixer’s input.
5
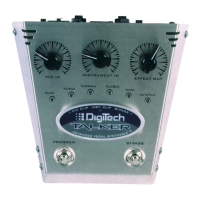
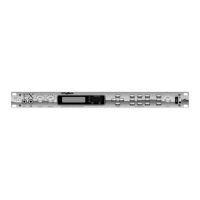
Talker Setup
Connect Talker to your system.
• Connect your microphone to the balanced XLR Mic In jack and
select the -10 dBV or +4dBV setting with the Pad switch.
Note: Many mics work at the -10 dBV setting.
• Connect your instrument to the unbalanced 1/4" Instrument In jack.
• Connect the unbalanced 1/4" Amp Output to your favorite
guitar/instrument amplifier.
• Optional: Connect an XLR cable from PA to your mixer or PA
amplifier.
• Select the Effect Routing switch to Amp, P.A. or Both for depending
which output(s) you want the effect sound to appear on.
• Power up the Talker by plugging the AC adaptor cable into the
Power Input jack.
Note: The Talker powers up in bypass mode with NuVo preset select-
ed (which takes approximately 5 seconds)
Ground loop note: When you use both the PA and Amp outputs, there
is the possibility of hum due to ground loops between your amp and
the PA system. If you experience hum in this setup, use only a proper
audio ground lifting device such as one found in a DI box.
Amplifier distrotion note: If you prefer to use the the preamp distor-
tion from your amplifier instead of running a distortion box before the
Talker, you will hear less Talker effect unless you run the Talker into
the effects loop of your amp. The effects loop adds preamplifier distor-
tion before the Talker which makes the effect more distinct.
Setting the Bypass levels.
• Select Bypass (the Bypass LED should be on).
• Set your instrument and amp levels the way you normally do. If you
have the P.A. output connected, adjust the levels on the P.A. to set-
tings you normally use.
Note: For maximum enjoyment, it’s important to set up the proper lev-
els for the Talker effect.
4