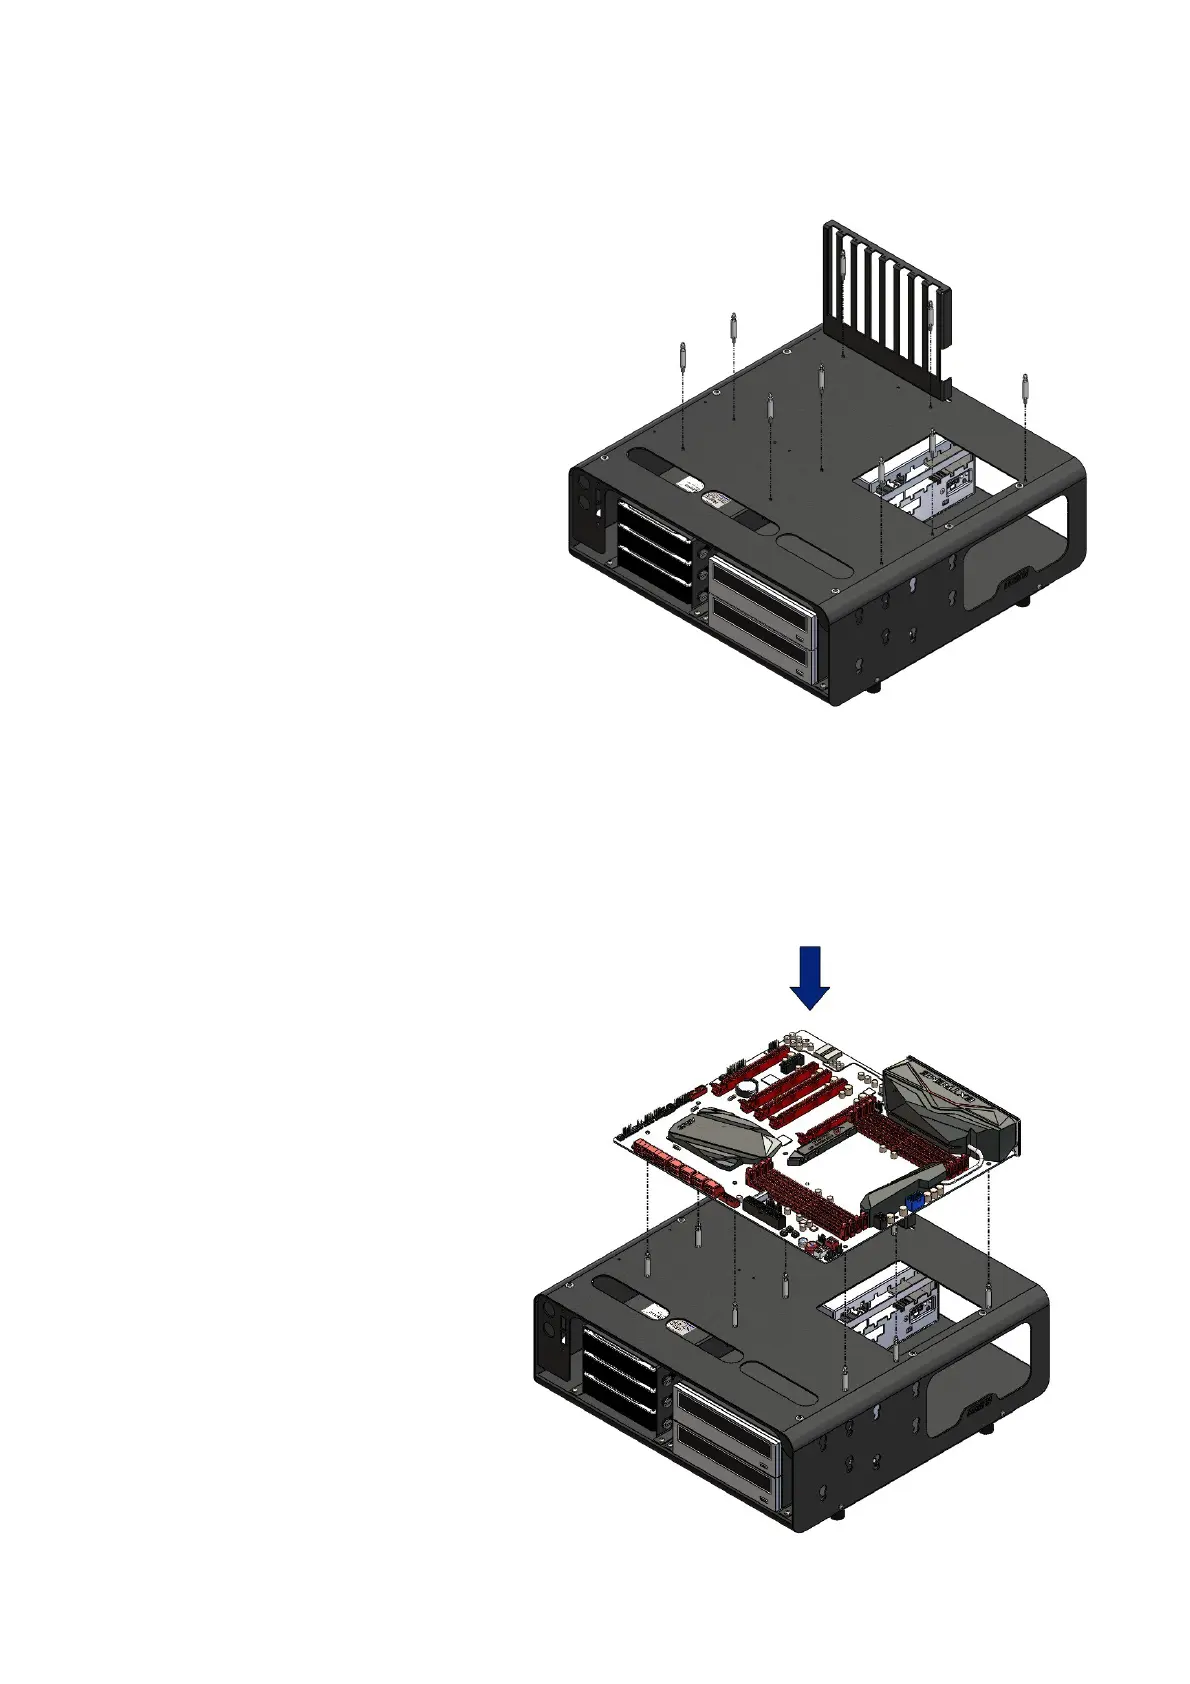
ASSEMBLY DimasTech Mini V.2.0 – STEP-8
- The DimasTech Mini V.2.0 has the
possibility to mount No.9 spacers
VC016_EasyGo_M3_25mm (13) in
any of the No.9 threaded holes M3
available to you according to the type
of motherboard you have purchased
or to your favorite arrangement , the
image has the sole purpose of
illustrating the possible positions of
the parts.
- Align the spacers
VC016_EasyGo_M3_25mm (13) to
the corresponding M3 threaded
holes of the DimasTech Mini V.2.0
and fastem, as shown in the figure
beside
ASSEMBLY DimasTech Mini V.2.0 – STEP-9
- Align the holes in the
motherboard (item not included)
with the spacers
VC016_EasyGo_M3_25mm (13),
to fasten the motherboard just a
slight downward pressure as
shown in the figure opposite, the
image has the sole purpose of
illustrating the possible positions
of the parties.
Note: The number indicated in the
brackets indicates the
corresponding identification in the
table on the page No.2
 Loading...