ASSEMBLY DimasTech Mini V.2.0 – STEP-10
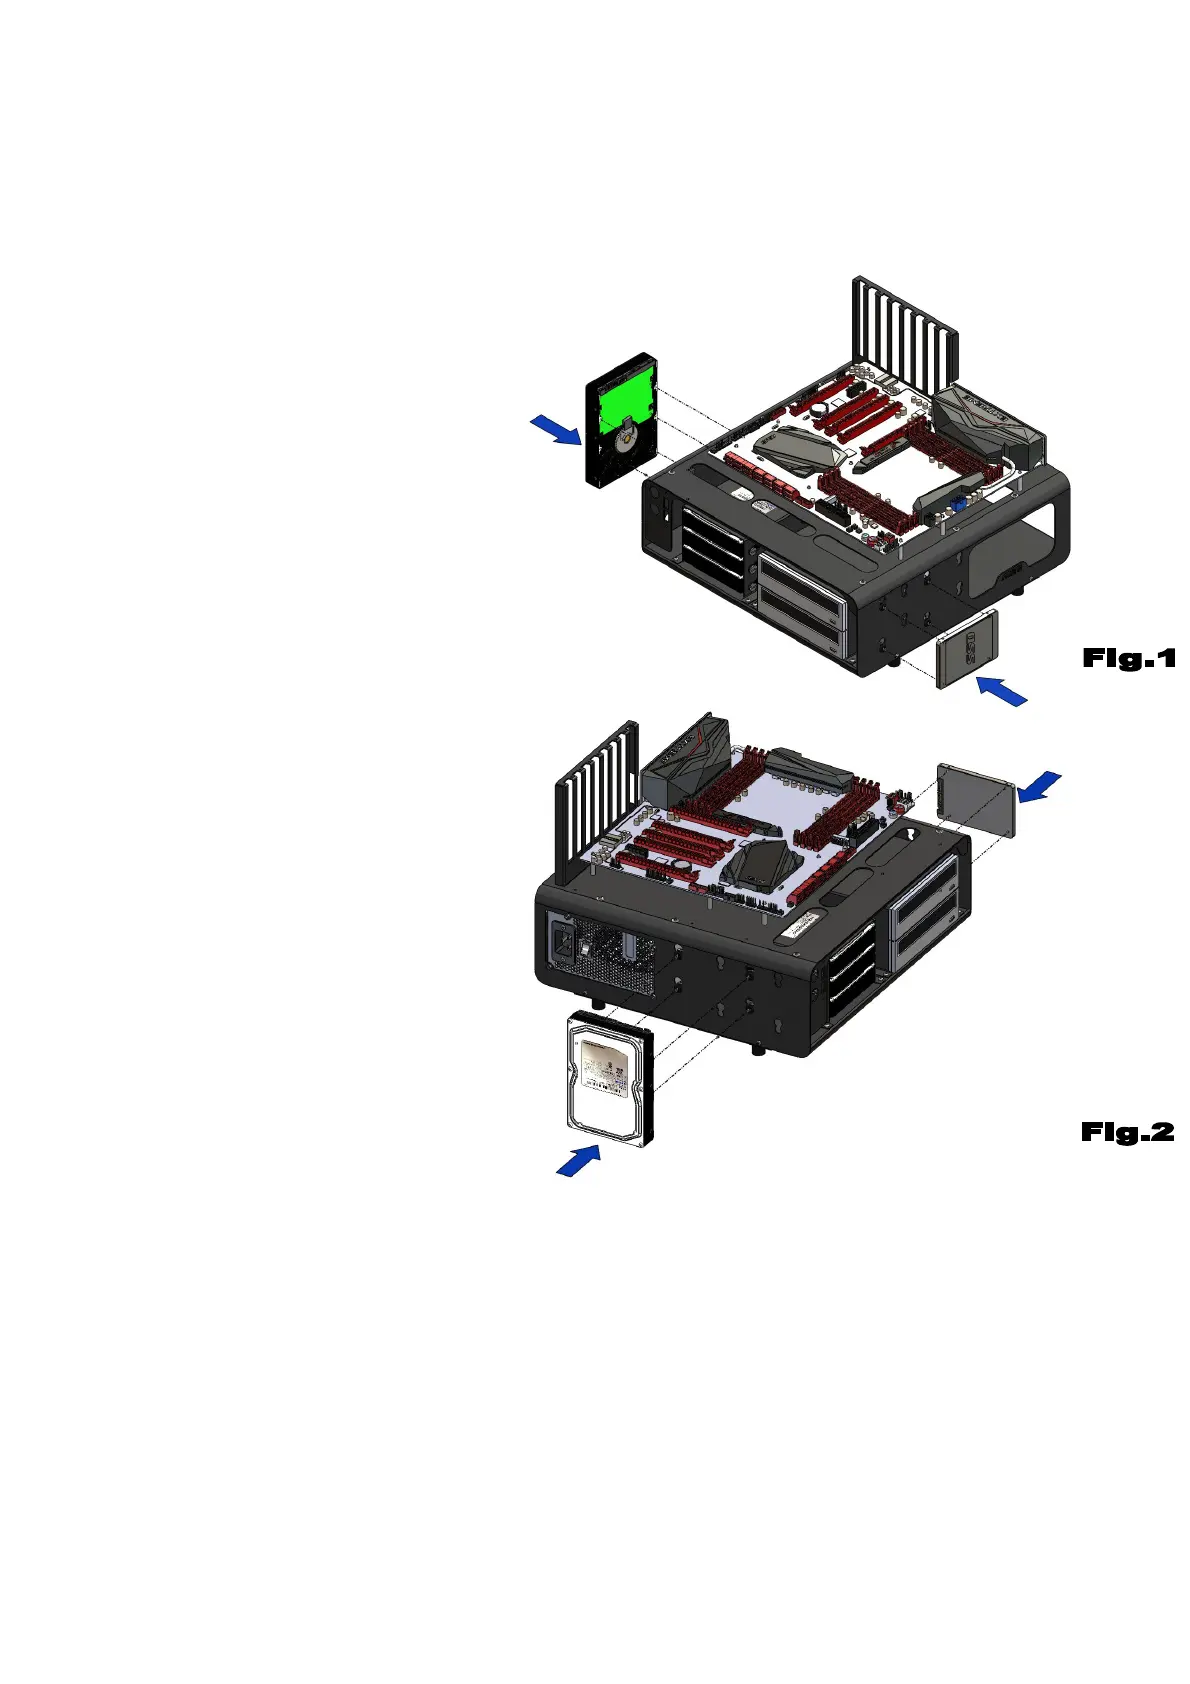
- The DimasTech Mini V.2.0 has
the additional possibility to mount
No.1 hard-disk and No.1 SSD disk
(items not included) on the sides
of the body according to the
layout you prefer, the image has
the sole purpose to illustrate the
possible positions of the parts.
- Before proceeding with the
assembly of the hardware parts, it
is necessary to extract the
DIMAS_23 (3) and DIMAS-24
components (4) as shown in STEP-
2 and STEP-5.
- Insert No.4 VC019 (14) into the
appropriate shaped slots chosen
according to the type of hardware
to be used.
– Align the holes in the base of
the SSD disk with the holes in
VC019 (14) and fasten with No.4
screws VC013_M3 (16), as shown
in figure 1.
- Align the holes in the base of the
hard-disk with the holes in VC019
(14) and fasten with No.4 screws
VC014_6-32 (15), as shown in
figure 2.
Note: The number indicated in the brackets indicates the corresponding
identification in the table on the page No.2
 Loading...