Do you have a question about the Dimplex AC3RE and is the answer not in the manual?
Covers obstruction, earthing, placement, mounting, and electrical safety for the appliance.
Details age restrictions, supervision, and warns about hot surfaces causing burns.
Addresses small rooms, supervision, installation, water proximity, and flammable materials.
Emphasizes proper manual handling and ensures correct electrical safety practices.
States compliance with Ecodesign requirements for electric local space heaters.
Provides model number, heat output, dimensions, and consumption data.
Details electricity consumption at various heat outputs and in standby.
Describes digital controls, timer modes, controller UI, and functions like Heat Selection.
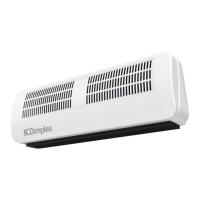
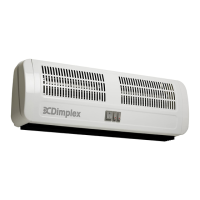
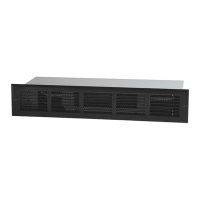
Details construction, mounting bracket, safety features, IP rating, supply, approvals, warranty, and manufacturer.
Details electrical installation by a competent electrician according to IEE wiring regulations.
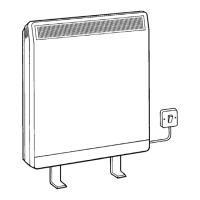
Describes wall-mounting or ceiling-fixing options and end-to-end mounting.
Guides on marking, drilling, and fixing brackets for wall or ceiling installation.
Explains the use of washers, screws, and endcaps for secure mounting.
Ensures the supply cable is securely fastened and clamped before operation.
Instructions for routing mains cable, connecting to terminal block, and securing cable.
Lists cut-out triggers and notes fan operation during cut-out.
Outlines reset steps, emphasizing the need for competent persons due to hazards.
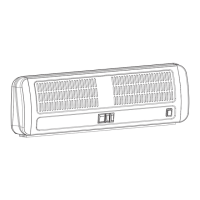
Introduces the Bluetooth remote for operating the appliance and its features.
Explains the function of each button: MENU, ENTER, BACK, ARROW keys, ADV.
Provides a key for understanding icons displayed on the remote screen.
Lists shortcut key combinations for specific functions and a note on audible confirmation.
Guides on removing the cover, inserting AA batteries, and replacing the cover.
Mentions that fitting batteries starts the scanning and pairing process.
Instructions on mounting the wall cradle using screws and wall fixings.
Details the procedure for pairing the product to the remote control.
Includes notes on pairing duration, product search, and successful connection indicators.
Guides on setting the hour and minute digits independently using arrow and ENTER keys.
Explains setting the day, month, and year, including daylight saving options.
Explains controlling the appliance via the remote's display and buttons.
Lists modes like Manual, User Timer, and Frost Protection.
Details the function of each button: MENU, ENTER, BACK, ARROW keys, ADV.
Lists shortcut key combinations for specific functions and a note on audible confirmation.
Describes Timer, Manual, Frost Protect, and Comfort Off modes.
Explains Runback, Setback, Adaptive Start, and PIN Lock modes.
Details the display of mode, temperature set-point, heating status, and current time.
Explains when the remote enters sleep mode and how to wake it.
Notes on automatic reconnection and pairing indication when the remote wakes.
Describes using the keypad to navigate menus and select operational modes via icons.
Explains the electronic thermostat, temperature range, and default settings.
Details how to adjust the temperature set point using the Up & Down arrows.
Describes selecting between HI, LO heat, and FAN settings.
Instructions on how to change the heat setting using the ADV button.
Explains how HI setting modulates output and switches to LO as temperature approaches.
Notes that FAN output is displayed instead of time on the home screen.
Highlights timer mode for efficient operation with programmable profiles.
Explains Adaptive Start and Setback mode behaviour within Timer Mode.
Guides on activating Timer mode via the MENU, Schedule Icon, and ENTER.
Steps to access Timer Settings, select 'Edit', and choose the day of the week.
Details setting 'On' time, set-point temperature, and 'Off' time for each period.
Explains how to exit settings, noting that unsaved changes are lost.
Instructions on copying a day's time profile using ADV and pasting it to other days using ENTER.
Defines continuous heat as maintaining a set temperature indefinitely.
Lists Manual mode, Frost Protection, and Comfort Off.
Steps to activate Manual mode (Comfort On) and adjust target temperature.
Maintains a constant 7°C for frost protection, not for comfort.
Guides on activating Frost Protect via MENU and Frost Icon, or by setting temp to 7°C.
Provides no temperature control; remote displays time. Appliance remains in active state.
Steps to activate Comfort Off via MENU and OFF icon, or by holding BACK.
Explains how the ADV button modifies heating periods early or stops heating.
Details the impact of activating/deactivating the Advance function in different modes.
Assigns a timed period to continuous heating, reverting to Comfort Off afterwards.
Steps to initiate Runback using ADV, select duration, and confirm set-point.
Explains the display showing runback time left and current set point.
Instructions on cycling through settings with ADV to deactivate Runback.
How to access the menu by holding ADV and MENU buttons.
Lists options: Runback, Setback, Adaptive Start, and PIN Lock.
Steps to activate Runback ON or OFF and edit Runback time.
Presents a table of selectable runback durations and periods.
Guides on selecting runback time and temperature using arrow keys and ENTER.
Modifies Timer Mode to maintain a constant temperature during 'Heating Off' periods.
Steps to activate Setback ON or OFF and set the setback temperature.
Predictive function that pre-heats room to reach target temp by start of Heating On period.
Guides on activating Adaptive Start ON or OFF via ADV/MENU and ENTER.
Provides notes on learning function, environmental factors, and multiple heater implications.
Locks appliance in active mode, restricting functions to basic ones.
Summarizes functions after PIN lock is applied in different active modes.
Steps to activate PIN lock by setting a 4-digit PIN.
Instructions to unlock the device by entering the correct PIN.
Describes the display feedback for incorrect PIN entry.
How to toggle between Celsius and Fahrenheit display on the remote.
How to view appliance ID and software versions on the remote and appliance.
Guides on entering Factory Reset and selecting Heater or Remote reset.
Steps to confirm Factory Reset for YES (y) or NO (n) option.
Explains error code 'Er 20' indicating an issue with the room temperature sensor.
Notes on battery disposal and automatic reconnection after replacement.
Warning to disconnect power before cleaning the heater.
Instructions for cleaning the external appearance with a damp cloth and mild soap solution.
Information on proper disposal of electrical products and batteries according to WEEE directive.
Details what the 2-year warranty covers: defects in materials or workmanship.
How to claim warranty, requiring proof of purchase and product details.
Lists exclusions like accidental damage, misuse, and external factors.
Further exclusions include misuse, negligent use, unauthorized repairs, and non-specified parts.
Covers validity, proof of purchase, repair work, replacement, and statutory rights.
Information on contacting Dimplex for questions about warranty coverage.