See back for further instructions.
PAGE 2 PAGE 3
(314) 205-3033 WWW.DIODEDYNAMICS.COM
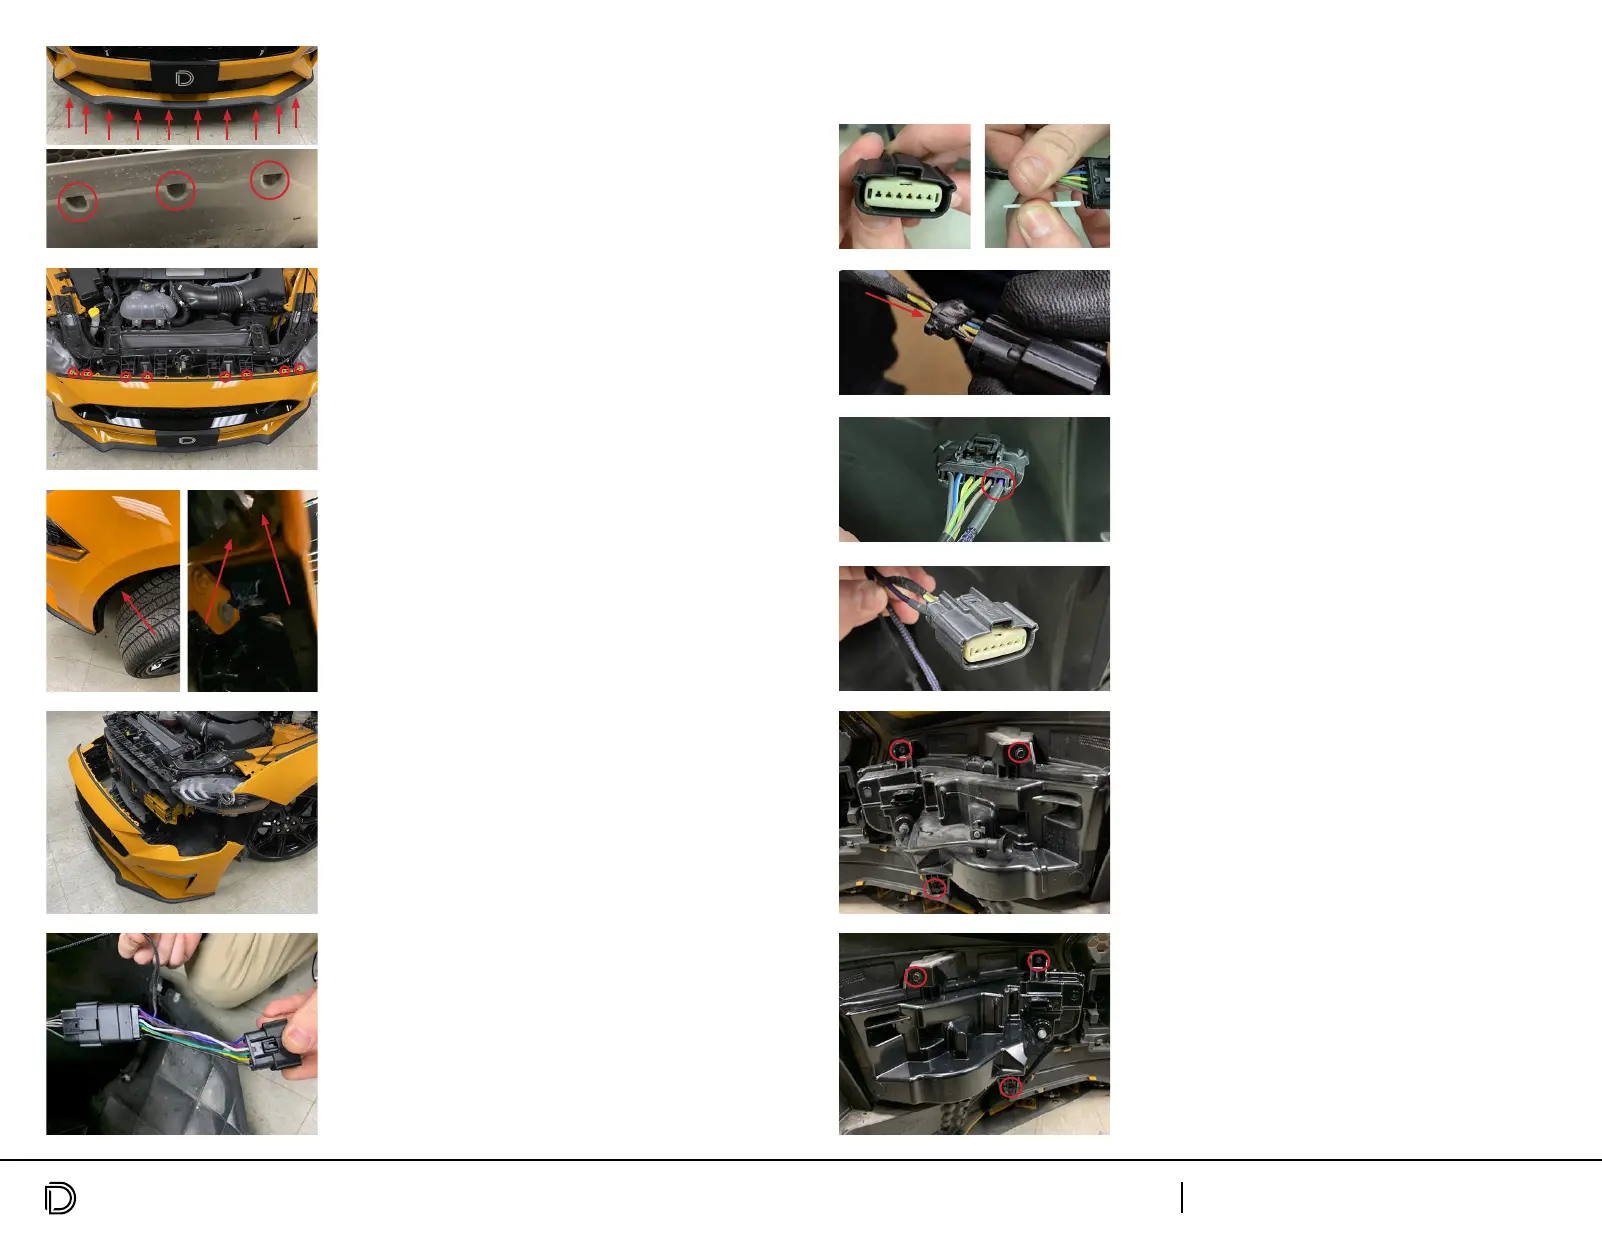
7. Unplug the factory headlight connector and install
the new DRL harness provided in the kit. Then plug
the harness back into the headlight. Do this on
both sides of the vehicle.
6. Remove the bumper cover. The cover will need
to be lifted and rotated slightly upward to fully
remove it. Disconnect the connectors from the
factory fog lamps and set the cover aside.
5. Peel back the inner fender and use a 10mm socket
to remove the two nuts securing the bumper cover
to the fender. Do this on both sides of the vehicle.
NOTE: There is a push pin in between the two nuts.
This push pin will keep the bumper cover attached to
the fender when the nuts are removed. Disconnect
the bumper cover by pulling down and forward to
release the push pin.
4. Using a 8mm and a 7/32“ socket, remove the
eight upper bolts securing the bumper cover
to the core support.
3. Using a 7mm socket, remove the fteen lower
screws holding the bumper cover to the lower
splash guard.
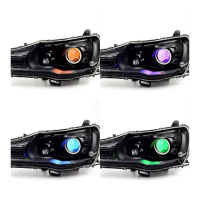
10. Install your new Elite Series combination lamps
into the factory positions. Left and Right sides are
displayed on the outer lens and on the backside
of the housings for easy identication. Reuse the
factory 7mm screws to secure the new lamps
into place.
9. Remove both factory fog lamps. Using a 7mm
socket, remove the three screws holding the factory
fog lamps to the bumper cover and set aside.
The factory screws will be reused.
8. You should nd one extra wire hanging from the DRL harness. This wire will have a
braided loom covering. The end of this wire has a metal terminal, which needs to be
inserted into the fog lamp connector, as follows:
A. Locate the fog lamp connector. Remove the white
retaining clip, by lifting the tabs on each side using
the provided small screwdriver.
B. Remove the white sealing plug from pin 6, by
prying up on the release tab from the front, while
pulling the sealing plug from the back. Set aside.
NOTE: If the white sealing plug is not present, you
may need to remove the knockout from that pin slot.
Access the knockout by gently prying o the back
plate of the connector with the small screwdriver.
Remove the knockout by pushing it out from the
back. Reinstall the back plate onto the connector.
C. Align the terminal from the DRL harness, placing
it into position 6 of the fog lamp connector. Ensure it
is rotated to match the other connectors, with thick
part at the bottom. It should clip into place when
fully seated.
D. Reinstall the retaining clip. You should not need
to force it into position. If it does not clip into place,
remove the clip and inspect the terminals, making
sure they are correctly aligned.
Repeat steps A-D on the other side of the vehicle.
 Loading...