us.diono.com/installation-videos
1-855-463-4666
34
35
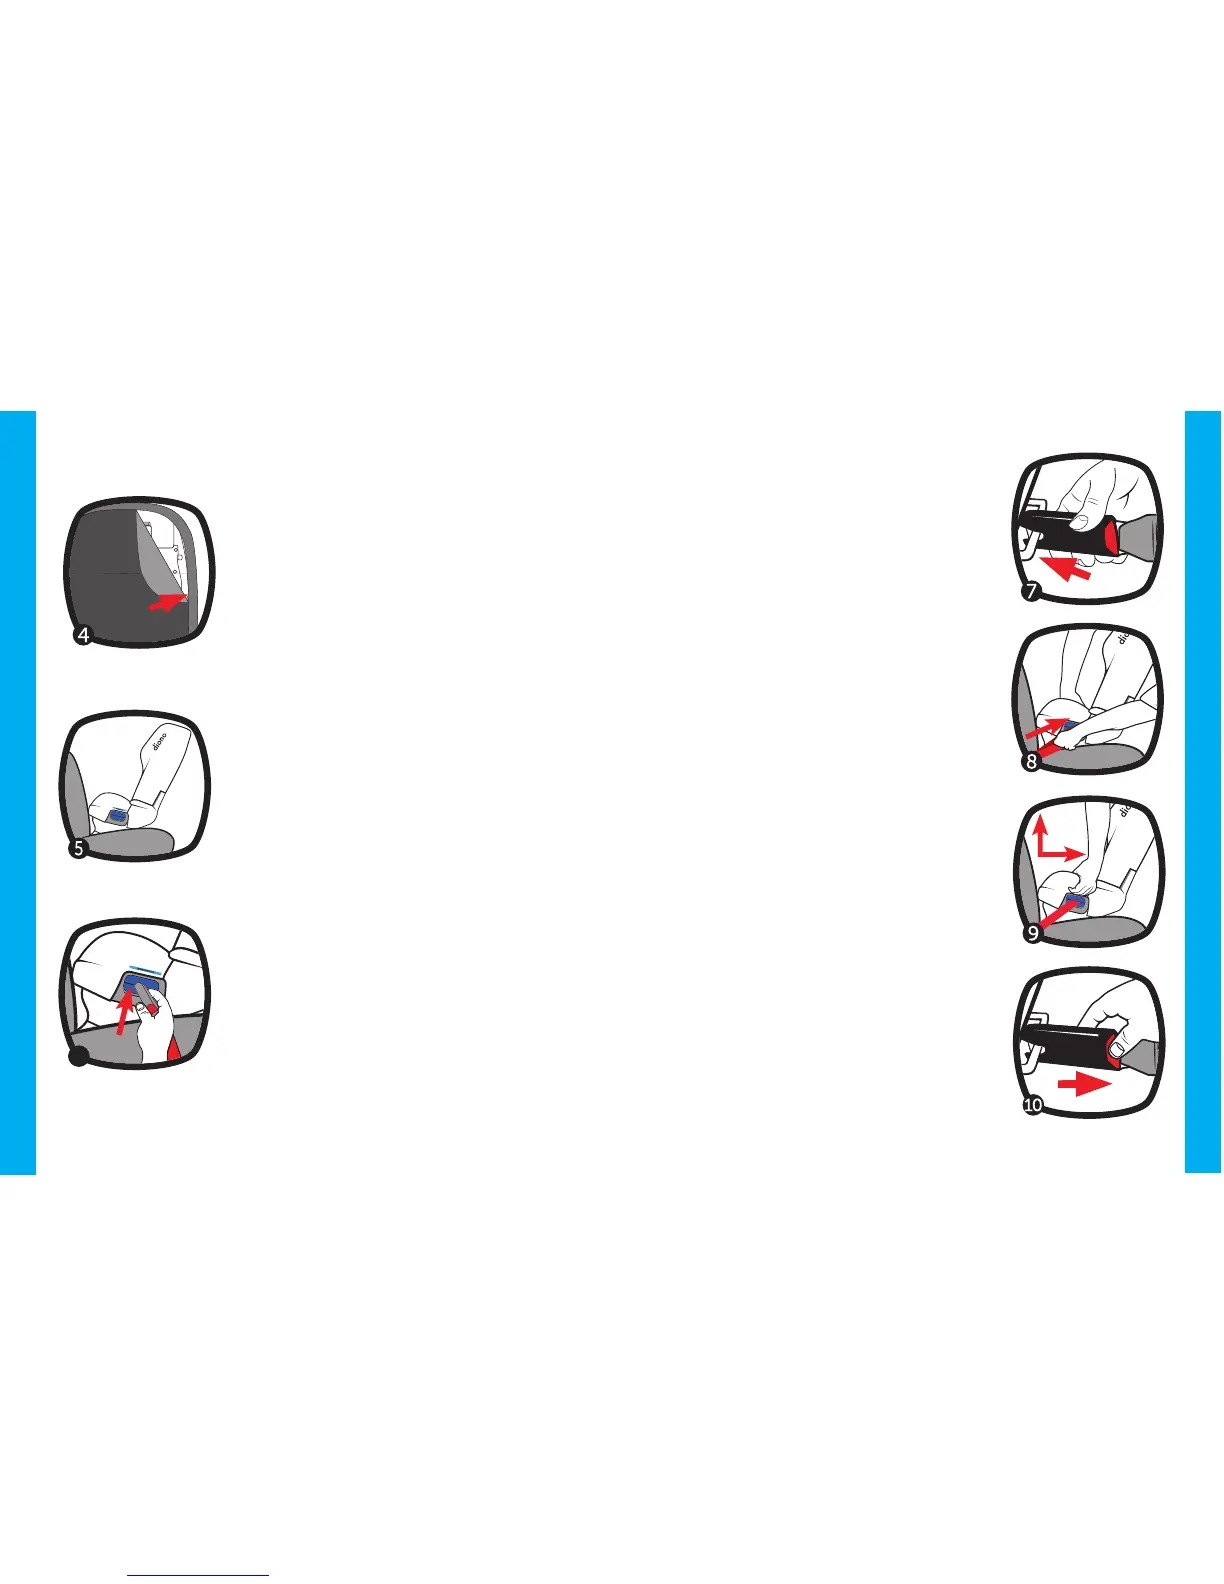
4. Place LATCH for access to Rear-
facing belt path. Unzip the pocket
to the right side of the latch storage
area, this will allow you to move
the latch connectors down to the
rear-facing belt path. Feed LATCH
anchors down, keeping it under the
cover and out the bottom. Once
completed, close the zip pocket.
5. Place Car Seat Rear-Facing in
Back Seat of the Vehicle
Place rear-facing in vehicle seat
and center the car seat between
the lower LATCH anchors. The
base should sit flat on the vehicle
seat.
6. Locate the LATCH Strap in the
Rear-Facing Belt Path.
Thread the LATCH strap through
the rear-facing belt path (marked
with the blue label) and out the
other side. The LATCH belt should
lie flat and not be twisted.
REAR FACING
7. Attach LATCH Connectors to
Vehicle’s Lower LATCH Anchors
and listen for audible click to
confirm engagement.
8. Tighten the LATCH Strap
Press down firmly in the center of
the car seat while tightening the
LATCH strap. You may need to
tighten further by pulling upwards
in-line with the belt path as shown.
9. Test for Tightness
Grab the side of the seat with
one hand where the LATCH strap
is and slide the car seat side-to-
side and front-to-back. If the seat
moves less than 1 inch (2.5 cm),
it is tight enough. Do not test by
grasping top of the seat.
10. To Remove LATCH Strap From
Vehicle
Push in on the red buttons on the
LATCH connects and pull them o
the anchor bars.
REAR FACING
6