14
COOLED AIR
INTAKE AIR
WALL
WALL
HEAT
RADIATION
SLEEVE
Over 20"
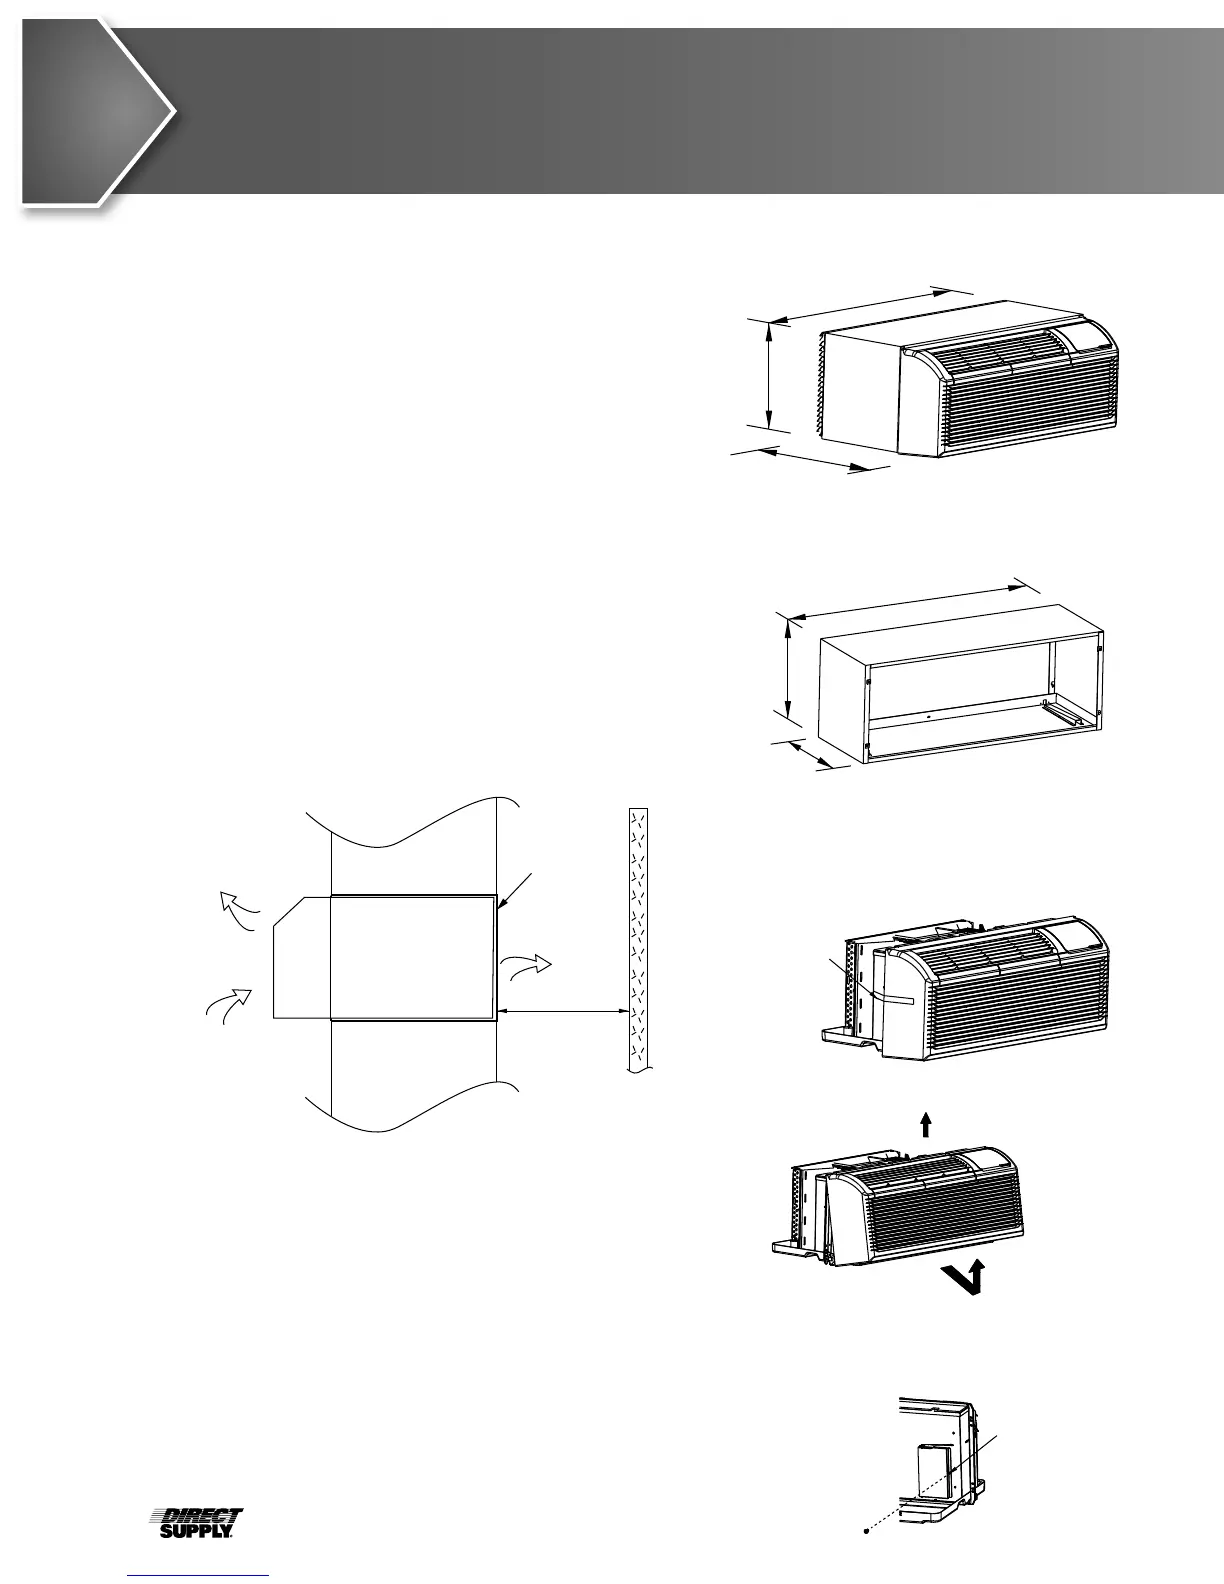
Fig. 2
Fig. 3
Shipping
tape
Fig. 5
Shipping
screw
Fig. 4
42inch/1067mm
16inch/
408mm
23.9inch/606mm
42inch/1067mm
16inch/408mm
14.8inch/376mm
1
2
Installation
How To Install The Unit
• CAUTION: There are sharp edges that can cause
serious cuts. When lifting the air conditioner, it is
HEAVY. Use two people to lift.
• If installing into an existing sleeve, you should
measure the wall sleeve dimensions prior to
installation to ensure proper fit.
• Install the new air conditioner according to these
installation instructions to achieve the best
performance. All wall sleeves used to mount the new
air conditioner must be in good structural condition
and have a rear grille that securely attaches to the
sleeve or the flange of the sleeve to secure the new
air conditioner.
• If installing into an existing sleeve, remove all baffles
from the rear grille prior to installation of the PTAC.
• To avoid vibration and noise, make sure the unit is
installed securely and firmly.
• When installing the sleeve, make certain there is
nothing within 20 of the back that would interfere with
heat radiation and exhaust airflow. (See Fig.1)
PREPARATION OF SLEEVE ASSEMBLY (optional)
• Refer to the installation instructions of sleeve assembly
for details.
PREPARATION OF REAR GRILLE ASSEMBLY (optional)
• Refer to the installation instructions of rear grille
assembly for details.
UNIT INSTALLATION
• Carefully remove shipping tapes from the front panel.
(See Fig.3)
• Remove the front panel. (See Fig.4)
• Remove shipping screw from the vent door. (See Fig.5)
Dimension of air conditioner
Dimension of sleeve assembly (optional)
• Pull out at the bottom to release it from the tabs 1
• Then lift up 2
COOLED AIR
INTAKE AIR
WALL
WALL
HEAT
RADIATION
SLEEVE
Over 20"
Fig. 2
Fig. 3
Shipping
tape
Fig. 5
Shipping
screw
Fig. 4
42inch/1067mm
16inch/
408mm
23.9inch/606mm
42inch/1067mm
16inch/408mm
14.8inch/376mm
1
2