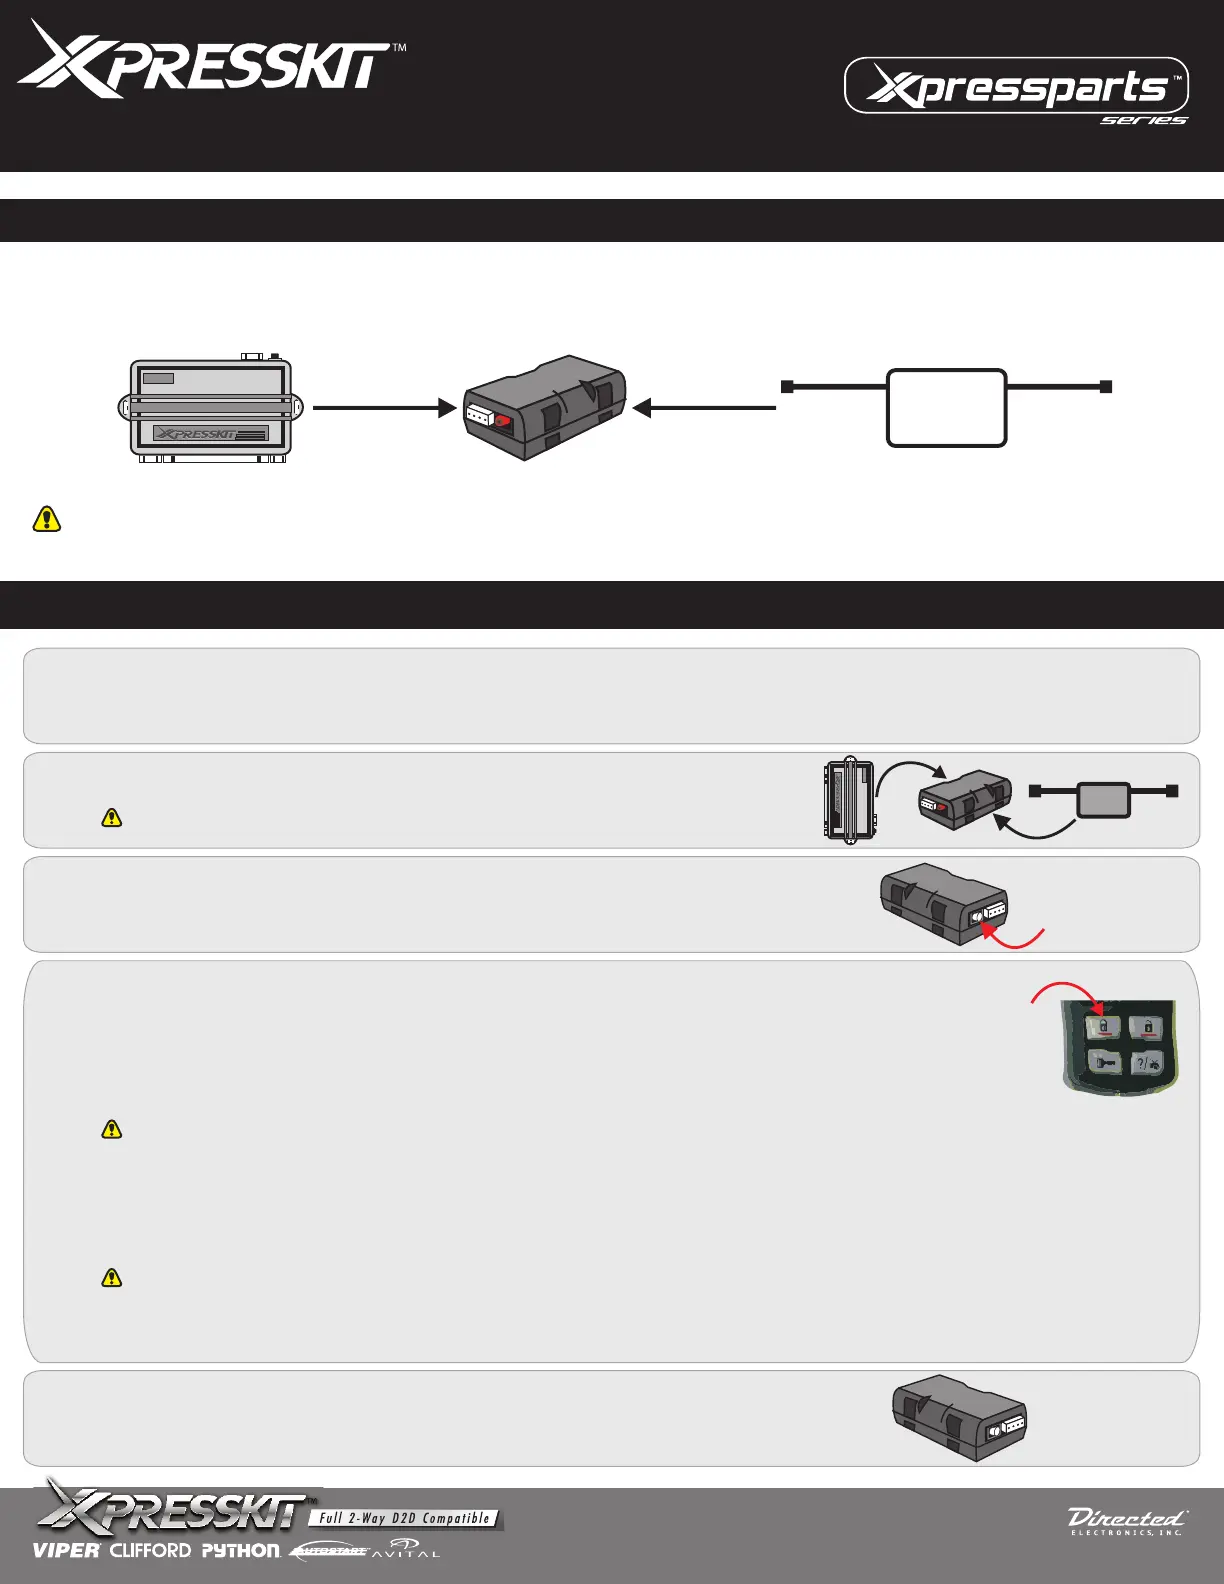
HOW TO PROGRAM A REMOTE INTO XL202
3
Press and hold the programming button of the XL202 to enter in programming mode.
XL202
PRESS & HOLD
PROGRAMMING
BUTTON
5
When programming is finished, release programming button on the XL202.
XL202
RELEASE
PROGRAMING
BUTTON
4
1
Refer to the D2D installation instructions for the module to make all the necessary connections and ensure power is supplied to
the XL202.
2
Antenna
XL202
1. Connect the antenna to module with the antenna harness (number 1 in the diagram).
2. Connect the module to the 4-pin connector of the using the D2D harness (number 2 in the diagram).
3. Connect wires to the vehicle according to the firmware install guide.
XL202
XL202
HOW TO CONNECT
Antenna
HARNESS #2 HARNESS #1
D2D
Antenna
LED
side view
XL202
Page 2
XK modules: The power ( ) must be applied last to the XK module.12V
CANMAX400: The RFTD feature must be turned on to have full two-way communication.
Plug the module and the antenna in the XL202.
See page 3 for more information on how to switch between modes.
Press one of the remote buttons while holding the programming button to program the remote
into the XL202; the LED flashes once.
- Unlock: driver priority unlock.
If the Unlock button is pressed once, the driver door is unlocked; if pressed twice however, all
doors are unlocked.
- Any other button: unlock all.
* To program extra remotes, repeat steps 3 & 4 for each remote.
(A maximum of four (4) remotes can be programmed in an XL202.)
PRESS ONE OF
THE BUTTONS
ON THE REMOTE
Important Note
There are 4 memory slots. Every time you program a new remote, you access the next memory slot, empty or not.
After the 4th one is reached, it will go back to the 1st one, and so on.
Each remote has its own unlock setting, once decoded/learned. If for some reason, the same remote is programmed in slot #1 and #3,
slot #1 is decoded first so the associated function for the unlock feature will be from slot #1, not from #3. It is preferable to erase all
remotes if you are unsure.
The feature behavior may vary depending on which firmware you are using.
Rev.: 20091124
© 2009 Directed Electronics. All rights reserved.
MODEL: XL202
FIRMWARE: RFTDAF
 Loading...