Preparatory work
Unpacking and assembling
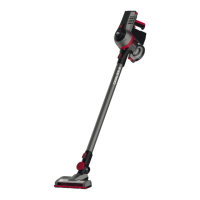
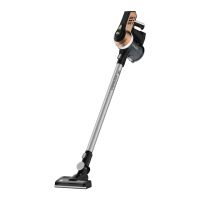
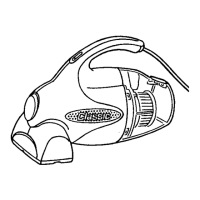
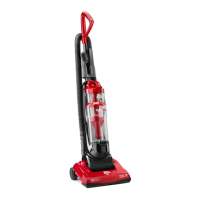
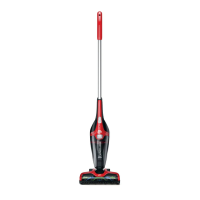
➊ Check that the contents are complete (Fig. 1 ,
Fig. 2 for optional accessories). If you notice any
transport damage or if anything is missing, contact
your dealer immediately. ➋ Connect the appliance
(Fig. 1 /1) to the suction tube (Fig. 1 /2, Fig. 3 ) and
the lower connection piece of the suction tube by
inserting it into the stop catch on the floor nozzle
(Fig. 4 ) so that you hear and feel it click into place.
NOTE:
If you wish to detach the floor nozzle or the suc-
tion tube later, press in the release catch to dis-
engage the components from each other. Then,
pull the components apart.
NOTE:
Place the appliance in a corner of the wall, place
it flat on the floor or insert the appliance into the
wall mount (Fig. 8 ) so that it does not topple
over.
Charging the rechargeable battery
WARNING!
Risk of fire or explosion! Only use the mains
adapter included in the scope of supply to
charge the rechargeable battery.
➊ Connect the mains adapter cable to the charging
socket on the appliance (Fig. 5 ). ➋ Connect the
mains adapter to a socket (Fig. 6 ). ➔ The “ON/OFF”
LED lights up constantly in red to indicate the charg-
ing process (Fig. 7 ). ➌ After a maximum of
5.5 hours, the “ON/OFF” LED switches to green.
➔ The rechargeable battery is then charged.
➍ Disconnect the mains adapter from the socket (to
save electricity) and disconnect the mains adapter
cable from the appliance.
Installing the wall mount
➊ Connect the handle of the appliance to the wall
mount (Fig. 8 ). ➋ Place the appliance against the
wall, together with the wall mount, so that the floor
nozzle rests flat on the floor. ➌ Mark the positions for
the drilled holes with a pencil.
➍ Drill the holes. ➎ Remove the wall mount from the
handle and screw it to the wall with suitable fasten-
ing accessories. ➏ Insert the hole covers.
Switching the appliance on/off
NOTE:
When the“ON/OF” LED (Fig. 7 ) flashes red, the
rechargeable battery charge is low and the ap-
pliance will switch off within 20 seconds. Fully
charge the rechargeable battery to use the appli-
ance again > „Charging the rechargeable battery“
on page 17.
▶
To switch on the appliance, press and hold the
ON/OFF button on the handle (Fig. 9 /1).
ÎÎ The motor starts. “ON/OFF” LED lights up
green.
NOTE:
You can lock the ON/OFF button so that the
appliance remains switched on permanently
(Fig. 9 /2). Do not forget to release the locking
mechanism after cleaning.
▶
To switch off the appliance, release the ON/OFF
button (Fig. 9 /1).
ÎÎ The appliance switches off. The “ON/OFF” LED
goes out.
Vacuum-cleaning floors or furniture
➊ Fit one of the following nozzles as required if
included in the scope of supply:
NOTE:
The nozzles can also be attached directly to the
connection port on the base appliance.
(Fig. 10+19 ).
• Combo floor nozzle with rotating brush for option-
al activation for hard floors and carpets (Fig. 1 /3)
CAUTION!
Make sure that the surface can withstand the
rotating brush without becoming damaged.
• Parquet brush (gentle on floors) (Fig. 2/D )
• 3-in-1 combo nozzle (brush for joints, furniture &
upholstery) (Fig. 1/4 )
• Long flexible crevice nozzle (Fig. 2/A )
• Extended flexible furniture brush (Fig. 2/B )
➋ Switch on the appliance. ➌ Vacuum-clean the floor
or the piece of furniture. ➍ Activate or deactivate the
rotating brush roller on the combo floor nozzle as re-
quired using the button on the top of the appliance
(Fig. 7 /1). ➎ Switch off the appliance.
!
Maintaining the appliance
Removing the rechargeable battery
➊ Press and hold the locking mechanism for the
rechargeable battery to release it. ➋ Remove the
rechargeable battery from the appliance (Fig. 12 ).
Emptying the dust bin
➊ Open the release catch on the connection port
to disconnect the base appliance from the suction
tube or the attached nozzles (Fig. 3 ). ➋ Hold the
appliance with the dust bin over a waste bin. ➌ Press
the locking mechanism on the dust bin cover
(Fig. 13 ). ➔ The dust bin cover opens downwards
and the dust falls out.
Cleaning the filter
NOTE:
The appliance and the filter should be cleaned
regularly in order to maintain the suction power.
➊ Press the filter
release button at the rear of the
appliance.➋ Pull the filter holder out of the appli-
ance (Fig. 14 ). ➌ Remove the filter from the mount
(Fig. 15 ). ➍ Tap out the filter and the mount over a
waste bin. ➎ Rinse out the filter under running water
(max. 40 °C). ➏ Leave the filter to dry for at least 24
hours before you insert the filter and mount into the
appliance again.
Cleaning the cyclone unit
➊ Empty the dust bin, > „Emptying the dust bin“ on
page 18. ➋ Press and hold the dust bin release catch
on the underside of the appliance
(Fig. 16 /1). ➌ Tip the dust bin towards the connec-
tion port for the suction tube and pull it downwards
(Fig. 16 ). ➍ Turn the filter fleece anti-clockwise and
pull it downwards from the cyclone unit (Fig. 17 ).
➎ Turn the cyclone unit anti-clockwise and pull it
downwards from the appliance (Fig. 18 ). ➏ Tap out
the filter fleece and the cyclone unit over a waste
bin. ➐ Use a dry cloth to remove any remaining dust
and dirt.
Inserting the cyclone unit
➊ Connect the cyclone unit to the appliance so that
the two arrows on both components line up. ➋ Turn
the cyclone unit clockwise so that it clicks into place.
➌ Attach the filter fleece to the cyclone unit with the
seal facing away from the appliance. ➍ Turn the filter
fleece clockwise to lock it in place. ➎ Place the dust
bin on the appliance in a slightly inclined position.
➏ Push the dust bin towards the handle to lock it in
place.
Removing and cleaning the brush roller
➊ Release floor nozzle as necessary and remove it
from the suction tube (Fig. 4 ). ➋ Push the brush
locking mechanism on the underside of the floor
nozzle to the side (Fig. 20 ). ➌ Lift the brush roller
from the floor nozzle (Fig. 21 ). ➍ Remove any dirt
and hairs from the floor nozzle and from the brush
roller. If necessary, you can carefully use a pair of
scissors as an aid.
Accessories
• Hygienic exhaust filter - 0698002 (Fig. 22 /A )
• Brush roller- 0698413 (Fig. 22 /B )
• Separator with filter - 0698401 (Fig. 22 /C )
• Dust bin assembly - 0698405 (Fig. 22 /D )
• Wall mount - 0698011 (Fig. 22 /E )
• Mains adapter - 0698003 (Fig. 22 /F )
• Rechargeable battery - 0698004 (Fig. 22 /G )
Troubleshooting
Before you contact our customer service department
or send the appliance to the Dirt Devil customer
service department, you will find a lot of additional
information in the service area of our website which
will help you solve problems:
www.dirtdevil.de/service
WARNING!
Switch off the appliance before you start trou-
bleshooting. Never use a faulty appliance, mains
adapter or rechargeable battery.
!
17
18