18
5 Maintenance
5 Maintenance
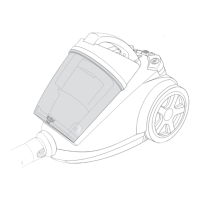
5.1 Emptying and cleaning the dust container
It is best to empty the dust container after each vacuuming session.
However, empty the dust container at the latest if:
- the "MAX" marking (Fig. 9/B1) has been reached; or
- the cleaning indicator (Fig. 1/26) is illuminated; or
- before prolonged storage or dispatch.
1. Switch off the appliance , chapter 4.3, „Switching off“.
2. Push the release button for the dust container (Fig. 9/A).
3. Remove the dust container by pulling it upwards out of its holder.
4. Empty the dust container by holding it low over a dustbin and only then
press the release button (Fig. 9/B).
5. Remove any residual dust from the dust container using a dry cloth or
a soft brush, e.g. the supplied furniture brush.
6. Close the dust compartment bottom plate.
7. Put the dust container back into its holder (Fig. 9/C).
You will feel and hear it snap into place.
5.2 Cleaning filter inserts
It is best to clean the filter inserts each time you empty the dust container, chapter 5.1, „Emptying and cleaning the dust container“.
Clean the filter inserts at the latest when the cleaning indicator (Fig. 1/26) lights up.
1. Switch off the appliance and empty the dust container, chapter 5.1,
„Emptying and cleaning the dust container“.
2. Remove the premotor filter from its holder (Fig. 10/A).
3. Unlock the cover of the dust container by rotating it in the direction of
the arrow
(Fig. 10/B).
4. Remove the protective motor filter from the dust container (Fig. 10/C).
5. Unscrew the filter screen
and lift it out of the dust container
(Fig. 11/A).
6. Lift the cyclone unit out of the dust container (Fig. 11/B). The cyclone
unit does not have to be unlocked for this purpose. It merely sits on the
dust container.
7. Remove larger accumulations of dirt by hand and brush the filter inserts
using the supplied furniture brush.
8. If the filter inserts are still dirty after this dry-brushing procedure, thor-
oughly rinse them by hand until all dirt is gone.
9. If one of the filter inserts is damaged, replace it with a new one
(chapter 5.4, „Spare parts and accessories“).
10. Put the premotor filter container back into its holder (Fig. 10/C).
11. Put the cleaned cyclone unit back into the dust container (Fig. 11/C). In
the process, make sure that its inlet opening lines up with the opening
of the dust container (Fig. 11/C).
If the cyclone unit does not attach completely when lowered, rotate it
slightly back and forth and then engage it securely.
12. Re-insert the filter in a manner such that the lock symbols line up
(Fig. 12/A).
13. Then re-tighten the filter screen
(Fig. 12/A).
14. Place the protective motor filter dust container (Fig. 12/B).
15. Fit the cover in such a way that the fitting mark on the cover () exactly
corresponds to the lock symbol ( ) on the dust compartment (Fig. 12/
C).
16. Fix the cover by rotating it in the direction of the arrow
(Fig. 12/C).