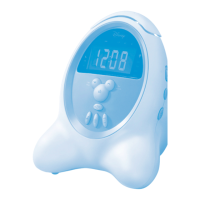
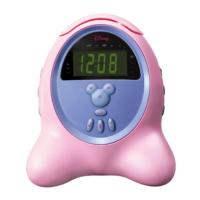
This document describes the Disney DCR5000-C Clock Radio, an electronic device designed for timekeeping, radio listening, and alarm functions, featuring Disney-themed alarm options.
Function Description:
The Disney DCR5000-C is a clock radio that combines a digital clock with AM/FM radio capabilities and an alarm function. It allows users to set the current time, tune into radio stations, save preset radio stations, and set alarms to wake up to either a radio station or one of five Disney alarm melodies. The device also includes a snooze function for temporary alarm silencing and a sleep function to automatically turn off the radio after a set period.
Important Technical Specifications:
- Power Source: 120V, 60Hz AC outlet.
- Battery Backup: Requires two (2) AAA size batteries (not included) for internal operation during power outages, maintaining time settings without displaying them.
- Radio Bands: AM and FM.
- Radio Presets: Up to 10 preset stations for each band (AM and FM).
- Alarm Types: Wake to radio or one of five Disney alarm melodies.
- Snooze Duration: 10 minutes.
- Sleep Timer: Adjustable up to 90 minutes in 10-minute intervals.
- Display: Digital clock display with two levels of brightness (Low/High).
- Time Display Format: Selectable 12-hour or 24-hour format.
Usage Features:
Quick Reference:
- Set Radio Preset/Disney Alarm Type: Press the "Radio Preset Set/Disney Alarm Type" button.
- Activate Snooze: Press the "Snooze" button.
- Set Clock/Alarm Time: Press the "Clock Set/Alarm Set" button.
- Adjust Hour/Decrease Frequency: Press the "Tuning Down/Hour" button.
- Adjust Minute/Increase Frequency: Press the "Tuning Up/Minute" button.
- Turn Radio On/Off: Press the "Radio On/Off" button.
- Select Wake Sound (Radio or Disney Melodies): Press the "Alarm Type" button.
- Increase Radio Preset: Press the "Radio Preset Up" button.
- Select 12/24 Hour Time Display: Press the "Display (12/24hr)" switch.
- Select Low/High Display: Press the "Display Low/High" button.
- Adjust Volume: Use the "Volume Control."
Installation:
- Unravel the AC cord and connect it to a 120V, 60Hz AC outlet. The clock display will illuminate and "0:00" or "12:00" will blink.
- For battery backup, remove the battery compartment door (located at the bottom of the unit) by inserting a small screwdriver or paper clip into the tab.
- Insert two (2) AAA size batteries, observing polarity markings.
- Replace the battery compartment door.
- Periodically check battery condition by disconnecting and reconnecting the AC cord; if preset times do not appear, batteries may be dead or improperly connected.
Listening to the Radio:
- Press the "Radio On/Off" button to turn the unit on. The AM or FM indicator will light.
- Press the "AM/FM Band" button to select AM or FM.
- Tune a station by pressing the "Tuning Up/Minute" or "Tuning Down/Hour" button. Press and hold either button to scan and stop on the next strong station.
- Adjust the volume using the "Volume Control."
- Press the "Radio On/Off" button to turn the unit off.
- For FM reception, extend the FM antenna wire (located in the battery compartment).
- For AM reception, turn the unit for better AM reception.
Setting Radio Presets (10 for each band):
- Tune a station.
- Press the "Radio Preset Set/Disney Alarm Type" button once; the Preset Number will blink.
- Press the "Radio Preset Up" button to select a radio preset number.
- Press the "Radio Preset Set/Disney Alarm Type" button again to confirm and set the preset.
Recalling Radio Presets:
- Press the "Radio Preset Up" button repeatedly until the desired Radio Preset appears in the display.
Setting or Resetting the Actual Time:
- With the unit off, press the "Clock Set/Alarm Set" button once. The time indicator will light and the display will blink.
- Press the "Tuning Down/Hour" button to set the hour and the "Tuning Up/Minute" button to set the minute. Ensure the appropriate AM/PM indicator is lit if using 12-hour mode.
- Wait 10 seconds, or press the "Clock Set/Alarm Set" button again, and the time will be set.
Setting or Resetting the Alarm Time:
- With the unit off, press the "Clock Set/Alarm Set" button twice. The alarm time indicator will light and the display will blink.
- Press the "Tuning Down/Hour" button to set the hour and the "Tuning Up/Minute" button to set the minute. Ensure the appropriate AM/PM indicator is lit if using 12-hour mode.
- Wait 10 seconds, or press the "Clock Set/Alarm Set" button again, and the time will be set.
Setting Alarm to Wake to Radio:
- Set the alarm time as instructed above.
- Select a radio station and make sure the volume control is set as desired (not too low).
- Press the "Alarm On/Off" button once. The Alarm On and Radio (Alarm) indicators will light.
- When the actual time matches the selected preset alarm time, the radio will automatically turn on.
- To shut off the alarm, press the "Alarm On/Off" button.
Setting Alarm to Wake to Disney Alarm Music:
- Set the alarm time as instructed above.
- Press the "Alarm On/Off" button once. The Alarm On and Radio (Alarm) indicators will light.
- Press the "Alarm Type" button repeatedly to cycle through the five Disney alarm choices.
- Press the "Radio Preset Set/Disney Alarm Type" button to confirm.
- When the actual time matches the selected preset alarm time, the selected tone will play.
- Note: The unit will automatically set the volume to a preset level if it's too low to be heard.
- To shut off the alarm, press the "Alarm On/Off" button.
Shutting Off the Alarm:
- To shut off the alarm for the day (without setting it for the next day), press the "Alarm On/Off" button once.
- To reset the alarm for the next day, press the "Alarm On/Off" button again until the Alarm On indicator lights.
Snooze Function:
- Press the "Snooze" button to temporarily turn off the alarm. The alarm will reactivate automatically after 10 minutes. The Snooze indicator will light when activated.
Sleep Function:
- Tune the desired radio station.
- Press the "Sleep" button. The Sleep indicator will light and "10" (minutes) will appear on the display. The unit will play for 10 minutes and then turn off.
- To adjust the sleep time (up to 90 minutes in 10-minute intervals), repeatedly press the "Sleep" button.
- To cancel Sleep, press the "Radio On/Off" button.
Display Low/High:
- Repeatedly press the "Display Low/High" button to switch between two levels of brightness for the display.
Maintenance Features:
General Care:
- Clean the unit with a damp cloth; do not use liquid or aerosol cleaners.
- Avoid using attachments not recommended by the manufacturer.
Battery Precautions:
- Use only the specified size and type of batteries (AAA).
- Install batteries with correct polarity.
- Do not mix different battery types (e.g., Alkaline and Carbon-zinc) or old with new batteries.
- Remove batteries if the device will not be used for a long period to prevent leakage.
- Do not attempt to recharge non-rechargeable batteries.
Safety Precautions:
- Dangerous Voltage: The lightning flash symbol indicates uninsulated dangerous voltage within the product.
- Attention: The exclamation point symbol indicates important operating and maintenance instructions.
- Risk of Electric Shock: Do not open the cover or back; refer servicing to qualified personnel.
- Placement: Place the unit on a stable surface. Avoid direct sunlight, heat sources (radiators, electric heaters, other stereo equipment), areas lacking ventilation, dusty places, constant vibration, or humid/moist places.
- Accessories: Use only manufacturer-recommended carts, stands, tripods, brackets, or tables.
- Ventilation: Ensure cabinet slots and openings are not blocked to prevent overheating. Do not place on beds, sofas, rugs, near radiators/heat sources, or in built-in installations without proper ventilation.
- Power Sources: Operate only from the specified power source.
- Grounding/Polarization: The product has a polarized AC plug (one blade wider); do not defeat this safety feature.
- Power-Cord Protection: Route power cords to prevent walking on or pinching, especially at plugs and receptacles.
- Outdoor Antenna: Do not connect an outdoor antenna to avoid electric shock.
- Lightning: Unplug the unit during lightning storms or when unused for long periods.
- Object and Liquid Entry: Never push objects into openings or spill liquids on the product.
- Servicing: Do not attempt to service the product yourself. Refer all servicing to qualified personnel.
- Replacement Parts: Use only manufacturer-specified replacement parts. Unauthorized substitutions may result in fire, electric shock, or other hazards.
- Safety Check: After any service, ask the service technician to perform safety checks.
- Wall or Ceiling Mounting: Mount only as recommended by the manufacturer.
- Damage Requiring Service: Unplug the unit and refer to qualified service personnel if the power-supply cord/plug is damaged, liquid has been spilled, objects have fallen into the product, the product has been exposed to rain/water, it does not operate normally, or it has been dropped.
- Cable TV System Installer: Note to CATV system installer: Article 820-40 of the NEC provides guidelines for proper grounding.
- Power Lines: Do not locate an outside antenna system near overhead power lines or other electric light/power circuits.
- Surge Protectors: It is recommended to use a surge protector for AC connection. Lightning and power surges are not covered under warranty.
Troubleshooting Guide:
- Power does not come on: Insert AC line cord into AC outlet.
- No sound (Radio): Press Radio On/Off button, increase volume, extend FM antenna, turn unit for better AM reception.
- Noise or sound distorted on AM or FM: Turn radio for better AM reception, extend FM antenna wire.
- Flashing time (Clock): Check batteries, replace if necessary.
- Clock not set: Set the clock.
- Alarm does not turn on: Press Alarm On/Off button until indicator lights, set alarm time.