Do you have a question about the diversey QFM and is the answer not in the manual?
Open the QFM by inserting the "C"-shaped steel clip into the front cover and lifting it upward.
Press the clip on the backplate inwards to release the proportioner from the backplate.
Position the QFM vertically on the wall and drill three holes for mounting slots or keyholes.
Instructions for connecting the water inlet, including swapping sides if necessary.
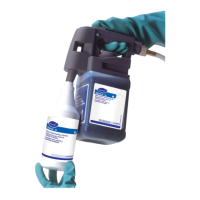
Steps for attaching the discharge tube and the pick-up tube to the unit.
Connecting the discharge tube to the large barb for high flow applications.
Connecting the pick-up tube for low flow applications, including the anti-foam tube.
Procedure for securely attaching the anti-foam tube to the eductor.
Guide on placing the ceramic weight and footvalve, and inserting the metering peg.
Guide to selecting metering pegs based on desired dilution ratios using provided charts.
Steps to calibrate the dilution ratio accurately using a graduated cylinder.
Procedure to switch the activation mode from momentary "Hold ON" to "Lock ON".
| Brand | Diversey |
|---|---|
| Model | QFM |
| Type | Dispenser |
| Material | Plastic |
| Operation | Manual Push |
| Mounting Type | Wall Mount |
| Color | White/Gray |
| Refillable | Yes |
| Dispenser Height | 26.6 cm (10.5 in) |
| Dispenser Width | 10.1 cm (4.0 in) |
| Dispenser Depth | 10.1 cm (4.0 in) |