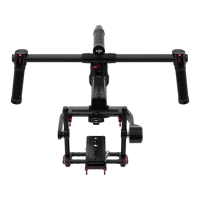
RONIN-MX
Quick Start Guide
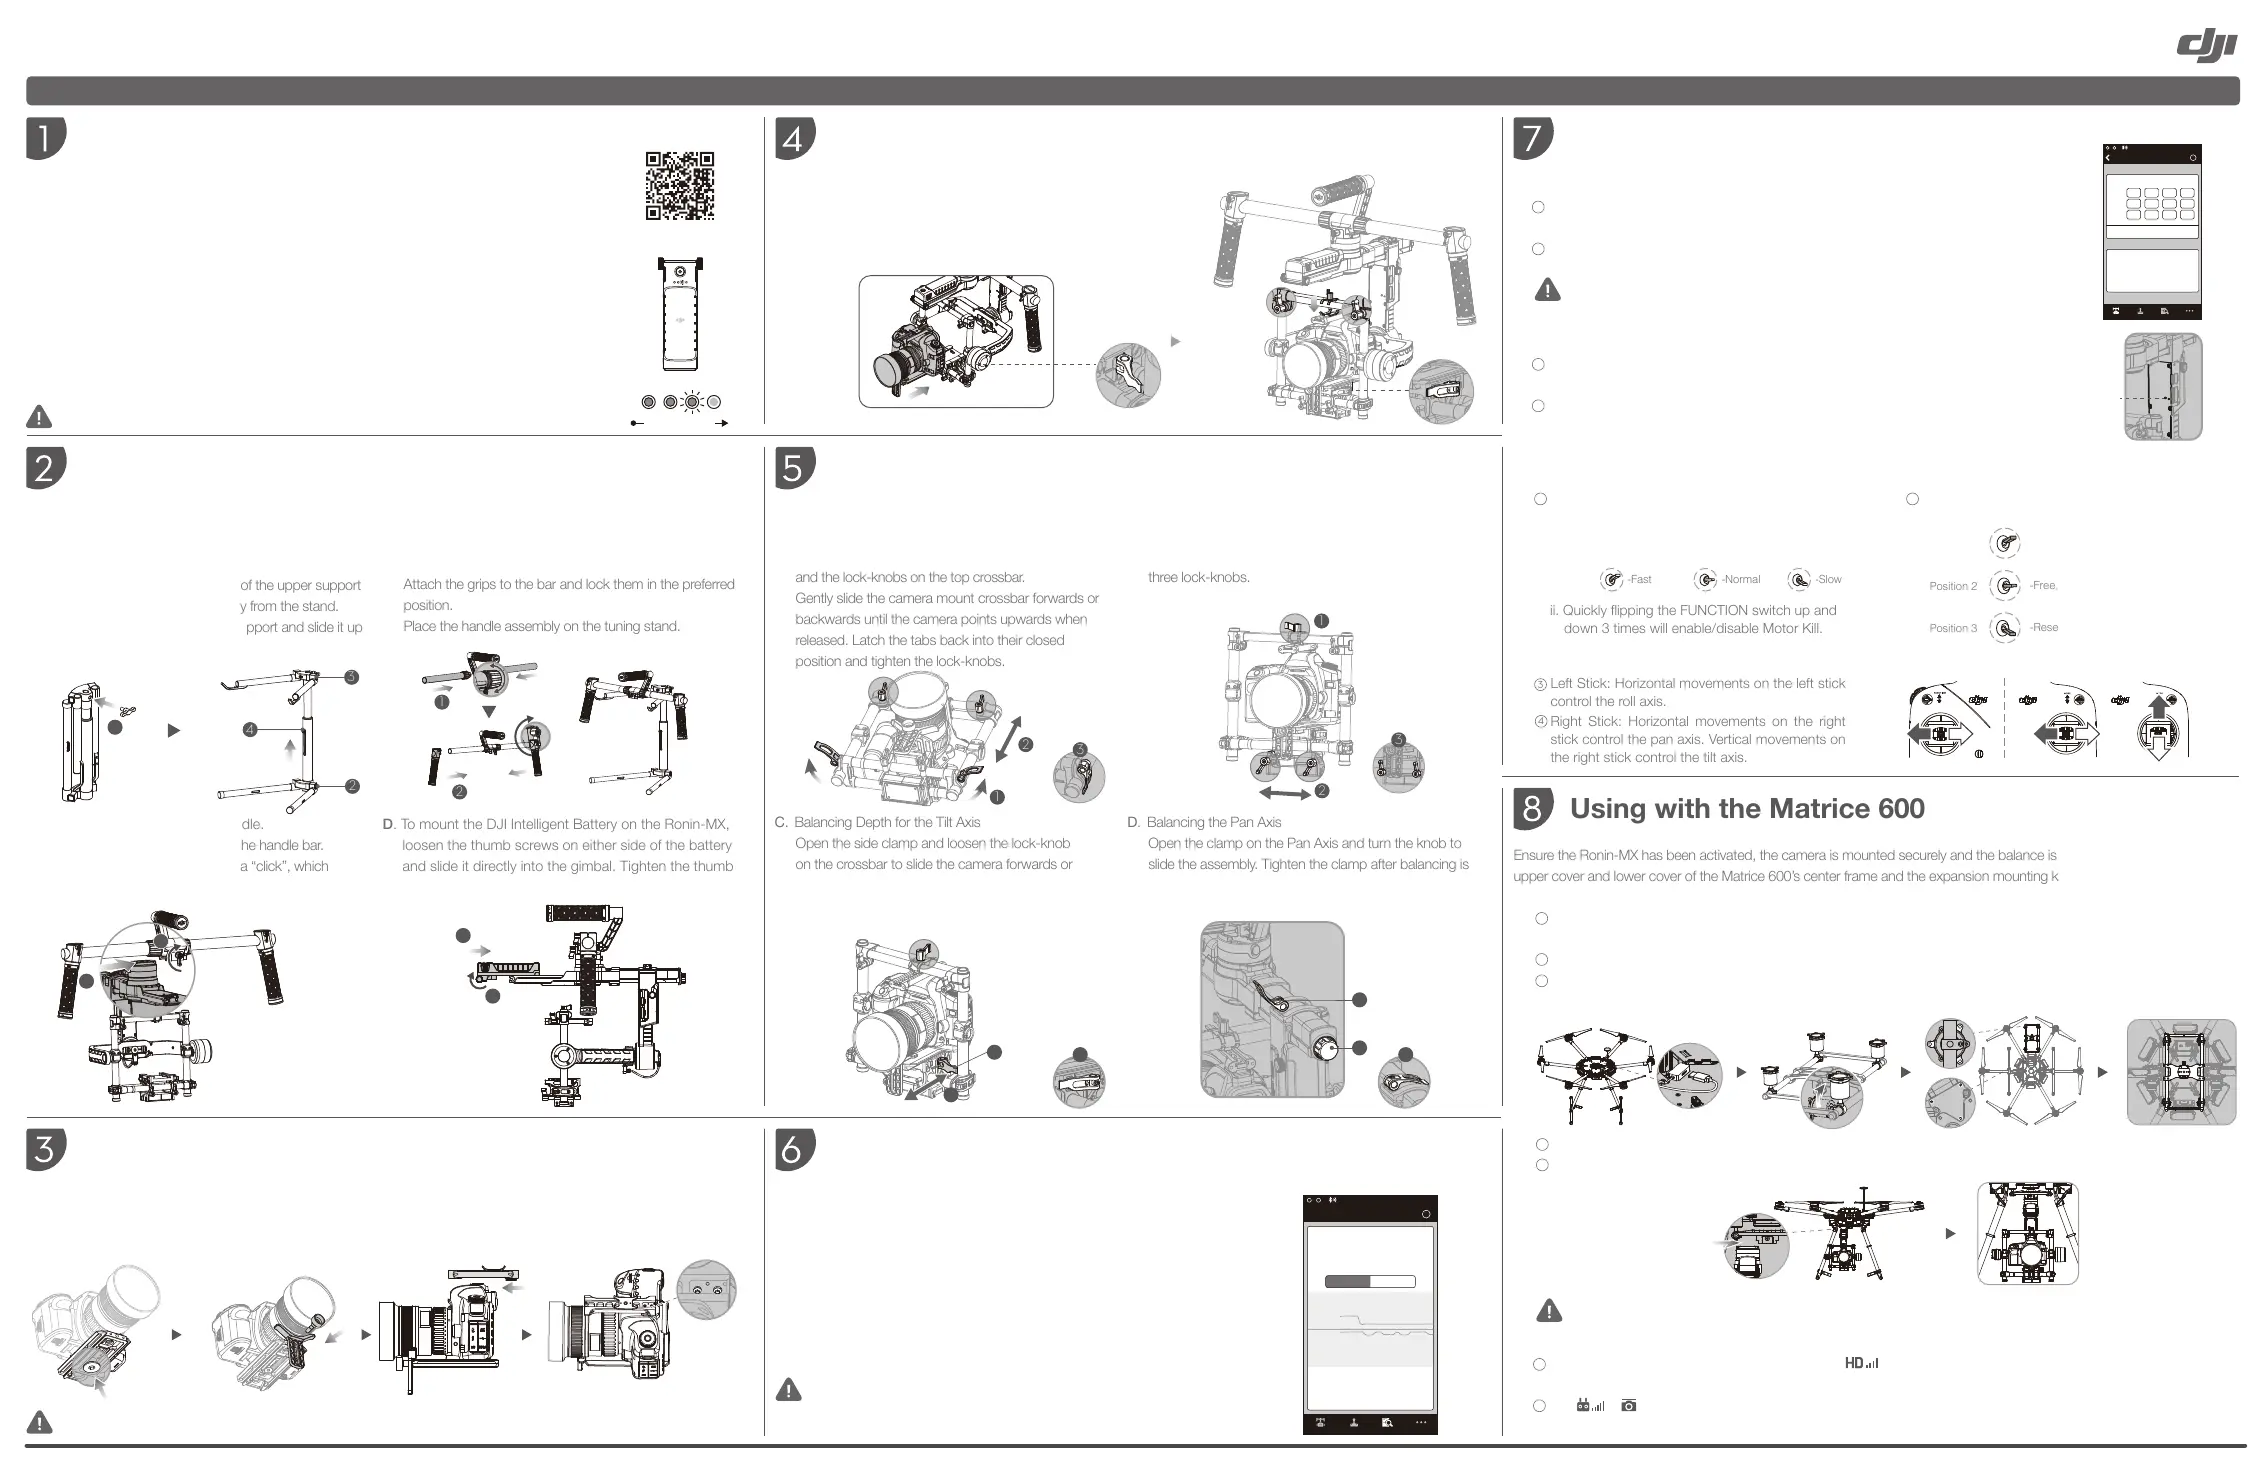
Start
A. Download and install the DJI
TM
Assistant app.
Search “DJI Assistant” on the App Store and then follow the instructions for iOS
installation. Search “DJI Ronin
TM
” on the Google Play and then follow the instructions for
Android installation.
B. Before you start using your Ronin-MX, be sure to charge the DJI Intelligent Battery first.
Pressing the Intelligent Battery power button once will display the current battery level.
Press and hold for 1 second to turn on/off.
C. On the Remote Controller, slide the power switch to the right to power on. The battery level
indicators display the current battery status. If the low voltage alert sounds, recharge the
battery via the micro USB port.
●
Use a mobile device that runs iOS 7.1 or above or Android 4.3 or above.
DJI Assistant
High
Low
Battery Level
Assembling the Ronin-MX
B. Assembling the handle bar.
Attach the bars to both sides of the top handle and
tighten the grip screws.
Attach the grips to the bar and lock them in the preferred
position.
Place the handle assembly on the tuning stand.
1
1
2
C. Attach the Ronin-MX to the handle.
Slide the gimbal horizontally into the handle bar.
Tighten the knob when you hear a “click”, which
indicates that the safety lock has engaged.
D. To mount the DJI Intelligent Battery on the Ronin-MX,
loosen the thumb screws on either side of the battery
and slide it directly into the gimbal. Tighten the thumb
screws.
2
Mounting the Camera on the Ronin-MX
A. Slide the mounting plate into the receiver until the safety lock engages.
B. Adjust the vertical position of the crossbar to meet the Camera Upper
Mounting Plate. When the camera achieves a rough balance, tighten
the camera base side clamp and the lock-knobs.
Balancing
A. Balancing the Vertical Tilt
Rotate the Tilt Axis so that the camera lens is pointing
upward and loosen the two vertical adjustment tabs
and the lock-knobs on the top crossbar.
Gently slide the camera mount crossbar forwards or
backwards until the camera points upwards when
released. Latch the tabs back into their closed
position and tighten the lock-knobs.
C. Balancing Depth for the Tilt Axis
Open the side clamp and loosen the lock-knob
on the crossbar to slide the camera forwards or
backwards until the Tilt Axis remains level and
then tighten the side clamp and lock-knob.
B. Balancing the Roll Axis
Loosen the three lock-knobs to slide the camera left or
right until the Roll Axis remains level, and then tighten the
three lock-knobs.
D. Balancing the Pan Axis
Open the clamp on the Pan Axis and turn the knob to
slide the assembly. Tighten the clamp after balancing is
completed.
1
3
2
1
2
3
1
3
2
Pairing with the DJI Assistant App
A. Power on the Ronin-MX. Switch on your mobile device’s Bluetooth and
launch the DJI Assistant app.
B. Connect your mobile device to the Ronin-MX within the DJI Assistant app.
C. Check balance on the Viewer page. If a particular motor axis indicates a
power greater than 10, rebalance the camera.
?
Viewer
Control Viewer More
14.50V
0:01:59
35.40
。
Power
Power
Angle
Angle
Pan Axis
Tilt Axis
Roll Axis
Voltage
Temperature
Time
2
-2
0
-0.01
。
-0.45
。
1.8 9
。
Gimbal
●
Activation is required when using the Ronin-MX for the first time, otherwise
the gimbal will not work. To activate your Ronin-MX, connect your mobile
device to the Internet, then enter the “More” page in the DJI Assistant app
and tap the “Activate” button.
Using the Ronin-MX on the Ground
●
You can also use the DJI Assistant software for PC/MAC to activate and configure the
Ronin-MX. For more information, refer to the User Manual.
A. DJI Assistant App Tuning
With the Ronin-MX on the tuning stand and a properly balanced camera, tap Camera Type
and select DSLR Camera or RED Camera.
Switch on/off Briefcase Mode and SmoothTrack, and adjust the control speed as needed.
1
2
Left Stick: Horizontal movements on the left stick
control the roll axis.
Right Stick: Horizontal movements on the right
stick control the pan axis. Vertical movements on
the right stick control the tilt axis.
3
4
B. Connecting the Remote Controller to the Ronin-MX
Turn on the Ronin-MX. Press the recessed Bind Button of the Ronin-MX once with a
pointed object.
Turn on the Remote Controller. If the LED on the gimbal turns solid green, the Remote
Controller and the Ronin-MX have been successfully bound.
1
2
Bind Button
?
Gimbal
Wizard
Live Data
0
0
0
0
0
0
Power
Pan
Tilt
Roll
Angle
Gimbal Control Viewer More
Configuration
55
45
45
40
40
40
0
0
0
20
60
60
Camera Type
DSLR Camera
Stiffness Strength Outfilter Control
Pan Axis
Tilt Axis
Roll Axis
4
2
3
1
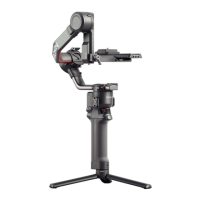
A. Deploy the tuning stand as shown. Tighten the knob.
Press the buttons on the outside of the lower legs and
rotate the legs downward, away from the stand. Then
press the buttons on the outside of the upper support
arms and pull them upward, away from the stand.
Press the button on the vertical support and slide it up
to extend the stand.
1
2
1
2
3
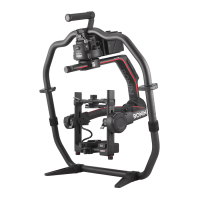
Using with the Matrice 600
Ensure the Ronin-MX has been activated, the camera is mounted securely and the balance is adjusted properly. Ensure the
upper cover and lower cover of the Matrice 600’s center frame and the expansion mounting kit have been removed.
A. Mounting the Ronin-MX onto the Matrice 600
Connect one end of the provided CAN cable to the CAN1 port on the Matrice 600’s main controller, and pull the other
end through the outlet of the center frame. Then re-mount the Matrice 600’s upper and lower covers.
Adjust the Ronin-MX vibration absorbtion mounting plate, then tighten the screws on the connector.
Mount the vibration absorber onto the bottom of the Matrice 600 with the lock-knob facing forward, then tighten the 12
vibration absorber mounting screws provided.
1
2
3
Slide the gimbal into the gimbal connector of the vibration absorber, then tighten the lock-knob when you hear a “click”.
Connect the CAN cable to the CAN2 port on the Ronin-MX.
4
5
●
Be sure the Ronin-MX is mounted properly and firmly, and all the connections are correct and will not obstruct the
Ronin-MX’s movements.
B. DJI GO App Tuning
Set the App Output Mode in the DJI GO app: Tap , disable the EXT Port, and then adjust the Bandwidth
Allocation to ensure that the “HDMI” percentage is more than 0%. Set the App Out Mode to HDMI.
Tap > > Camera Type to configure the gimbal.
1
2
C. Use the Matrice 600’s Remote Controller to control the Ronin-MX.
Mounting the Camera on the Mounting Plate
A. Attach the camera to the mounting plate and tighten the screws.
B. Attach the lens support to the mounting plate. Apply upward pressure to the lens support and tighten the screw.
C. Mount the Camera Upper Mounting Plate to the top of the camera through the hot shoe and then tighten the screws.
●
The steps above are suitable for most cameras. When mounting a RED or ARRI camera, the proper camera accessories
must be used.
MODE Switch: For toggling SmoothTrack.
C. Remote Controller Operation
2
Position 1
-Free, SmoothTrack Off
Position 3
-Reset to Center, SmoothTrack On
Position 2
-Free, SmoothTrack On
FUNCTION Switch:
i. Select the SmoothTrack speed according to the
following positions:
ii. Quickly flipping the FUNCTION switch up and
down 3 times will enable/disable Motor Kill.
1
Position 1
-Fast -Normal -Slow
Position 2 Position 3
 Loading...