1144 INSTALLATION GUIDE | DIGITAL MONITORING PRODUCTS 3
ADDITIONAL INFORMATION
When a receiver is installed, powered up, or the panel is reset, the supervision time for transmitters, including key fobs, is
reset. If the receiver has been powered down for more than one hour, wireless transmitters may take up to an additional
hour to send a supervision message unless a button is pressed. This operation extends battery life. A missing message
may display on the keypad until the key fob sends a supervision message.
LED Status Operation
Depending on the programmed action of a key fob button, the Status LED turns on to acknowledge a button press or
to indicate the armed state of the system. For best results, allow the LED to turn on and then turn o before pressing
another button.
When the button is programmed for Panic, Panic 2, Emergency, Emergency 2, Output, or Sensor Reset, a 1/2second
green flash occurs to acknowledge the button press.
When the button is programmed for Arm, Disarm, Toggle Arm/Disarm, or Status, the system armed status is received
by the key fob and the LED pulses once, as shown in Table 4. The LED does not operate when a button programmed as
Unused is pressed.
LED COLOR DURATION DESCRIPTION
Red 2.0 Seconds All System On
Green 2.0 Seconds All System O
Green/Red 2.0 Seconds System On (Some Areas Armed)
Table 4: LED Operation
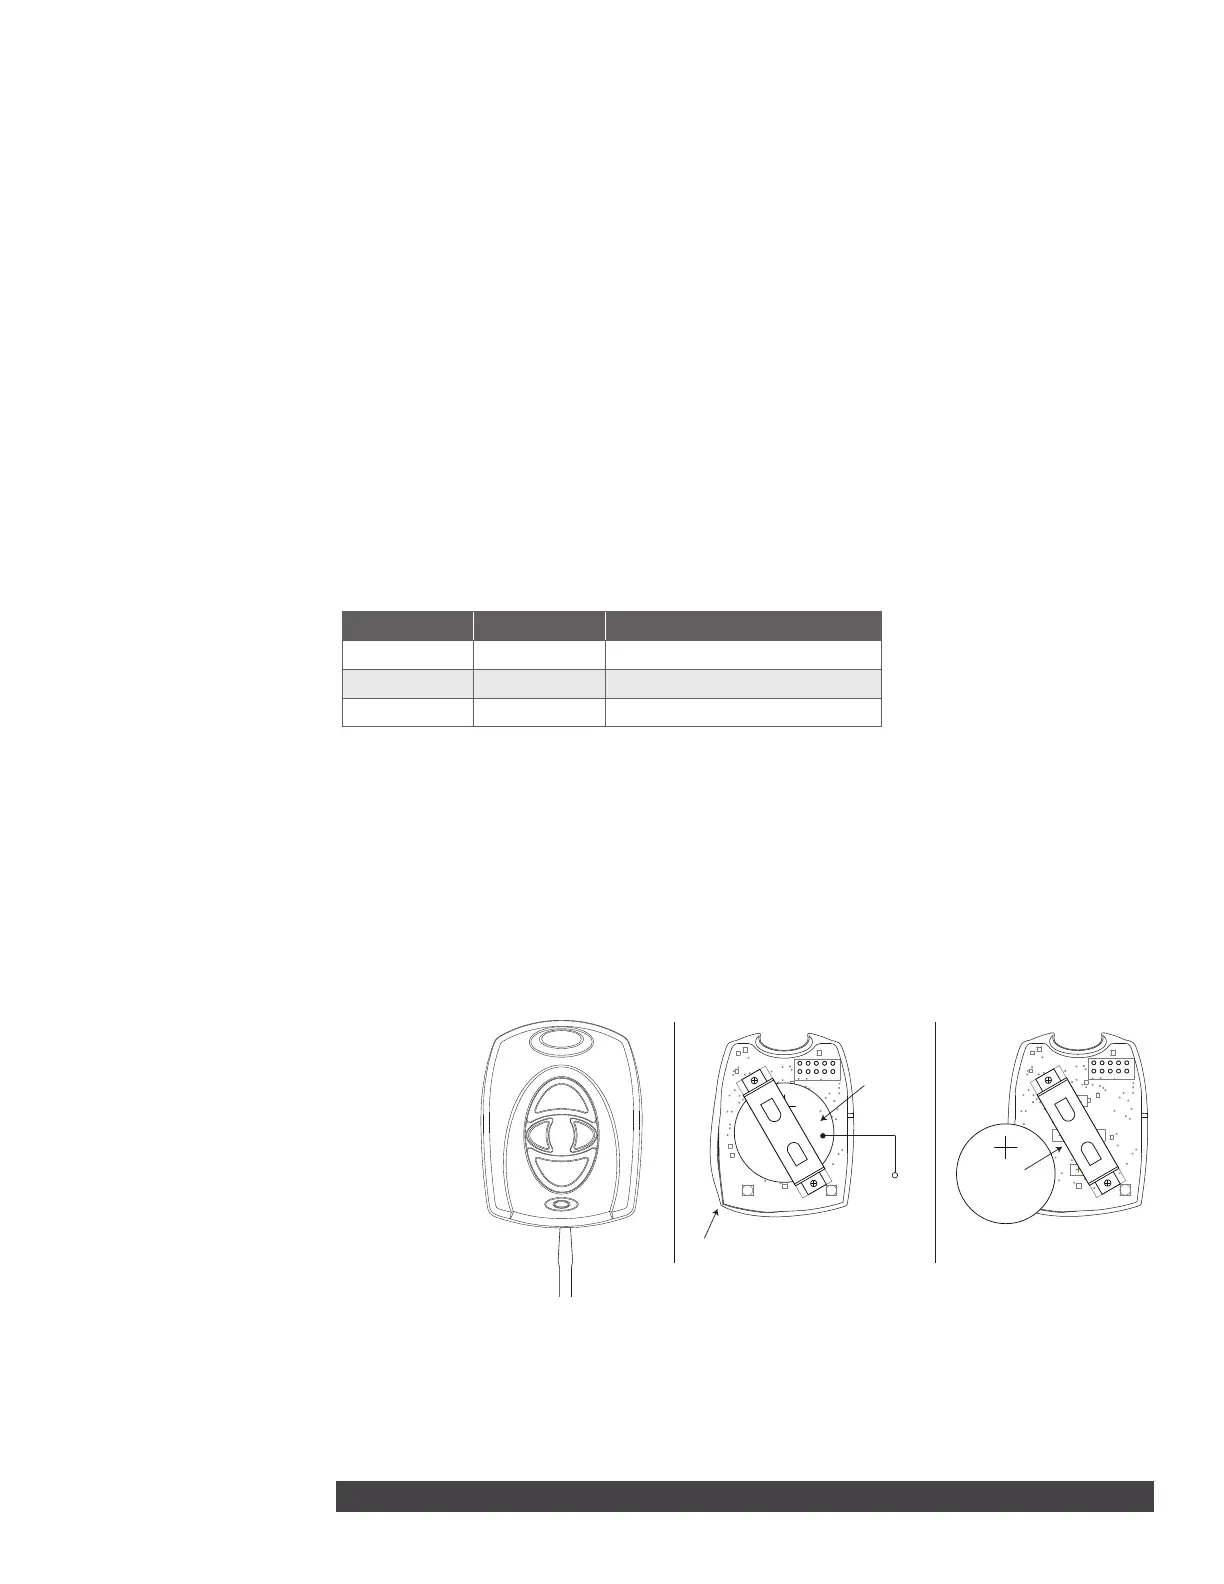
Replace the Battery
The 1144 Series Key Fob reports a low battery condition by automatically testing for a low battery on a daily basis. When
replacement of the key fob battery is necessary, a LOBAT message will display on the keypad. Refer to Figure 4 when
replacing the battery.
Observe polarity when installing the battery. Use only DMP ModelCR2430 3.0V coin cell batteries or equivalent Sony
CR2430 battery from a local retail outlet.
1. Insert a small flathead screwdriver into the slot at the key fob end opposite the key ring and twist to separate the
sections.
2. Push on the button area to remove
the PCB and elastomer from the hard
plastic case.
3. Gently roll the corner of the
elastomer wall down then push and
slide the old battery out of the holder
in the direction of the arrow.
4. Verify the positive side of the battery
is up and slide the new CR2430
Lithium battery into the holder and
push it into place.
5. Roll the corner of the elastomer wall
around the PCB and replace in the
front hard plastic case.
6. Snap the front and back sections
back together.
Perform a Sensor Reset to Clear LOBAT
1. Once the battery is replaced, a sensor reset is required at the keypad to clear the LOBAT message.
2. On an LCD keypad, press and hold 2for two seconds. On a graphic touchscreen keypad, press RESET. Enter your
user code, if required. The keypad displays SENSORS OFF followed by SENSORS ON.
LABEL THE KEY FOB
2
Attach the key fob to any key ring or lanyard. Select the peel‑o labels that display button programming
and place them onto the corresponding key fob buttons. For easier label installation, use a small flat head
screwdriver or hobby knife to select the label and apply it to the proper button location. Button labels can be
changed if programming is changed. Button labels are not included with the 1144‑D.
Front View
Use a small flat
head screwdriver
to separate front
and rear sections
Gently roll this corner
of the elastomer wall
down
Push battery
edge to slide
battery
Battery inside
battery
compartment
Push battery
edge to slide
battery
Insert battery
with positive
side up
Figure 4: 1100 Series Key Fob Transmitters
 Loading...