1165/1165H/1165HS Detectors Installation Sheet Digital Monitoring Products
3
Installing the Detector
Note: When setting up a wireless system, it is recommended
to program zones and connect the receiver before installing
batteries in the transmitters.
Use the following steps to install the detector.
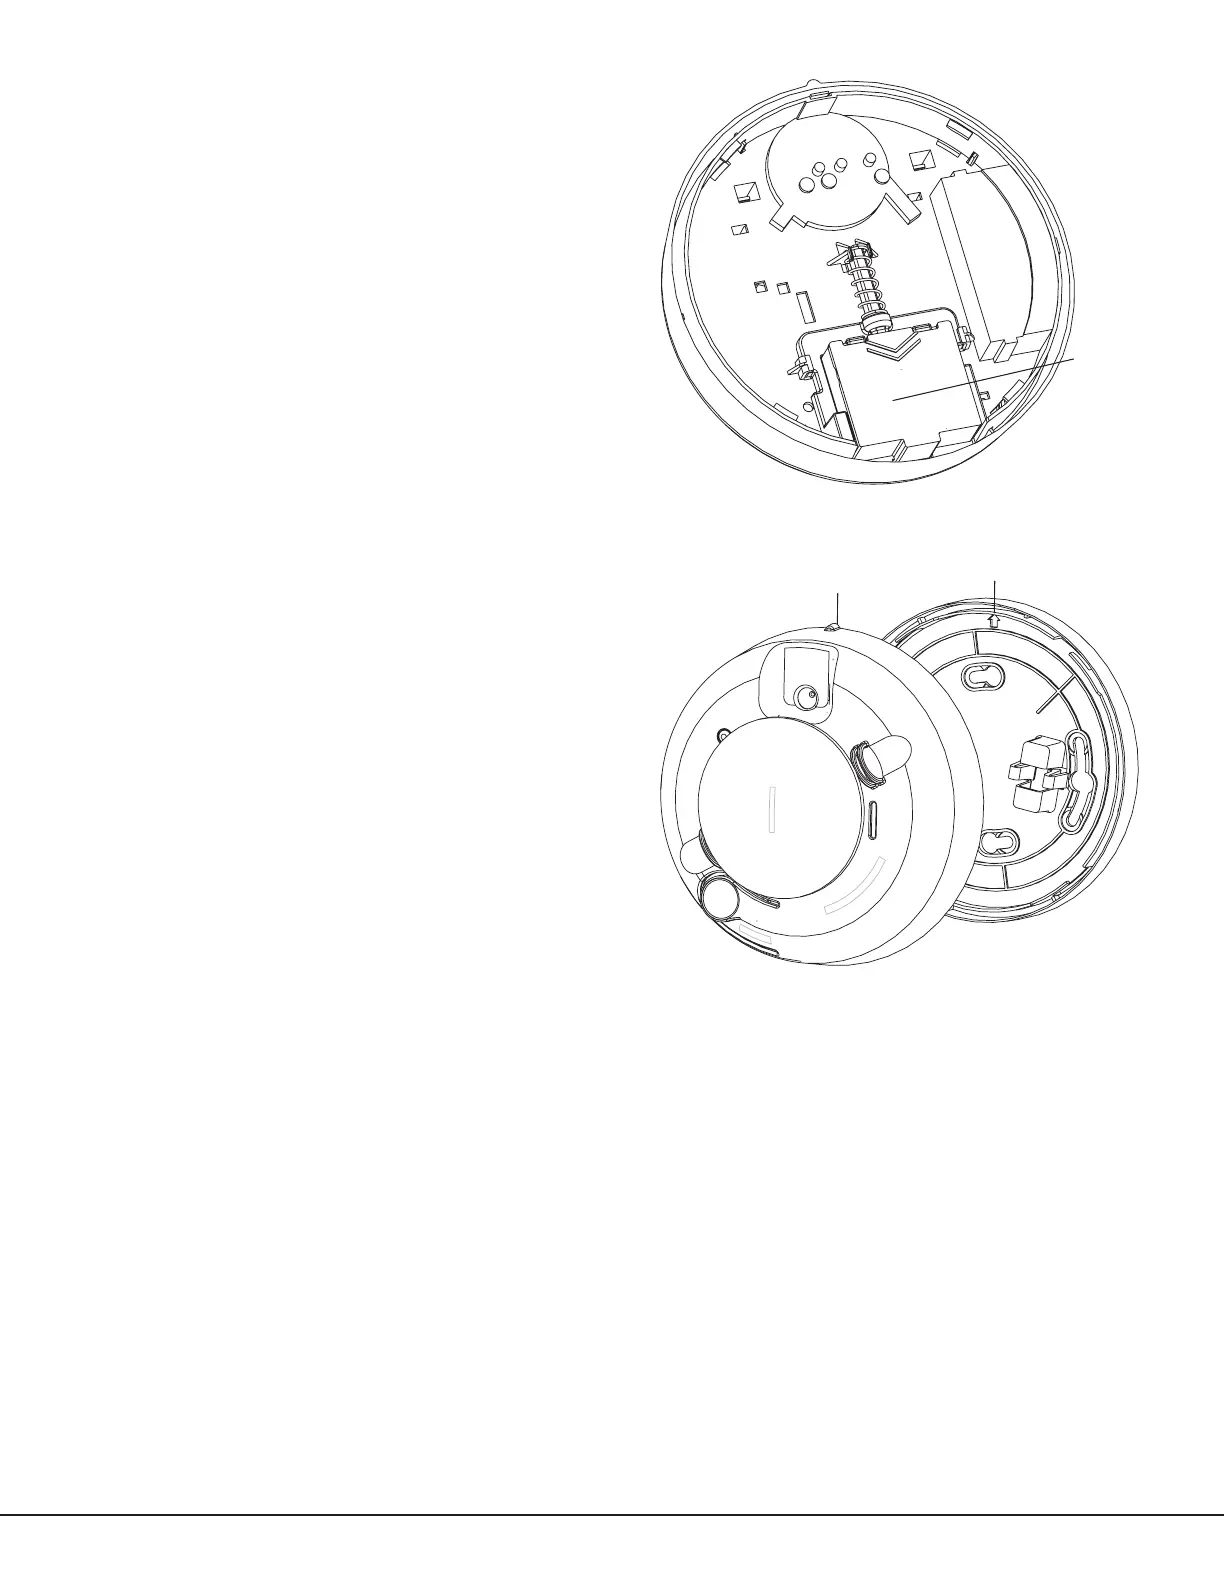
1. Slide the battery compartment cover away from the
detector to unsnap it and lift it off. See Figure 3.
2. Observing proper polarity, insert two 3V lithium
batteries into the detector battery compartment. Flip
the ribbon over the top of the batteries and replace
the battery compartment cover.
3. Locate and record the detector serial number.
This number is required during programming. See
Programming the Transmitter in the Panel.
4. Remove the red plastic dust cover from the
detector. The detector is shipped with a dust cover
for protection on construction sites with dusty
environments.
5. Test the communication between the control panel
and the detector before permanently mounting the
detector as follows:
- Hold the detector up where you plan to install it.
- Press the Test button on the detector for 4 seconds.
The detector sends a signal to the control panel.
- At the control panel, verify the signal was received
and the RF signal strength is adequate. If no signal
is received or the RF signal is low, relocate the
detector and retest.
6. Using the two screws and anchors provided, mount
the base.
7.
Line up the raised tab on the lip of the detector
with the slot on the lip of the mounting base. See
Figure 4.
Important: The control panel alarm and all auxiliary
functions should be veried for a complete test of the
system.
Smoke Testing the Smoke Detector
Smoke detectors should be tested in place annually using one of the following methods:
A. Use DMP Model 526, Smoke! in a can®, a canned aerosol simulated smoke and follow the directions on the can.
B. Use the following steps to test the detector with smoke:
1. Hold a smoldering punk or cotton wick close to the smoke entry openings.
2. Gently direct the smoke into the detector for 20 seconds or until an alarm is indicated.
Be sure to extinguish the smoke source after testing! The detector LED should stay on and an alarm should be
indicated at the control panel. Use the system reset switch to reset the detector.
Testing the Detector Sensitivity
The smoke detector provides a sensitivity level test mode that allows you to check the smoke detector sensitivity
using the Test/Silence button and the LED indicator on the detector as follows:
1. Press the Test/Silence button on the smoke detector for 2 seconds. Once the test starts, the detector LED
ashes one to nine times.
2. Count the number of times the LED ashes and use the following table to determine the status of the smoke
detector sensitivity and what action to take, if any.
Battery
Figure 3: Battery Compartment
Alignment Tab
Figure 4: Smoke Detector-to-Base Alignment
 Loading...