Beispiel: Bau eines 3HE-Rahmens für das A-100 System
Example: Building a 3U frame for the A-100 system
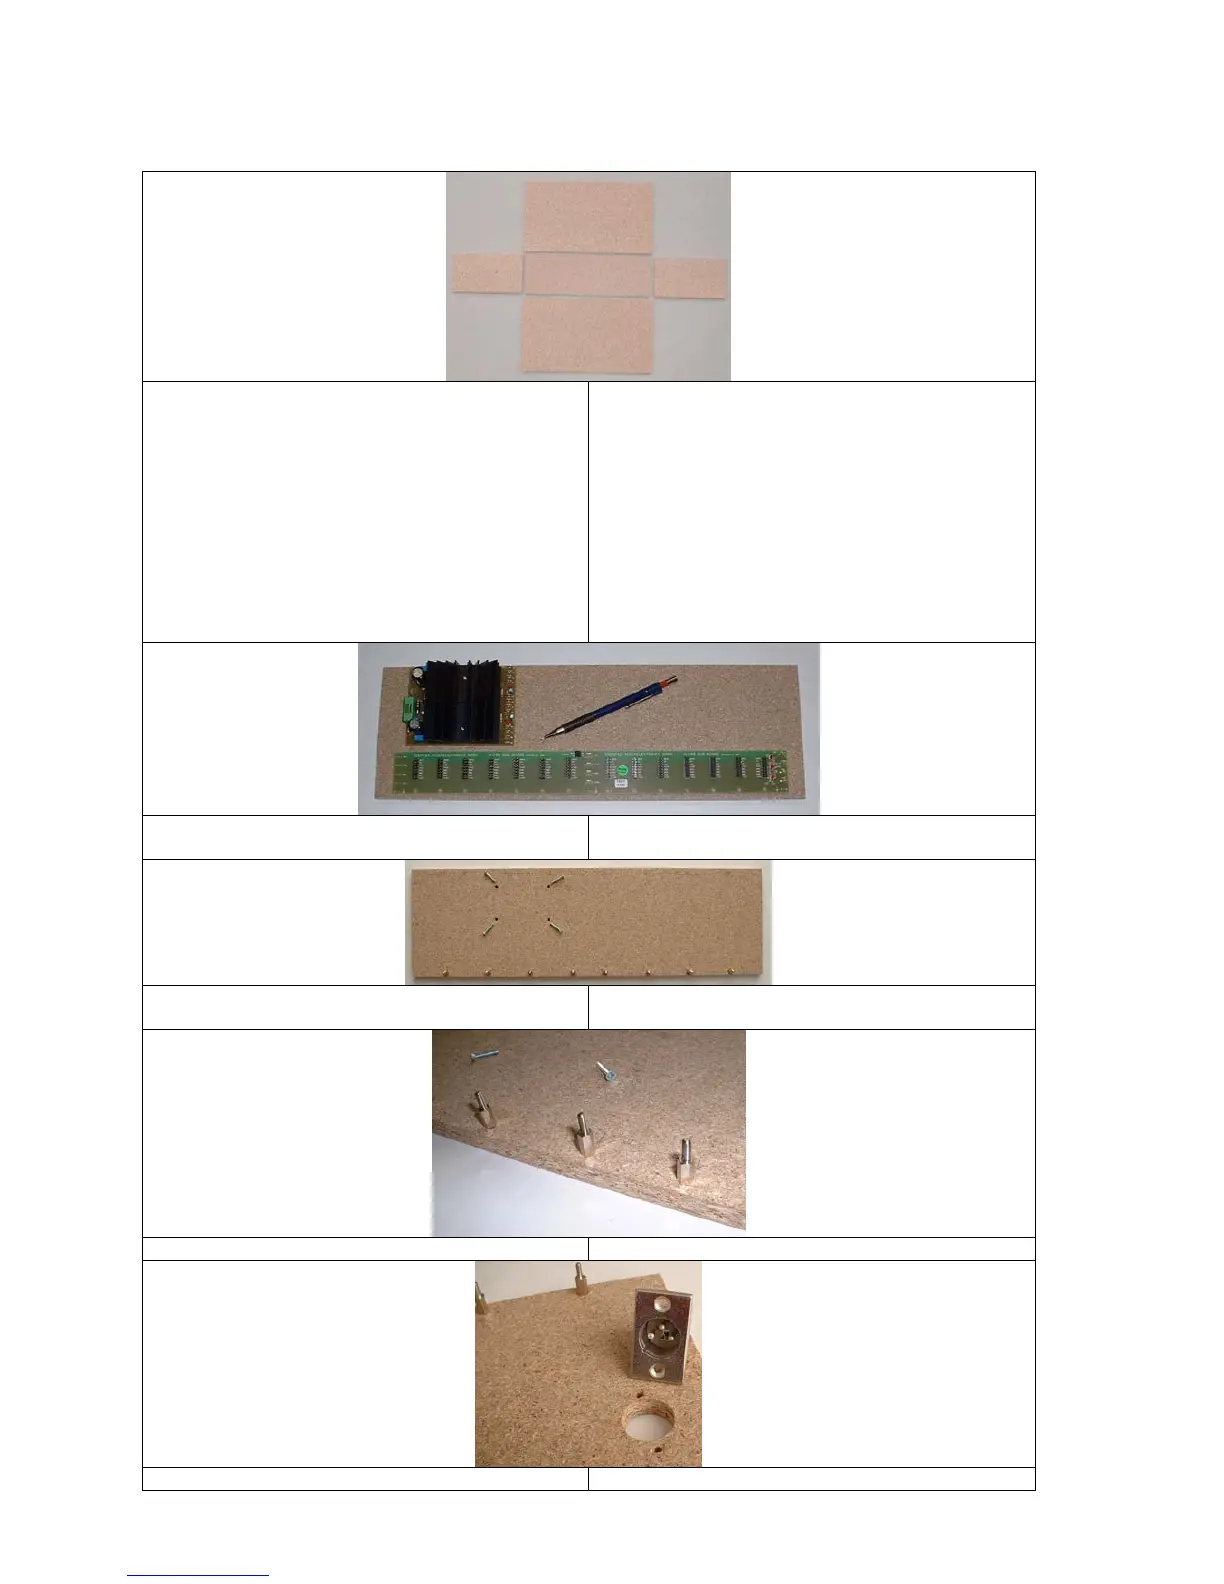
Die benötigten Holzteile:
obere/untere Abdeckung, Rückwand, linkes/rechtes
Seitenteil
Die Länge der Bodenplatte, der Abdeckung und der
Rückwand muss dabei genau der Länge der
gelieferten Profilschienen entsprechen !
Die Höhe der Seitenteile und der Rückwand erhält
man, indem man ein Modul probehalber an den
Profilschienen montiert und den Abstand zwischen
der Oberkante der oberen und der Unterkante der
unterer Profilschiene misst.
the required wooden parts:
top/bottom cover, rear panel, left/right sideplate
The length of the top/bottom cover and the rear
panel has to be the same as the length of the
delivered aluminium rails !
The height of the side plates and the rear panel can
be derived if one mounts a module temporarily at
two rails and measures the distance between the top
of upper and bottom of the lower rail.
Anzeichnen der Montagelöcher für Busplatine und
Netzteilplatine
marking the mounting holes for the bus board and
the power supply board
Bohren der Montagelöcher und Montage der
Abstandsbolzen
drilling the holes and mounting the distant bolts
Detailaufnahme Abstandsbolzen Busplatine detail: distant bolts for bus board
Optionale Steckverbindung, z.B. XLR (Rückwand) optional connector, e.g. XLR (rear panel)
 Loading...