10411 80th Avenue Pleasant Prairie, WI 53158|Orders and Customer Care: 1-800-574-7665|Fax: 1-800-323-5932|Doheny.com
CHAPTER 1:
IMPORTANT SAFETY INSTRUCTIONS
READ AND FOLLOW ALL INSTRUCTIONS
1. The installation should be carried out in accordance
to the safety instructions of swimming pools and
the specic instructions for each facility.
2. The user should make sure that the installation is
carried out by qualied authorized persons and that
these persons have rst carefully read the following
instructions. Incorrectly installed equipment may
fail, causing sever injury or property damage.
3. The operating safety of the lter is only guaranteed if
the installation and operation instructions are
correctly followed.
4. To reduce the risk of injury, do not permit children
to use this product.
5. Chemical spills and fumes can weaken Swimming
Pool or Spa. Corrosion can cause lters and other
equipment to fail, resulting in severe injury or
property damage. Do not store pool chemicals near
your equipment.
6. Any modication of the lter is not authorized. The
supplier assumes no liability for the damage and
injuries caused by unauthorized replacement parts
and accessories.
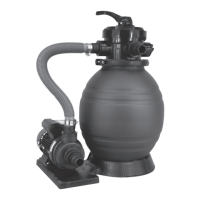
CHAPTER 2: INSTALLATION INSTRUCTIONS
▲WARNING This product should be installed and
serviced only by a qualied professional.
It is important to rst determine where your pump and
lter will be located. If above the water line, a self-
priming pump must be used. Self-priming pumps have
the ability to lift water from a lower level and prime
automatically.
1.
Position the lter next to the Swimming Pool or Spa.
2. The lter should be placed on a level concrete
slab, very rm ground, or equivalent. Ensure that
the ground will not subside, preventing any strain
from the attached plumbing.
3. Position the lter so that the piping connections,
Multi-Port Valve and winter drain is convenient and
accessible for operation, servicing and winterizing.
4. Ensure that the compliance label is facing the
front to allow easy identication in the case of
service difculties.
5. If practical, place pump and lter in the shade to
shield it from continuous direct heat from the sun.
Plumbing
1.
Use 1-1/2 inch or 2 inch piping. When making
permanent connections, be sure to provide unions
for easy servicing.
2. Refer to the diagrams for basic suggested valving.
Ball valves are recommended where needed. While
all systems vary, the main consideration is to provide
the desired control of water ow from the pool to the
pump and lter, and back to the pool. When the lter
is located below water level, provide valves to
prevent back ow of water to the lter during cleaning
and routine servicing.
3. All plumbing on these cartridge lters are 1-1/2 inch or
2 inch Male and Female National Pipe Threading
(NPT). Use plastic adapters when making threaded
connections to the lter. Take the Teon tape and
wrap the male threads three times in a clockwise
direction. Screw the male adapter into the female
adapter with your hand till its tight. Don’t tighten too
tight as the adapters are plastic and can break.
4. Connect the pool suction plumbing between the
skimmer, pool outlet, and the pump.
5. Install the pool return plumbing.
6. If pressure gauge is not installed, apply the Teon
tape to the gauge threads (just like you did to the
male adapter) and carefully screw the threaded hole
into the lter head.
7. A lter drain is furnished with each lter and is
needed for complete lter draining. A manual air
relief valve is furnished to aid in bleeding off unwanted
when starting the lter. The auto air relief valve
provides air removal during operation.
8. All electrical connections should be made in
accordance with local codes and done by a qualied
authorized person.
9. Check for joint leaks before operating.
10. Refer to pump manual for pump information.
Starting the Filter
1.
Make sure lter drain is closed. Open the manual air
relief valve by turning it counter-clockwise a few
times and open the suction and return valves.
▲
CAUTION All suction and discharge valves must
be open when starting the system. Failure to do so
could cause severe personal injury and/or property
damage. Make sure locking ring is secure (hand
tighten, only slight pressure is required).
2. Stand clear of the lter, prime and start the pump,
following the manufacturer’s pump manual.
3. Air trapped in the system will automatically vent to
the pool and out the air relief valve. Close air relief
valve as soon as air is vented by turning the valve
counter-clockwise.
 Loading...