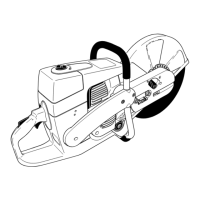
Do you have a question about the Dolmar PC-6212 HappyStart and is the answer not in the manual?
Tool designed for the removal of the flywheel from the engine.
Specialized tool used for the extraction of ball bearings.
Tool utilized for the safe removal of oil seals.
Tool essential for the proper mounting of the clutch hub.
Set of Torx screwdrivers, specifically T27, for various repair tasks.
Tools required for piston ring tensioning and stopping during assembly.
Steps to dismantle the clutch and drum, including component removal and piston blocking.
Procedure for correctly installing the muffler and heat plate onto the cylinder.
Steps for removing, testing, and identifying issues with spark plugs for optimal performance.
Procedure for safely removing and replacing the spark plug connector.
Detailed steps for removing the ignition, short circuit cable, and related components.
Final steps for removing the ignition and short circuit cable, including throttle rod and intake elbow.
Steps for correctly assembling the ignition and short circuit cable, ensuring proper connections.
Steps for removing, checking, and mounting the ignition armature.
Procedures for safely removing and mounting the flywheel, including torque specifications.
Steps for removing the starter assembly and the return spring.
Procedures for mounting, pretensioning, and checking the return spring's functionality.
Steps for replacing the bolt/ratchet mechanism, including gap and glue application.
Procedures for setting the L-nozzle, S-screw, and main nozzle (H) for optimal engine performance.
Steps for removing the carburetor, including associated shafts and rods, from the intake elbow.
Instructions for inspecting the intake hose for damage and replacing the insert.
Procedures for dismantling the control side and testing the control membrane and unit.
Steps for dismantling the pump side and testing the pump membrane and fuel sieve.
Steps for removing the air filter and cleaning the pre-filter, paper cartridge, and inside filter.
Instructions for switching to winter mode to prevent filter/carburetor freezing in cold temperatures.
Steps for removing and replacing the bracket handle by unscrewing strut and foot components.
Detailed procedure for replacing vibration absorbers, including component removal and mounting steps.
Steps for removing and inserting the fuel tank ventilation valve.
Procedures for replacing the throttle lever mechanism and the fuel pipe.
Methods for testing the fuel filter's condition, including a fingernail test for blockages.
Steps for dismantling the cylinder and removing the piston pin.
Procedures for mounting the piston and cylinder, including alignment and tightening.
Instructions for testing the decompression valve seating and cleanliness.
Steps for dismantling the crankcase, including removing screws and separating the sides.
Procedures for replacing the crankshaft and bearings, including heating and lubrication.
Procedure for testing the ignition system and spark plug using a specific test device.
Steps for testing the carburetor's pressure at 0.5 bar using a pressure test device.
Instructions for tightening various screw connections with a torque wrench as per specifications.
Steps for replacing the pressure disc and drive axle, including related components.
Procedures for replacing and mounting the V-belt pulley, including shim placement.
Steps for removing the pressure ring and assembling cutter guard holding attachments.
Procedures for replacing the guard stop, removing/mounting cutting device bearings.
Steps for adjusting the cutter guard holding attachment and tensioning the V-belt.
| Type | Petrol Chainsaw |
|---|---|
| Power source | Gasoline |
| Chain Pitch | 3/8 inch |
| Sound Power Level | 115 dB(A) |
| Engine Displacement | 61 cm³ |
| Power Output | 3.4 kW (4.6 HP) |
| Fuel Tank Capacity | 0.75 L |
| Chain Oil Tank Capacity | 0.4 L |