MOUNTING YOUR WATER HEATER
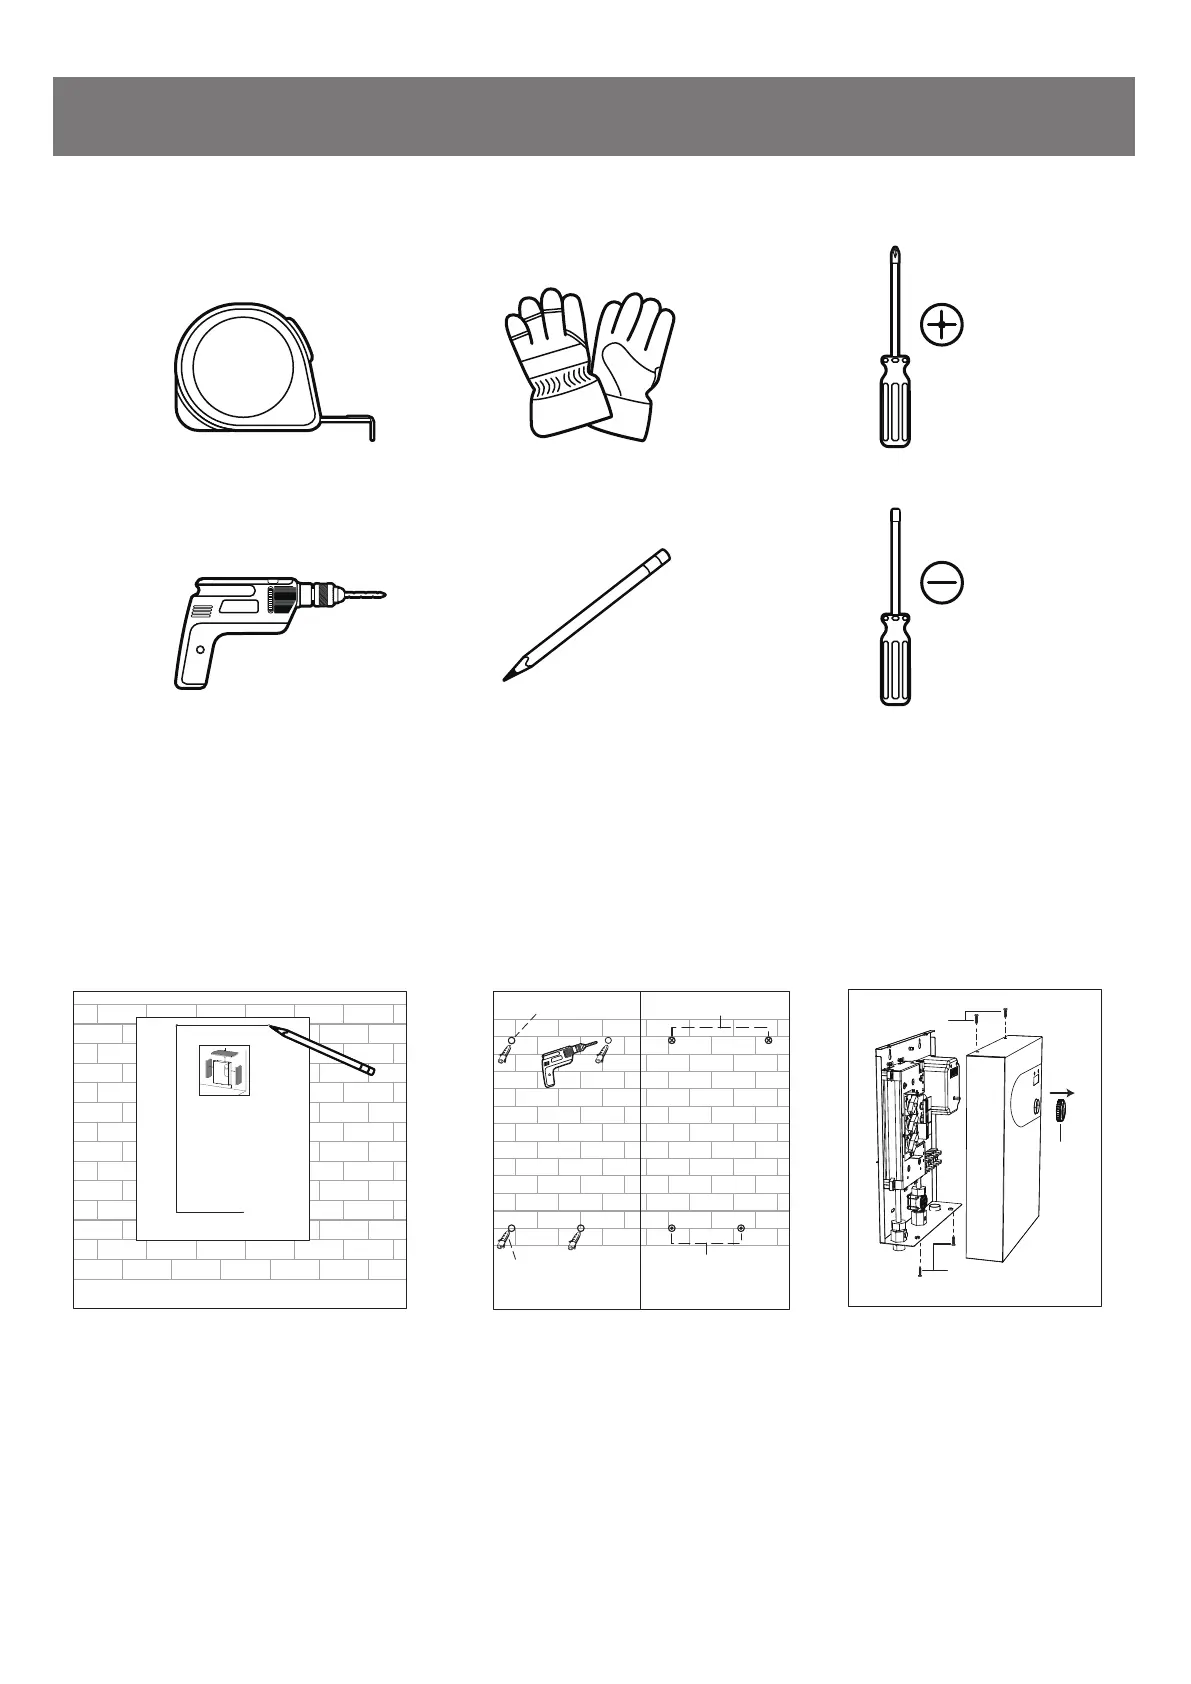
TOOLS/MATERIALS REQUIRED (NOT INCLUDE)
Measuring tape
Pencil
Phillips screwdriver
Slotted screwdriver
Safety gloves
Electric drill
INSTALLATION INSTRUCTIONS
1. Mark the positions of mounting holes on the wall as the installation template shows (Fig. 1).
NOTE: For ease of installation and servicing, we recommend that this unit be installed in an upright position with the inlet
and outlet water connections at the bottom.
2. Drill 4 mounting holes (Ø6x32mm) at the marked position (Fig. 2).
3. Put espansion boltes into the holes (Fig. 2).
4. Put two screws into the upper two holes (Fig. 3).
5. Remove the knob on front cover, 4 screws on the top and bottom edges of the unit, and then dismantle the front cover
(Fig.4).
Fig. 1 Fig. 2 Fig. 3
mounting hole
espansion bolte
Screw
espansion bolte
7 1/8" (180mm)
5 1/8" (130mm)
14 1/4" (363mm)
WARNING: This unit should be installed by a qualified electrician or plumber in
accordance with federal, state and local electrical and plumbing codes.
WARNING: This water heater must be connected to a reliable earth connection at
all times.
WARNING: Make sure all circuit breakers and disconnect switches are off before
installation and maintenance.
WARNING: DO NOT install this unit in a location where it may be subject to
freezing temperatures. If the water inside your tankless water heater freezes, it can
cause severe and permanent damage that is not covered under your warranty.
The wall for installation of water heater must be firm and solid and can bear four
times the weight of the water heater.
WARNING: Indoor installation only. Do not install this water heater near
flammable, volatile substances or strong magnetic fields. The unit must be
installed in the vertical position of the water pipe joint.
This unit has more than one power-supply connection point. Disconnect all power
supplies before servicing.
WARNING: To avoid damage, the unit needs to be kept dry. Keep unit away from
direct sunlight moisture, dust, steam, and other liquids.
WARNING: The unit do not installed in places with water leaks (such as under air
conditioning lines that might leak or condense moisture or water pipes ).
WARNING: Be sure that the water heater are out of the reach of children so they
cannot adjust the temperature knob at will.
WARNING: The outlet water pipe can get very hot, make sure that the outlet
water pipe is out of the reach of children.
b
b
a
a
Wall or other fixed objects that cannot be moved
a (side gap): minimum 12" (305mm)
b (bottom gap): minimum 15" (381mm)
WALL
Installation location
There should be a certain space around the machine for
installation and future maintenance
Fig. 4
Knob
Screw
Screw
INSTALLATION INSTRUCTIONS
7