PLUMBING INSTALLATION
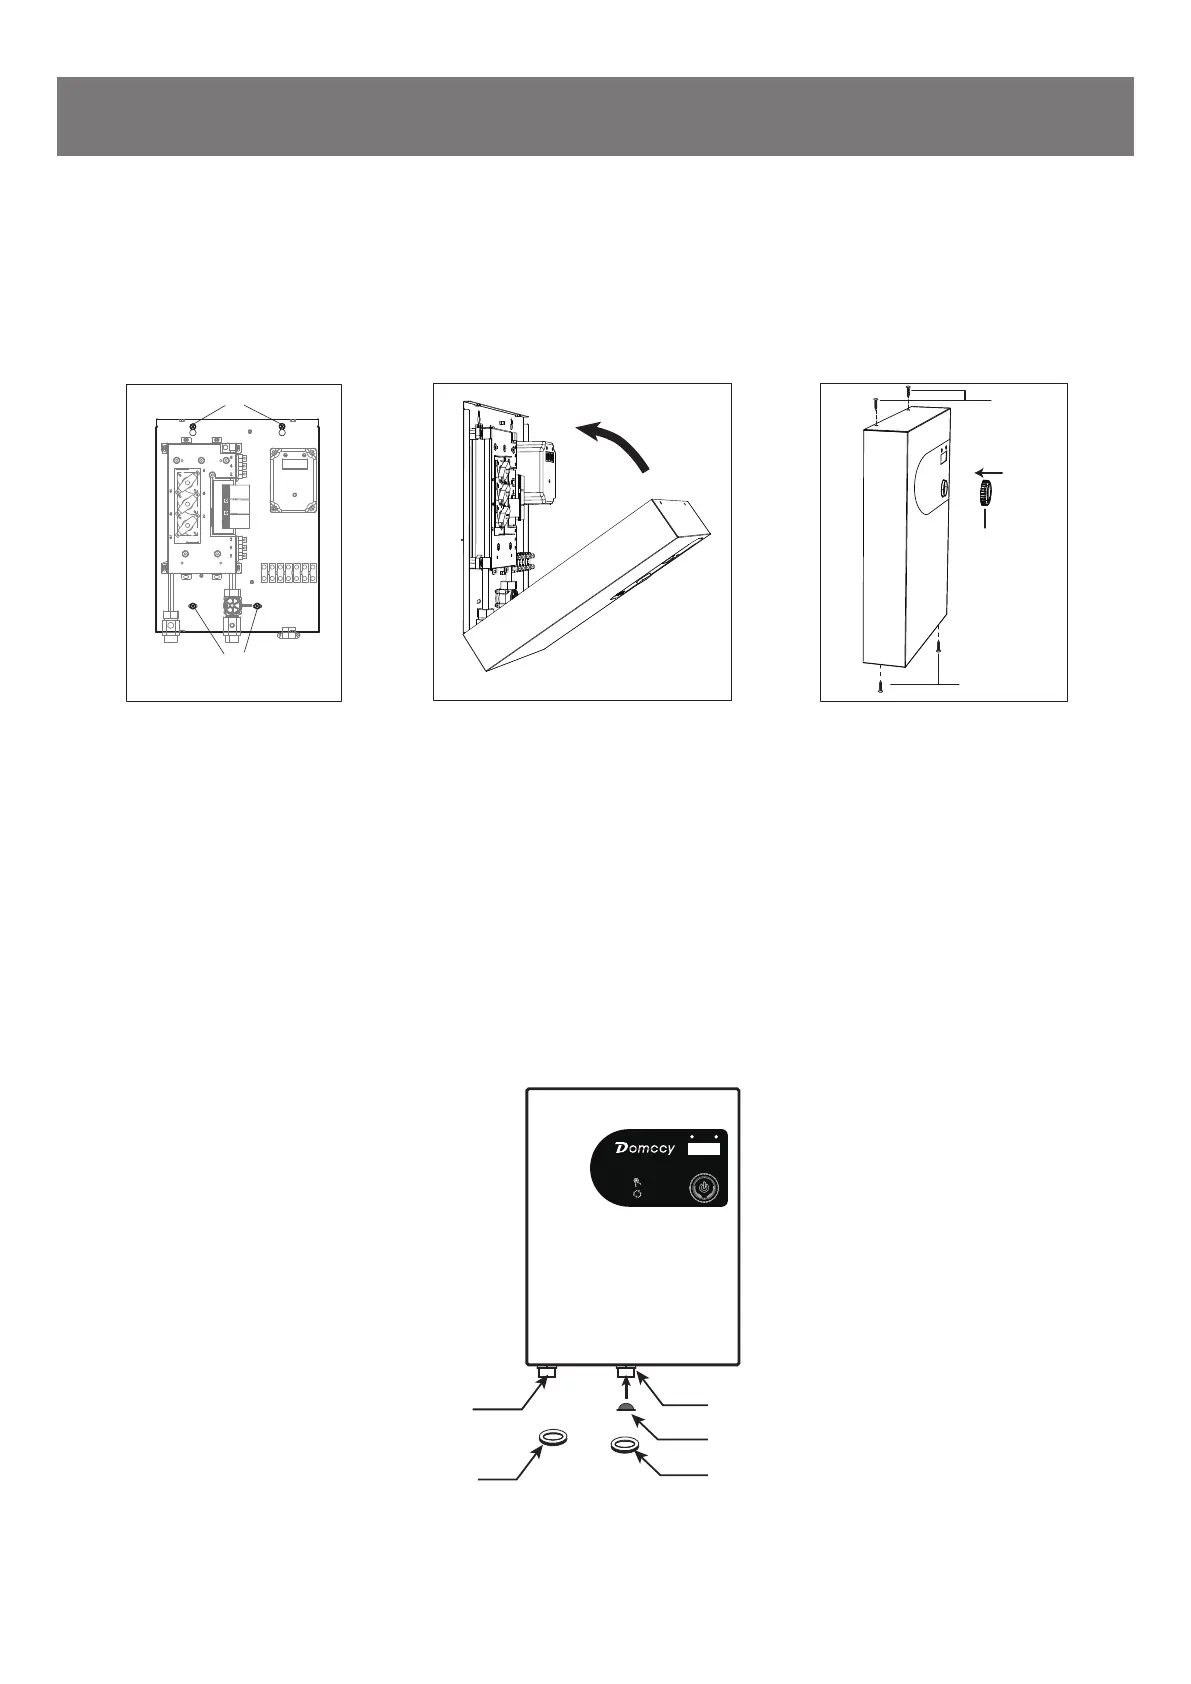
6. Hang the body on the two installed screws, then fix the other two screws. Tighten all 4 screws to secure the body.
NOTE: Make sure that the mounting surface is solid and firm, and ensure that the unit is level prior before tighten the
screws (Fig. 5).
7. Reinstall the front cover after finishing "PLUMBING and ELECTRICAL INSTALLATION". Fasten the front cover only
after confirming that the mounting screws are firm and reliable. The front cover mounting shows as right (Fig. 6).
WARNING: The electrical components inside the water heater may cause serious personal injury or electric shock death.
Make sure that the front cover is installed correctly and firmly. Do not remove the front cover unless you are installing a compo-
nent or maintaining the device.
8. Screw the front cover to the body. Reinstall the knob (Fig. 7).
8888
Fig. 5
Screw
Screw
Fig. 6
Fig. 7
Knob
Screw
Screw
CAUTION: The plumbing installation must be completed before the electrical installation.
WARNING: It is the responsibility of the Service Person to ensure that the water supply to the equipment is provided with
protection against backflow by an air gap as defined in ANSI/ASME A112. 1.2-1979; an approved vacuum breaker or
other such methods as proved effective by test.
WARNING: Pipe dope or PVC/CPVC primer and glue are not allowed to used on the threads of the outlet and inlet
fittings. These chemicals can damage the threads and cause leaks. Only thread sealing tape can be used.
SUGGESTION: To avoid the property damage caused by leakage (small probability event), the machine must be installed
in place with a floor drain.
SUGGESTION: Install a valve (not include) at the inlet pipe for future maintenance.
WARNING: Install a pressure relief valve between valve and unit if the inlet water supply pressure exceeds 150 PSI.
INSTALLATION INSTRUCTIONS
1. Put one gasket to outlet, and another one to inlet. Facing the unit, the outlet located marked on the left side of the unit
connect to the hot water line. The inlet located marked on the right side of the unit connect to the cold water line.
Outlet pipe
(hot water)
Inlet pipe (cold water)
Filter*
GasketGasket
Filter* this part is in the Inlet pipe
2. After tightening both fittings at the unit, open the hot water tap to allowd water to run through the unit for about 2 to 3
minutes, to make sure all the air is discharged from the waterpipe.
This step must be performed before power on.
IF YOU DO NOT FOLLOW THIS STEP, IT CAN CAUSE PERMANENT DAMAGE TO THE HEATING ELEMENTS.
3. Close outlet, open inlet, to check all connections for water leaks.
INSTALLATION INSTRUCTIONS
ON/OFF: CLICK THE KNOB
PRESS 3 SECONDS
8