5
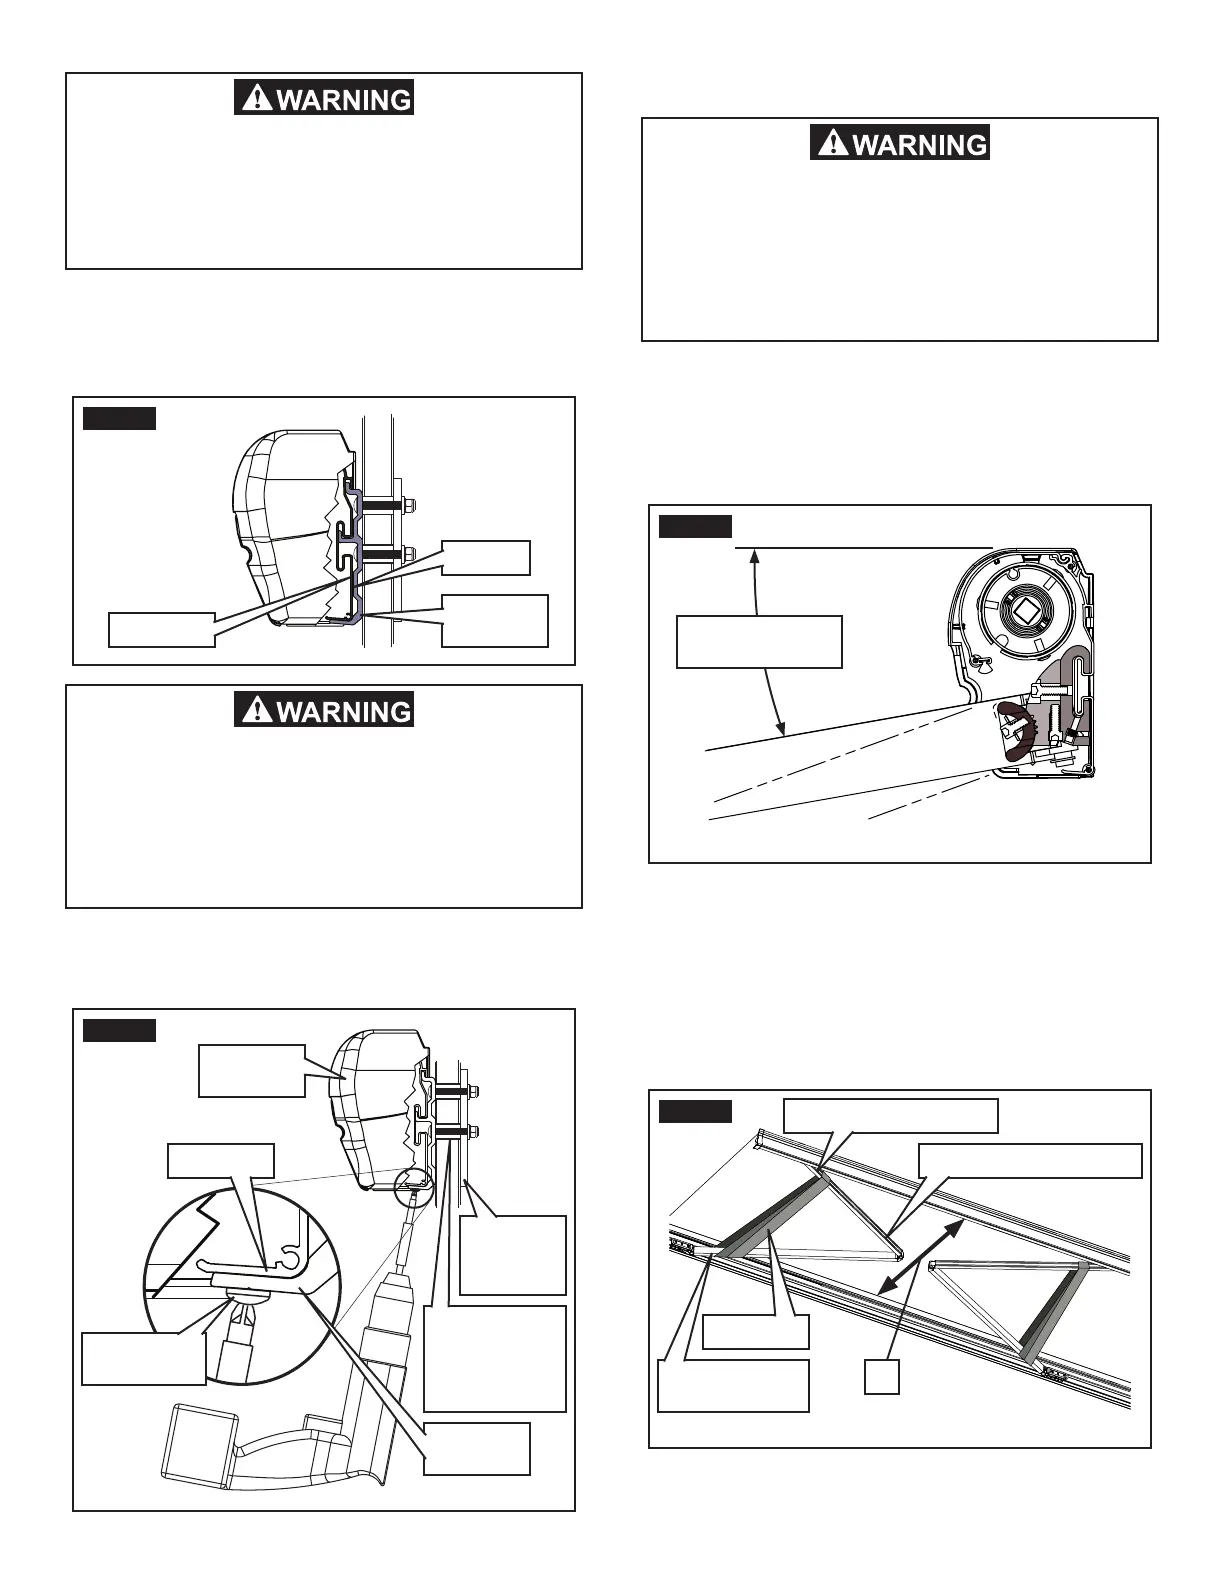
6. Ensure awning is securely hooked onto mounting
brackets, and carefully extend approximately 1'.
Verify awning’s back rail is fully contacting mount-
ing bracket’s vertical surface. See FIG. 7.
7. Place and tighten the self drilling screws through
mounting bracket and into cassette awning’s
back rail. See FIG. 8.
IMPACT OR CRUSH HAZARD. Make sure aw-
ning is securely mounted, and hooked onto
all mounting brackets. Failure to obey this
warning could cause awning to dislodge and
fall, and could result in death or serious injury.
FIG. 7
Back Rail
Mounting
Bracket
No Gap
FIG. 9
10° Slope
(Factory Preset)
Follow this procedure to adjust slope:
1. Extend awning far enough to access shoulder
(approximately 1'), then wrap duct tape securely
around all lateral arm assemblies near shoulder
and wrist. See FIG. 10.
FIG. 10
Lateral Arm Assembly
Duct Tape
1'
Near Shoulder
Assembly
Near Wrist Assembly
B. Adjust Fabric Slope (If Desired)
Any adjustment of this hardware must be
done by a Dometic, LLC Service Center or a
qualied service technician only. Improper
adjustment of this product can be extremely
hazardous and could result in personal injury
or property damage.
The cassette awning is factory preset for a 10° fabric slope
to help accommodate water runoff. Alternatively, the awning
may be set for a 20° fabric slope if there is adequate door
clearance, etc. See FIG. 9.
IMPACT OR CRUSH HAZARD. Do not operate
or leave awning unattended until it is securely
fastened to all mounting brackets. Failure to
obey this warning could cause the awning to
collapse, and could result in death or serious
injury.
FIG. 8
Self Drilling
Screw
Backing
Plate
(Optional)
Cassette
Awning
Mounting
Bracket
Back Rail
Sleeves
(Optional
-Installer Cut
To Length)