Do you have a question about the Dometic FAN-TASTIC VENT and is the answer not in the manual?
This section explains the safety alert symbol and its purpose in conveying potential injury hazards.
Defines signal words like WARNING, CAUTION, and NOTICE used in safety messages.
Provides critical safety instructions and compliance requirements for installation and operation.
Lists necessary hardware, supplies, and electrical wiring information for installation.
Specifies the tools required for the installation process.
Step-by-step instructions for mounting the vent to the RV roof, including sealant application.
Details on how to mount the fan unit after the exterior flange is secured.
Instructions for installing the 'clamp fan' configuration, securing the garnish to the fan base.
Guidance on installing the wall-mounted controller for RV manufacturer models.
Instructions on how to manually open or close the vent lid using the hand-knob.
Details on operating automatic lift vents, including speed settings and safety switches.
How to use the switch to control fan direction (IN/OUT) and turn the fan OFF.
Explanation of how the fan operates automatically based on temperature settings.
Details on operating premium remote and wall controls for specific Fan-Tastic Vent models.
Instructions for using the wall-mounted controls for models 5300 and 5350.
Operating instructions for the RJ-11 wall-mounted controls of models 5200 and 5250.
Guide to operating the Model 4200 RJ-11 wall-mounted fan controls.
Instructions for operating models 4100, 4150, and 4175, including speed and thermostat settings.
Details on operating models 3300 and 3350, including speed, direction, thermostat, and rain sensor.
Operating instructions for models 4201, 4251, 4301, 4351, covering speed, direction, and rain sensor.
Step-by-step guide on how to locate and replace the fuse.
Instructions for replacing batteries in the 7300/7350 Remote Control.
Procedure for addressing a stuck lid, including cleaning and applying sealant.
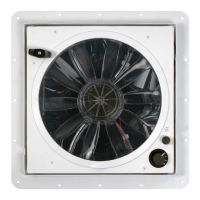
Detailed instructions on how to safely remove and clean the fan screen and blade.
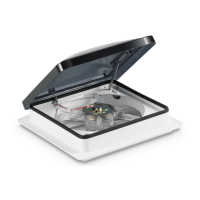
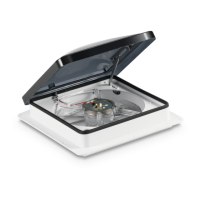
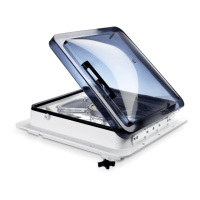
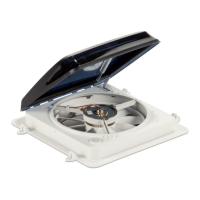
The Dometic Fan-Tastic Vent is a recreational vehicle (RV) ventilation system designed to provide maximum airflow while offering protection from the elements. It is intended for use in RVs and comes in various models, including manual lift, automatic lift, and models with remote or wall-mounted controls.
The primary function of the Fan-Tastic Vent is to circulate air within an RV, either by exhausting stale air out or drawing fresh air in. This helps to maintain a comfortable ambient temperature and improve air quality inside the vehicle. The fan operates on 12 VDC power and is designed to run on filtered DC current.
The vent features a dome (lid) that can be opened and closed to allow or restrict airflow. Depending on the model, the lid can be opened manually or automatically. Many models include a thermostat, allowing the fan to automatically turn on or off based on the interior temperature of the RV. This feature helps to regulate comfort levels without constant manual adjustment.
Some models are equipped with a fan blade motor-reversing switch, enabling the user to choose between "OUT" (exhaust mode) to expel hot, stale air, or "IN" (intake mode) to draw fresh air in. The intake mode can effectively pressurize the coach if all windows, doors, and other vents are closed.
Several models also incorporate a rain sensor. When moisture contacts the sensor, the lid automatically closes, and the fan motor disengages to prevent water from entering the RV. Once the rain sensor dries, the lid will not automatically re-open; it requires manual intervention or a specific command from the control unit to re-open. Manually opening the lid when the rain sensor has activated will bypass the sensor, allowing the fan to operate according to its previous settings. The rain sensor will reactivate once it dries.
The Fan-Tastic Vent offers a range of usage features depending on the specific model:
Manual Lift Vents:
Automatic Lift Vents and Controlled Models (e.g., Models 6300, 6350, 7300, 7350, 5300, 5350, 5200, 5250, 4200, 4100, 4150, 4175, 3300, 3350, 4201, 4251, 4301, 4351):
The manual outlines several maintenance procedures to ensure the longevity and optimal performance of the Fan-Tastic Vent:
The manual emphasizes the importance of following safety instructions, including taking precautions when working on the RV roof and ensuring proper electrical connections (12 VDC only, filtered DC current). It also advises against leaving the vent lid open and unattended for extended periods or using the product in inclement weather to prevent water damage.
| Model | FAN-TASTIC VENT |
|---|---|
| Category | Fan |
| Voltage | 12V DC |
| Manual Lift Dome | Yes |
| Built-in Thermostat | Yes |
| Reversible Airflow | Yes |
| Rain Sensor | Yes |
| Material | Plastic |
| Color | White |
| Airflow | 920 CFM |
| Fan Diameter | 12 inches |
| Remote Control | Yes |