19
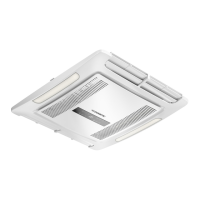
FreshJet3000 Installation
I
➤ Attach the required number of duct sections on the ADB.
➤ Fasten the ADB to the ceiling through to the roof air conditioner with the
4 bolts supplied.
See fig. h, page 8
A
➤ Tighten the screws using a torque spanner and a fastening torque of
2.5 Nm ±0.3 Nm.
8.5.5 Communication cable
➤ Connect the communication 4 pin plug into the socket on the side of the
display (2) in the ADB.
➤ Ensure the cable is located into the small opening away from the filter area.
➤ Secure excess cable into the holders.
➤ Push the filter back fully in.
See fig. i, page 8
➤ Clip the centre cover to the ADB.
The installation is now completed. Connect to the power and test.
NOTE
Additional duct sections can be purchased for thicker roofs.
NOTICE! Risk of damage
Tighten to the specified torque. Do not overtighten!
FreshJet3000--INM.book Seite 19 Donnerstag, 12. März 2020 11:39 11
 Loading...