EasyManua.ls Logo

Dometic PerfectWall PW1000 - User Manual

Dometic PerfectWall PW1000
30 pages
Print Icon
To Next Page IconTo Next Page
Loading...
PW1000, PW1500, PW1750
Awning
Operating manual . . . . . . . . . . . . . . . . . . . . 12
Markise
Bedienungsanleitung . . . . . . . . . . . . . . . . . 31
Store extérieuru
Notice d’utilisation . . . . . . . . . . . . . . . . . . .50
Told o
Instrucciones de uso . . . . . . . . . . . . . . . . . .70
Toldo
Manual de instruções . . . . . . . . . . . . . . . . .90
Tenda da so le
Istruzioni per l’uso . . . . . . . . . . . . . . . . . . . 110
Zonnescherm
Gebruiksaanwijzing. . . . . . . . . . . . . . . . . .129
Markise
Betjeningsvejledning . . . . . . . . . . . . . . . . 148
Markis
Bruksanvisning. . . . . . . . . . . . . . . . . . . . . . 166
Markise
Bruksanvisning. . . . . . . . . . . . . . . . . . . . . . 184
Markiisi
Käyttöohje . . . . . . . . . . . . . . . . . . . . . . . . . 202
Синусоидальный инвертор
Инструкция по эксплуатации . . . . . . . . . 221
Markiza
Instrukcja obsługi . . . . . . . . . . . . . . . . . . . 240
Markíza
Návod na obsluhu. . . . . . . . . . . . . . . . . . . 259
Markýza
Návod k obsluze . . . . . . . . . . . . . . . . . . . . 278
Előtető
Használati utasítás. . . . . . . . . . . . . . . . . . . 296
Markiza
Navodilo za uporabo . . . . . . . . . . . . . . . . 314
ȉȑȞIJĮ
ȅįȘȖȓİȢ ȤİȚȡȚıȝȠȪ . . . . . . . . . . . . . . . . 332
EN
DE
FR
ES
PT
IT
NL
DA
SV
NO
FI
RU
PL
SK
CS
HU
SL
EL
AWNINGS
PERFECTW ALL
PW1000-PW1500-PW1750-O-16S.book Seite 1 Donnerstag, 5. Oktober 2017 11:05 11
More information https://www.caravansplus.com.au

Other manuals for Dometic PerfectWall PW1000

Question and Answer IconNeed help?

Do you have a question about the Dometic PerfectWall PW1000 and is the answer not in the manual?

Summary

Notes on Using the Instruction Manual

Safety Instructions

Scope of Delivery

Accessories

Intended Use

Technical Description

Operating the Awning

Note on the Vehicle Location

Guidance on selecting a safe and clean location for awning deployment.

Extending the Awning with Hand Crank

Detailed steps for extending the awning manually using a hand crank.

Extending the Awning with 12 V Motor

Instructions for extending the awning using the optional electric motor.

Positioning the Struts on the Ground

Guidance on correctly positioning the awning struts on the ground for stability.

Securing the Struts on the Vehicle

Instructions for attaching the awning struts directly to the vehicle using latches.

Mounting the Tension Rafter

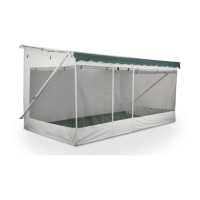
Instructions for fitting a tension rafter to prevent sagging on longer awnings.

Retracting the Awning with Hand Crank

Detailed steps for retracting the awning manually.

Retracting the Awning with 12 V Motor

Instructions for retracting the awning using the optional electric motor.

Unrolling the Blind (PW1750)

Instructions for unrolling the roller blind feature on the PW1750 model.

Rolling Up the Blind (PW1750)

Instructions for rolling up the roller blind feature on the PW1750 model.

Adjusting the 12 V Motor

Guidance on adjusting the 12 V motor for proper awning operation.

Replacing Remote and Switch Batteries

Steps for replacing batteries in the remote control and wall switch.

Cleaning and Maintenance

Cleaning

Procedures for cleaning the awning fabric and components to maintain its condition.

Lubricating

Recommendations for lubricating the awning's joints for smooth operation.

Checking

Regular checks for awning imbalance, wear, and damage to ensure safety and function.

Tighten Rear Hinge Screws

Instructions for re-tightening screws on the rear hinge after initial use and periodically.

Patching Fabric Holes

Method for repairing small holes or coating damage on the awning fabric.

Troubleshooting

Warranty

Disposal

Technical Data

Overview

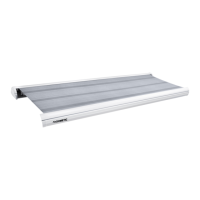
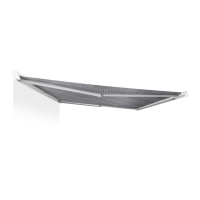
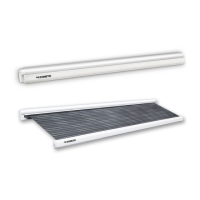
The Dometic PerfectWall PW1000, PW1500, and PW1750 are awnings designed for installation on motor homes or caravans, providing shade and protection from the elements. These awnings are intended for use only when the vehicle is stationary.

Function Description

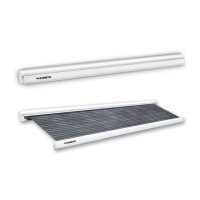
The PerfectWall PW1000, PW1500, and PW1750 awnings can be extended and retracted. The PW1000 model operates using a hand crank. The PW1500 and PW1750 models offer an optional 12 V motor for extension and retraction, controlled either by a wall switch or a remote control. The awning is secured to the side of the vehicle or to the ground using struts. The PW1750 model also features an integrated roller blind in the lead rail, which can be pulled out for additional protection against rain or sun.

Important Technical Specifications

PerfectWall PW1000:

  • Width options: 2.6 m, 3 m, 3.5 m, 4 m, 4.5 m
  • Extended length: 2 m (for 2.6 m and 3 m width), 2.5 m (for 3.5 m, 4 m, and 4.5 m width)
  • Weight: 18.6 kg (2.6 m), 21 kg (3 m), 24 kg (3.5 m), 27 kg (4 m), 30 kg (4.5 m)

PerfectWall PW1500:

  • Width options: 1.5 m, 2.6 m, 3 m, 3.5 m, 4 m, 4.5 m, 5 m, 5.5 m
  • Extended length: 1 m (1.5 m width), 2 m (2.6 m width), 2.5 m (3 m width), 2.5 m / 2.75 m (3.5 m, 4 m, 4.5 m, 5 m, 5.5 m width)
  • Weight: 12 kg (1.5 m), 18 kg (2.6 m), 21 kg (3 m), 24 kg (3.5 m), 27 kg (4 m), 30 kg (4.5 m), 33 kg (5 m), 36 kg (5.5 m)

PerfectWall PW1750:

  • Width options: 3 m, 3.5 m, 4 m
  • Extended length: 2.5 m
  • Weight: 26 kg (3 m), 30 kg (3.5 m), 33 kg (4 m)

12 V Motor (only PW1500 and PW1750):

  • Connection voltage: 12 V (11–15 V)
  • Amperage: 7 A
  • Output power: 84 W
  • Torque: 35 Nm
  • Inspection/certification: CE

Usage Features

Safety Instructions:

  • Always ensure the awning is fully retracted before starting a journey. Never move the vehicle with the awning open.
  • Remove the hand crank before driving.
  • Do not drive with damaged or torn fabric, as the awning arms are held by the fabric and could suddenly extend. Secure the awning to prevent unexpected extension while driving.
  • Do not open the awning while driving or in strong winds or snowfall.
  • Retract the awning if strong winds, heavy rain, or snowfall are imminent.
  • Prevent water or snow accumulation on the fabric to avoid damage or collapse.
  • Do not approach the awning if it was left open during heavy winds, if water or snow has accumulated, or if debris is on the fabric, as it may become unstable.
  • For PW1500/PW1750, if the connection cable is damaged, it must be replaced by an expert.
  • For PW1500/PW1750, disconnect the power supply via the on/off switch before cleaning the vehicle or awning.
  • Do not leave the extended awning unattended. Retract it before leaving your site.
  • Maintain a safe distance from barbecues or open fires to prevent fabric damage or fire.
  • The device can be used by children aged 8 and over, or by persons with diminished capacities, if supervised and taught safe use.
  • Electrical devices (PW1500/PW1750) are not toys; keep remote controls out of reach of children and prevent them from playing with the wall switch.
  • Park the vehicle where debris cannot fall onto the fabric.
  • Ensure the awning fabric remains taut and does not sag, especially at the edges, to prevent rubbing against arms and damage.

Extending the Awning (Hand Crank):

  1. Click the hand crank into the holder.
  2. Turn the hand crank to extend the awning by about 1.5 metres.
  3. Push the right strut in the front cover together to move it freely, then turn it to the side.
  4. Fold the right strut down and set it on the ground.
  5. Adjust the strut to the desired height.
  6. Fold the lever for the strut up to secure it.
  7. Extend the other strut similarly.
  8. Continue turning the hand crank until the awning is fully extended. Position struts vertically under the lead rail every 30 cm for security.
  9. Turn the hand crank approximately a quarter of the way back to tighten the fabric.
  10. Remove the hand crank from the holder.

Extending the Awning (12 V Motor - PW1500/PW1750 optional):

  1. Press the "extend" button on the switch or remote control until the awning is extended by about 1.5 metres.
  2. Follow steps 3-7 from the hand crank extension for strut positioning.
  3. Continue pressing the "extend" button until the awning is fully extended. Position struts vertically under the lead rail every 30 cm for security.
  4. Press the "retract" button briefly to tauten the fabric.
  5. Remove the hand crank from the holder (if applicable).
    • Note for remote control operation: The awning retracts automatically when the vehicle is started. It is blocked and cannot be extended while the vehicle is running. The receiver beeps once when switched on. Remote control operation may be affected by interference from other devices on the same frequency. Keep the remote control in a safe place while driving; the magnet in the holder is not designed for strong vibrations.

Positioning Struts:

  • On the ground: Position struts vertically under the lead rail. Secure with pegs. Position one strut slightly lower to create an angle for rain runoff.
  • On the vehicle: Slide the latch cover up, fit struts into the latch, then slide the cover down. Position one strut slightly lower for rain runoff.

Mounting the Tension Rafter (for awnings > 4 m):

  1. Slide the tension rafter together.
  2. Fit the top end into the attachment on the housing.
  3. Slide the other end into the attachment in the lead rail.

Unrolling the Blind (PW1750 only):

  1. Open the lock in the middle of the lead rail.
  2. Push the brackets on the right and left into the rails of the roller blind.
  3. Guide the tensioning belts or cords through the loops of the brackets.
  4. Pull the roller blind down evenly with both hands at the rails (maximum extension height 1.2 m).
  5. Secure the brackets on the right and left using the struts or secure the cords with pegs.

Retracting the Awning (Hand Crank):

  1. Remove any debris from the fabric.
  2. Loosen the struts from fastenings.
  3. Click the hand crank into the holder.
  4. Turn the hand crank until the awning is extended by only about 1.5 metres. Position struts vertically under the lead rail every 30 cm for security.
  5. Fold the lever of the right strut down to loosen it.
  6. Slide the struts together completely.
  7. Fold the right strut up, then turn it into the lead rail.
  8. Slide the bottom part of the right strut into the latch of the lead rail.
  9. Retract the other strut similarly.
  10. Turn the hand crank until the awning is fully retracted.
  11. Double-check that the awning is fully retracted and the lead rail is against the housing before driving.
  12. Remove the hand crank.

Retracting the Awning (12 V Motor - PW1500/PW1750 optional):

  1. Press the "retract" button on the switch or remote control until the awning is only extended by about 1.5 metres. Position struts vertically under the lead rail every 30 cm for security.
  2. Follow steps 5-9 from the hand crank retraction for strut positioning.
  3. Press the "retract" button until the awning is completely retracted.
  4. Double-check that the awning is fully retracted and the lead rail is against the housing before driving.

Rolling up the Blind (PW1750 only):

  1. Loosen the fasteners of the roller blind.
  2. Pull the roller blind down (it will then roll itself into the lead rail).
  3. Pull the brackets on the right and left out of the rail.
  4. Lock the lock in the middle of the lead rail.

Adjusting the 12 V Motor (PW1500/PW1750 optional):

  • If the awning no longer fully closes or opens, adjust the 12 V motor. The motor is pre-assembled in the roller tube.

Replacing Remote Control/Wall Switch Batteries (PW1500/PW1750 optional):

  • If the remote control LED does not light up, the battery is flat.
  1. Open the housing.
  2. Remove the old battery.
  3. Insert a new CR2450 battery (remote control) or CR2430 battery (wall switch) with the positive terminal facing upwards.
  4. Reassemble the remote control or wall switch. Dispose of old batteries at collection points.

Maintenance Features

Cleaning:

  • Never clean the awning with a high-pressure cleaner.
  • Do not use abrasive cleaning agents or hard objects.
  • Remove debris (twigs, leaves) from the fabric to prevent abrasions, stains, and mildew.
  • Clean the awning fabric regularly with water, 30 ml detergent, and 30 ml bleach per 10 litres of water. Soap the fabric, let it soak for five minutes, rinse thoroughly, and ensure all detergent is washed off. Let the fabric dry.
  • The manufacturer recommends Dometic awning cleaner (ref. no. 9600000165).
  • If the awning is retracted when wet, extend it again as soon as possible to dry to prevent mildew or fading. The same applies to the roller blind.

Lubricating:

  • If required, lubricate the joints of the awning with paraffin wax, Teflon oil, or silicone oil.

Checking:

  • Do not use the awning if any settings or maintenance work are required or if damage is discovered; contact a service partner.
  • Regularly check for imbalance, wear, and damage to major parts.
  • Check if the fabric is free of damage.
  • Check if the arms and lead rail are free of damage and signs of wear.
  • Check if the awning closes properly.

Tightening Screws on the Rear Hinge:

  • Screws on the rear hinge must be re-tightened after the first load:
    • After the first holiday using the awning.
    • After driving 20,000 km or six months after installation (whichever comes first).
  • These screws also need to be checked during routine vehicle inspections. Contact a service partner for re-tightening.
  • Instructions for servicing: Lift the lead rail slightly so the hinge is not bearing any load, then tighten the screws with 15–25 Nm. The awning arms must not bear any load during this process to prevent distortion of the fastening torque.

Patching Small Holes in the Fabric:

  • Use a cotton cloth to rub a small amount of liquid vinyl plaster (ref. no. 9103104018) around the damaged area. The plaster dissolves the coating and seals the hole when dry. Wait until the area is dry before retracting the awning.

Dometic PerfectWall PW1000 Specifications

General IconGeneral
BrandDometic
ModelPerfectWall PW1000
CategoryAccessories
LanguageEnglish

Related product manuals